13.2. Importing and Using Downloaded Examples in Eclipse
Throughout the modules we have provided code examples for you to download and follow along. Sometimes these code examples may be in the form of a: * a ZIP file, a compressed file containing many other files and subfolders or * a standalone Java file (a file with a .java extension)
Instructions regarding the following items have been provided within the sections below:
Downloading and importing standalone Java files (files with a “.java” extension)
13.2.1. Downloading and importing zip files
These are archive files that contain eclipse projects.
To open these files you must Import the zip/archive files into the Eclipse environment as a Project.
This has been demonstrated in the video below and described in the steps listed after the video.
The following steps will guide you through the process of importing zip/archive files into Eclipse:
Download the archive/zipped file to a location on your computer
Launch Eclipse IDE
Go to the File menu, select File->Import
The “Import” Dialog Box should appear
Select the option “Existing Projects into Workspace” and click Next
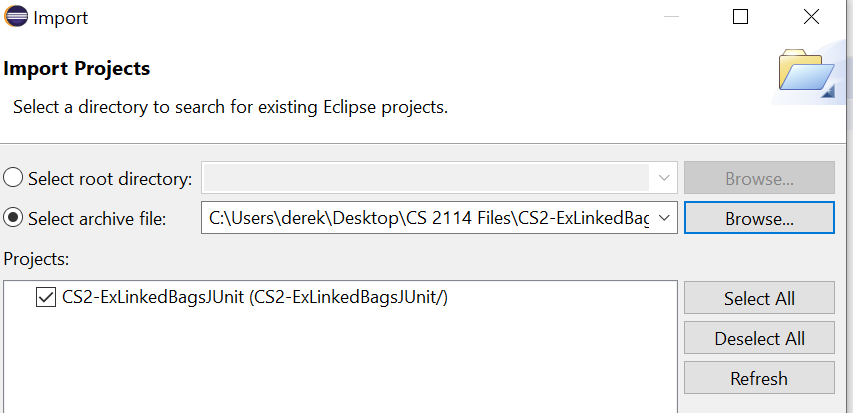
The “Import Projects” Dialog Box should now appear
Select the option labelled “Select archive file”, then Browse to find the location of the Project you wish to import
Make sure the Project you want is checked (see below), then click FinishDownloading and importing standalone Java files

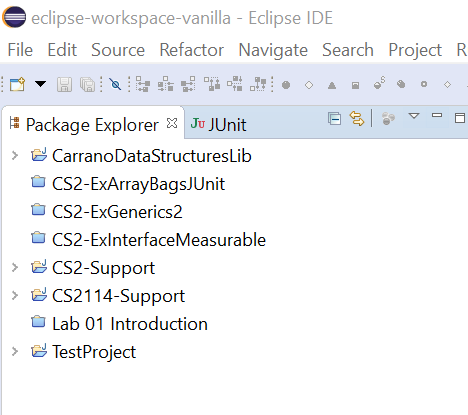
Check your Package Explorer window (see below) to confirm that the project has been successfully imported

13.2.2. Downloading and importing standalone Java files
These are individual java files that can be added to an existing project in Eclipse.
These files may be opened and viewed in any modern text editor, to be used and executed they should be added to an existing Eclipse project.
The following steps will guide you through the process of creating a Java project in Eclipse and adding a Java file to that project:
Open the standalone Java files (files with a “.java” extension) within your browser or text editor to view its contents
Scroll to the top of the file, note the name of the package. In the example below the package is named “example”
Create a new Eclipse Java Project
Download the Java file to a location on your computer
Launch Eclipse IDE
Go to the File menu, select New→Java Project Alternatively you can right-click within the Project Explorer pane and select New → Java Project.
The “New Java Project” Dialog Box should appear
Enter the Project name
Configure the options for Location, Java Runtime Environment (JRE), etc. or use the provided default options, then click Finish
Check your Package Explorer window (see below) to confirm that the project has been successfully created
Create a new package with the name previously noted in Step 2
One way to create a new package is to right click on the Eclipse project within the package explorer, then select New → Package
Name the package to match the name noted in Step 2.
Important!
Note that the package named at the top of the class MUST match the package the file is placed in within the Eclipse project. Eclipse will indicate an error if package names do not match. These will be visible via the Problems tab (by default this tab should be visible near the bottom of the screen).
In these cases Eclipse will advise that `the declared package “<some package name>” does not match the expected package “<some other package name>”. To resolve this error simply rename the packages so that they match.
Import the Java files into an existing Eclipse Java Project
Using the Package Explorer you are to select the folder or project to add the files
Go to the File menu, select New → Import
The “Import” Dialog Box should appear
Select the option “File System” and click Next
The “Import File System” Dialog Box should now appear
Browse for the folder with the files you wish to add
Select the files to be added, then click Finish
Check your Package Explorer window to confirm that the selected file(s) were added to the Eclipse project
Note: You may also use the Eclipse Package Explorer window to drag and drop files from a folder on your computer into your Eclipse project


