Add an OpenDSA eTextbook to a Canvas Course
OpenDSA is an eTextbook project developed at Virginia Tech. OpenDSA materials include many visualizations and interactive exercises that support courses in a wide variety of Computer Science-related topics such as Data Structures and Algorithms (DSA), Formal and Programming Languages.
OpenDSA has hundreds of visualizations and exercises. Most algorithms and data structures are illustrated by interactive algorithm visualizations. Students could enter their own test cases to see how the algorithm or data structure works on that input, and they can control the pacing of the visualization.
A course instructor who is using the Canvas LMS can add OpenDSA materials directly into their Canvas courses appearing as Modules and Assignments in Canvas. Below are the detailed instructions on how to create and add an existing OpenDSA book to your Canvas course.
See this link for information on how to configure a collection of OpenDSA modules.
To add one or more OpenDSA exercises in your Canvas course, follow the following steps:
Step 1: Go to OpenDSA.org and create an account.
Step 2: Send an email to opendsa@cs.vt.edu and ask for instructor access.
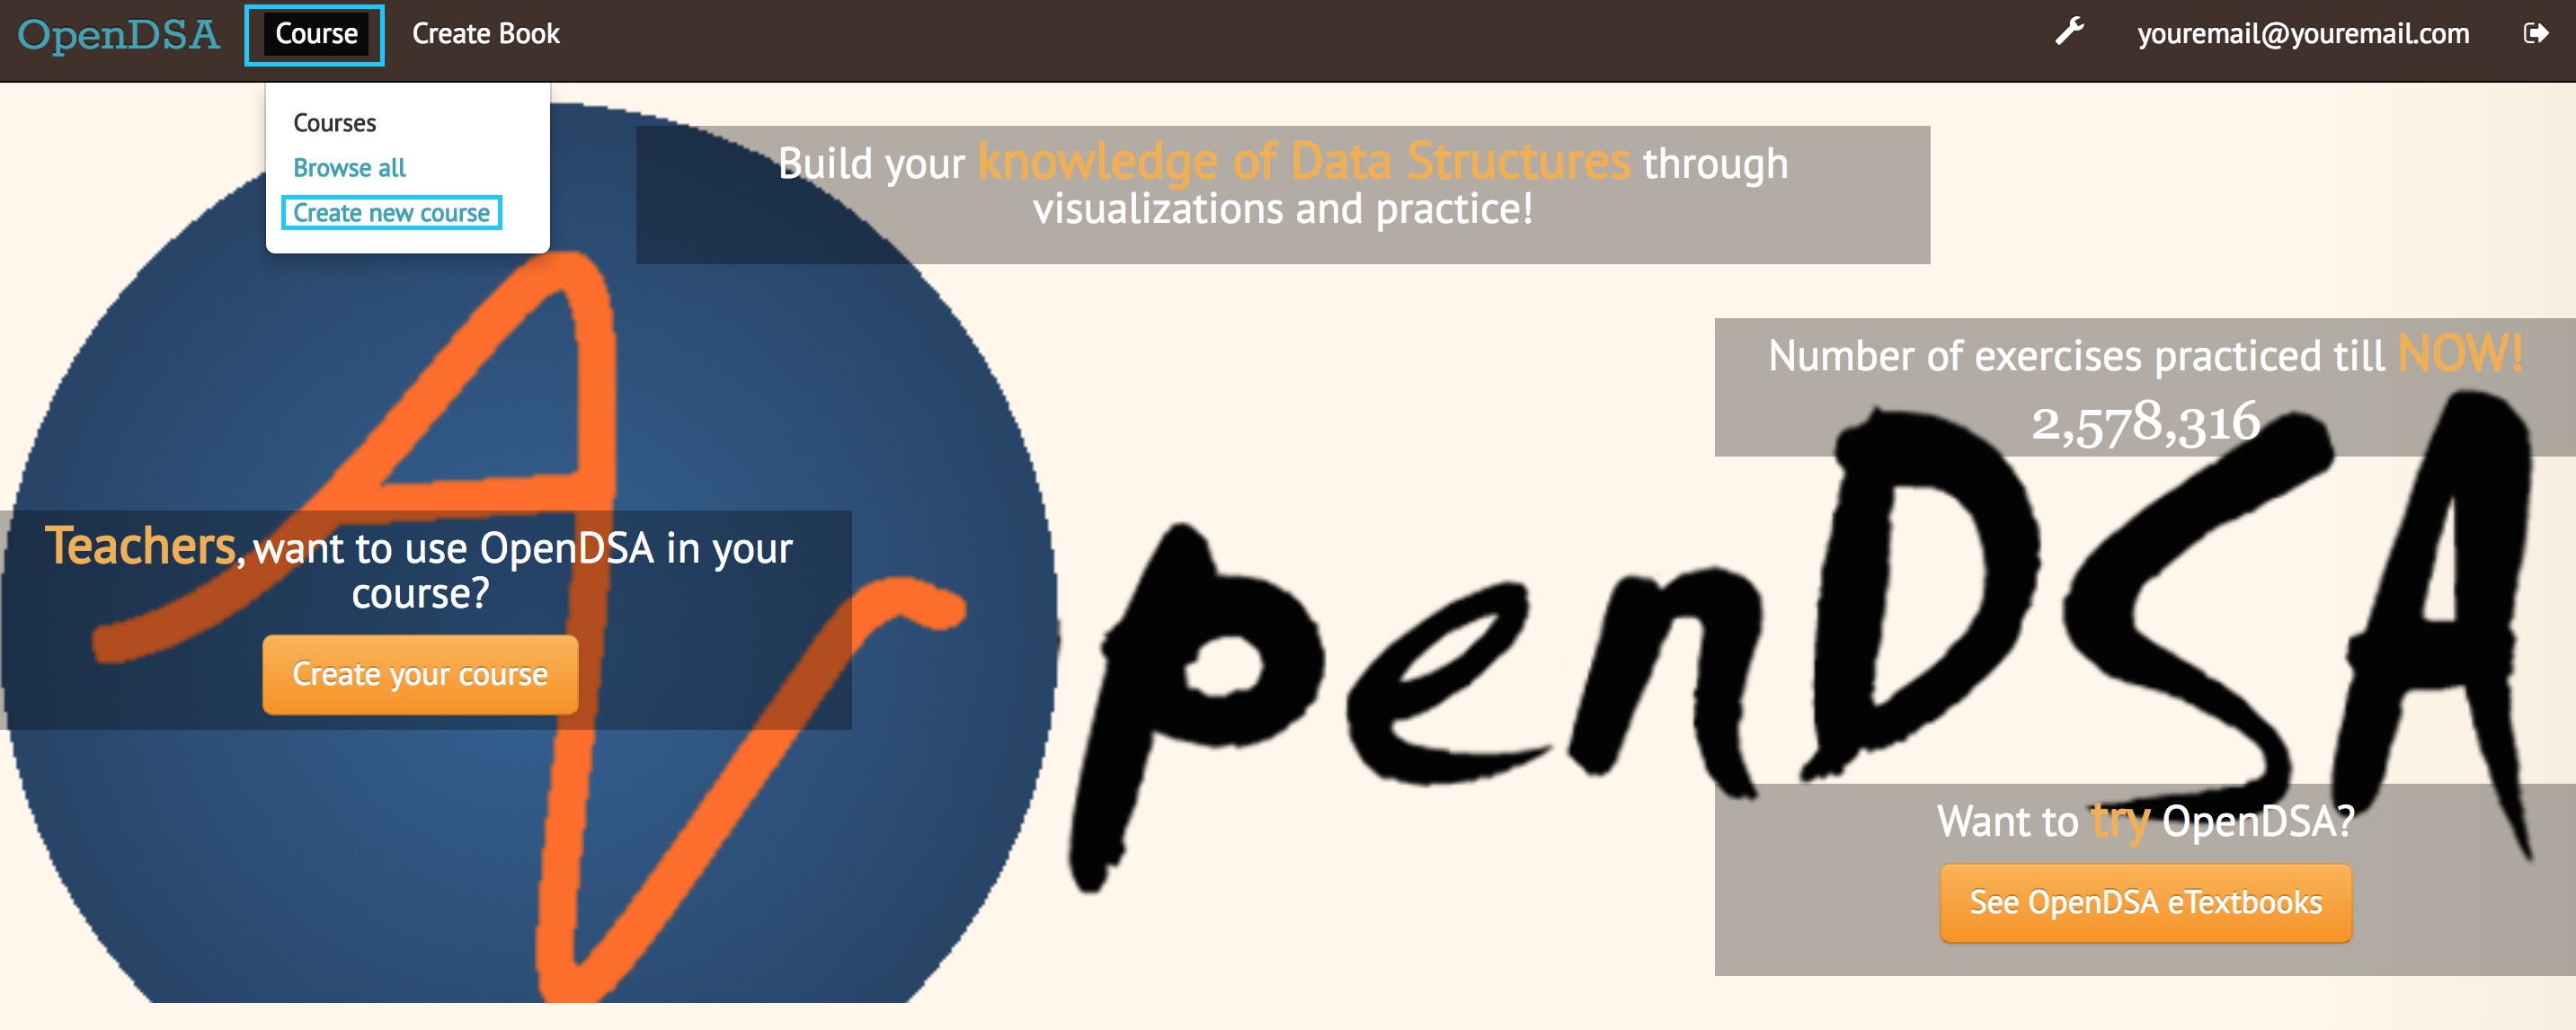
Step 3: Once you are provided with the instructor access, go to the "Course" menu item at the top left corner of the page and click on "Create new course".
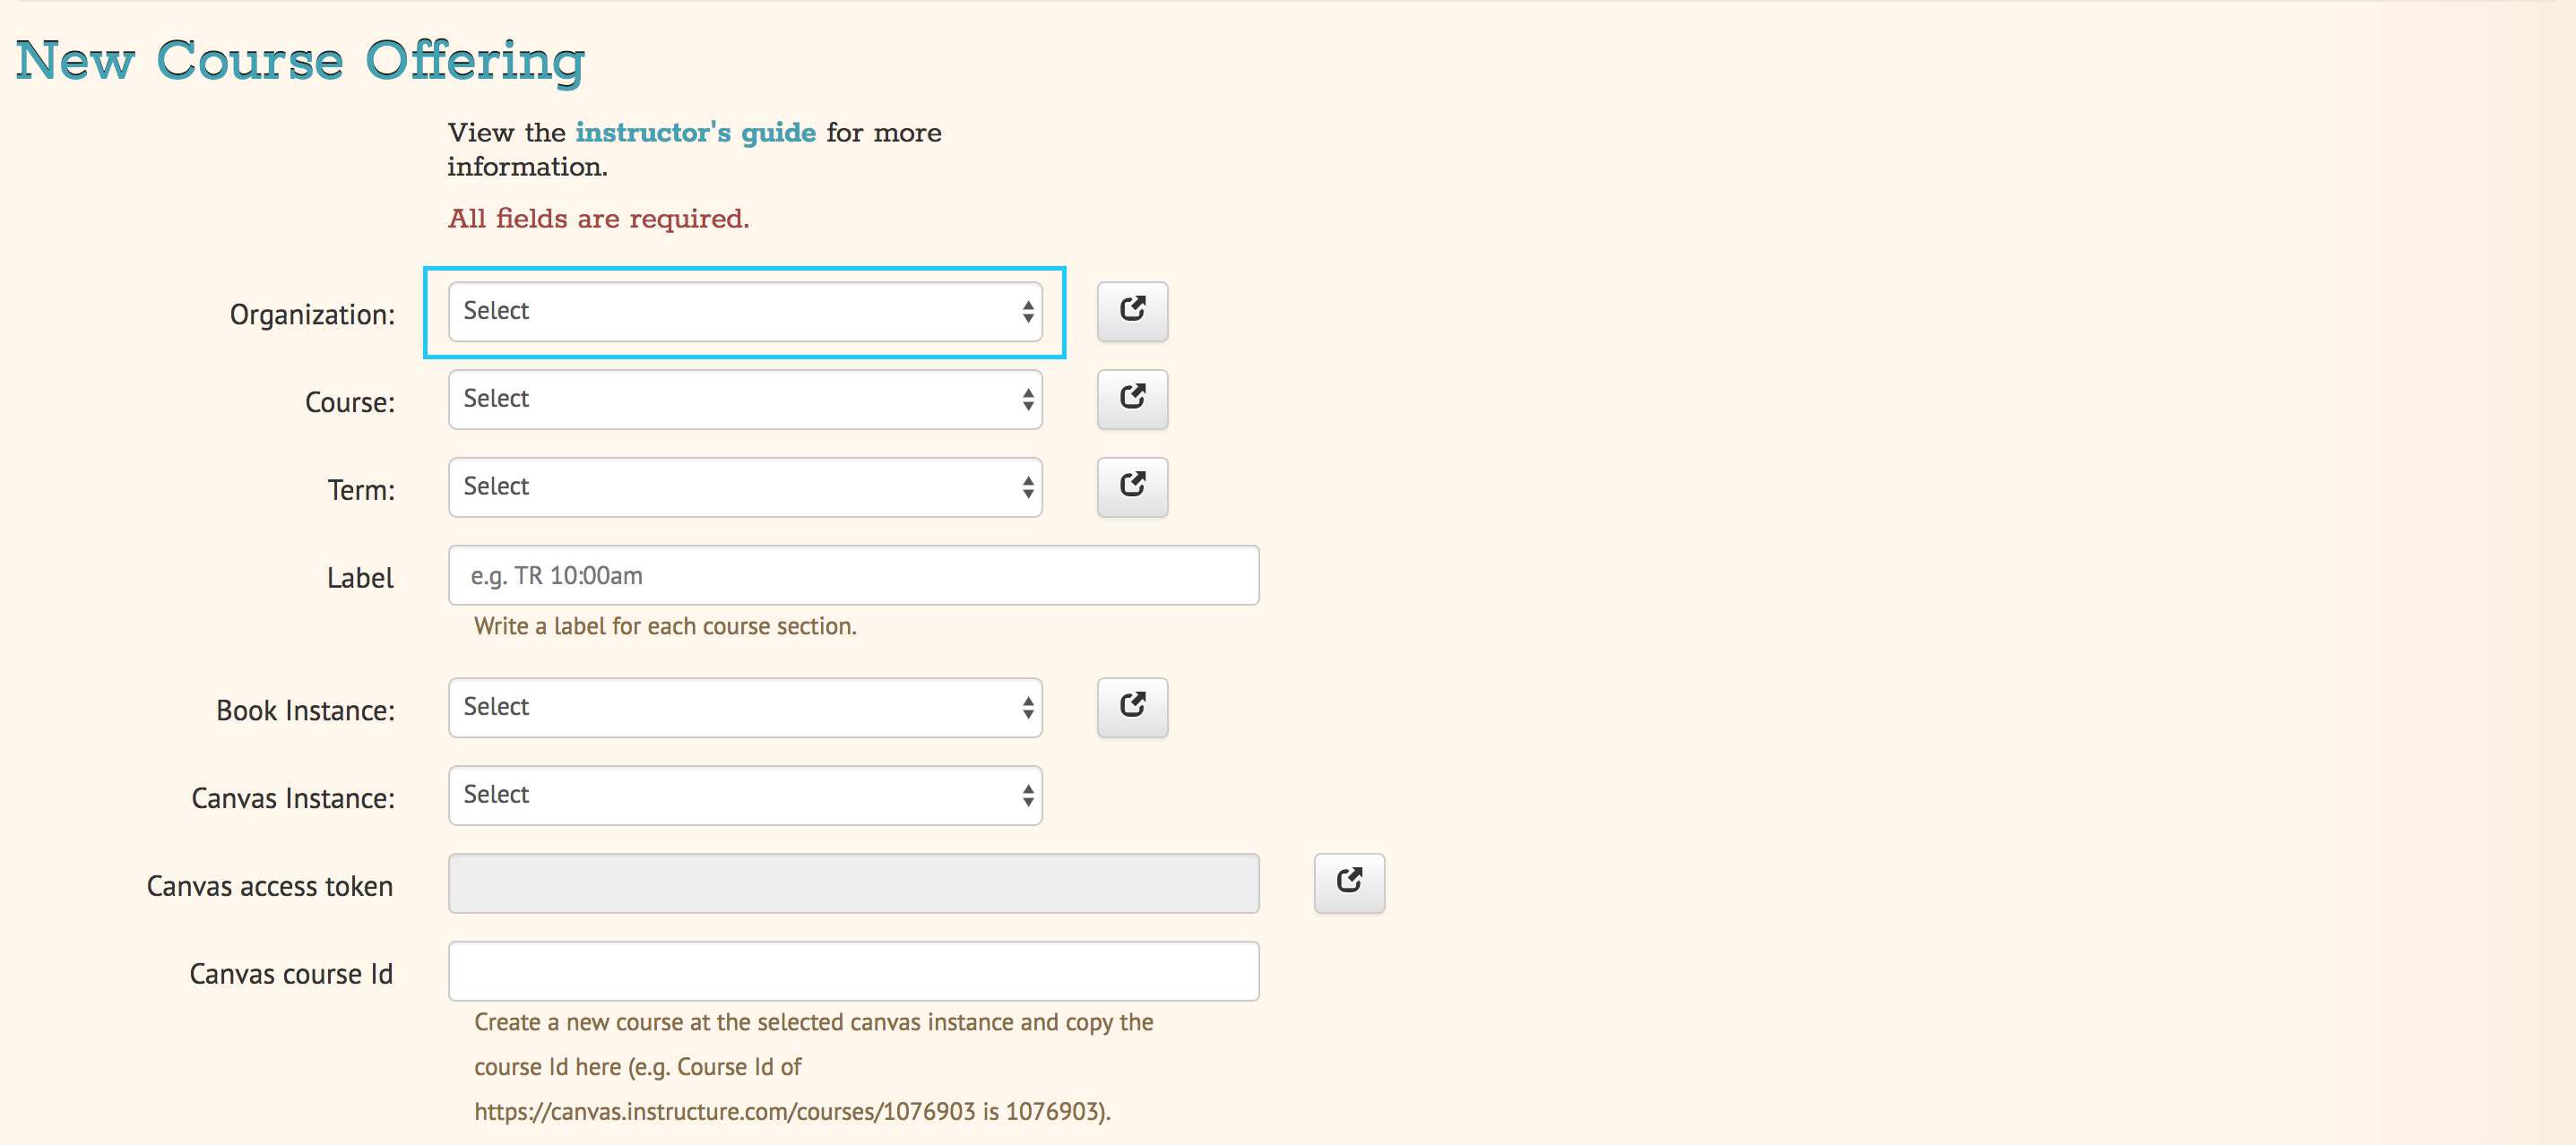
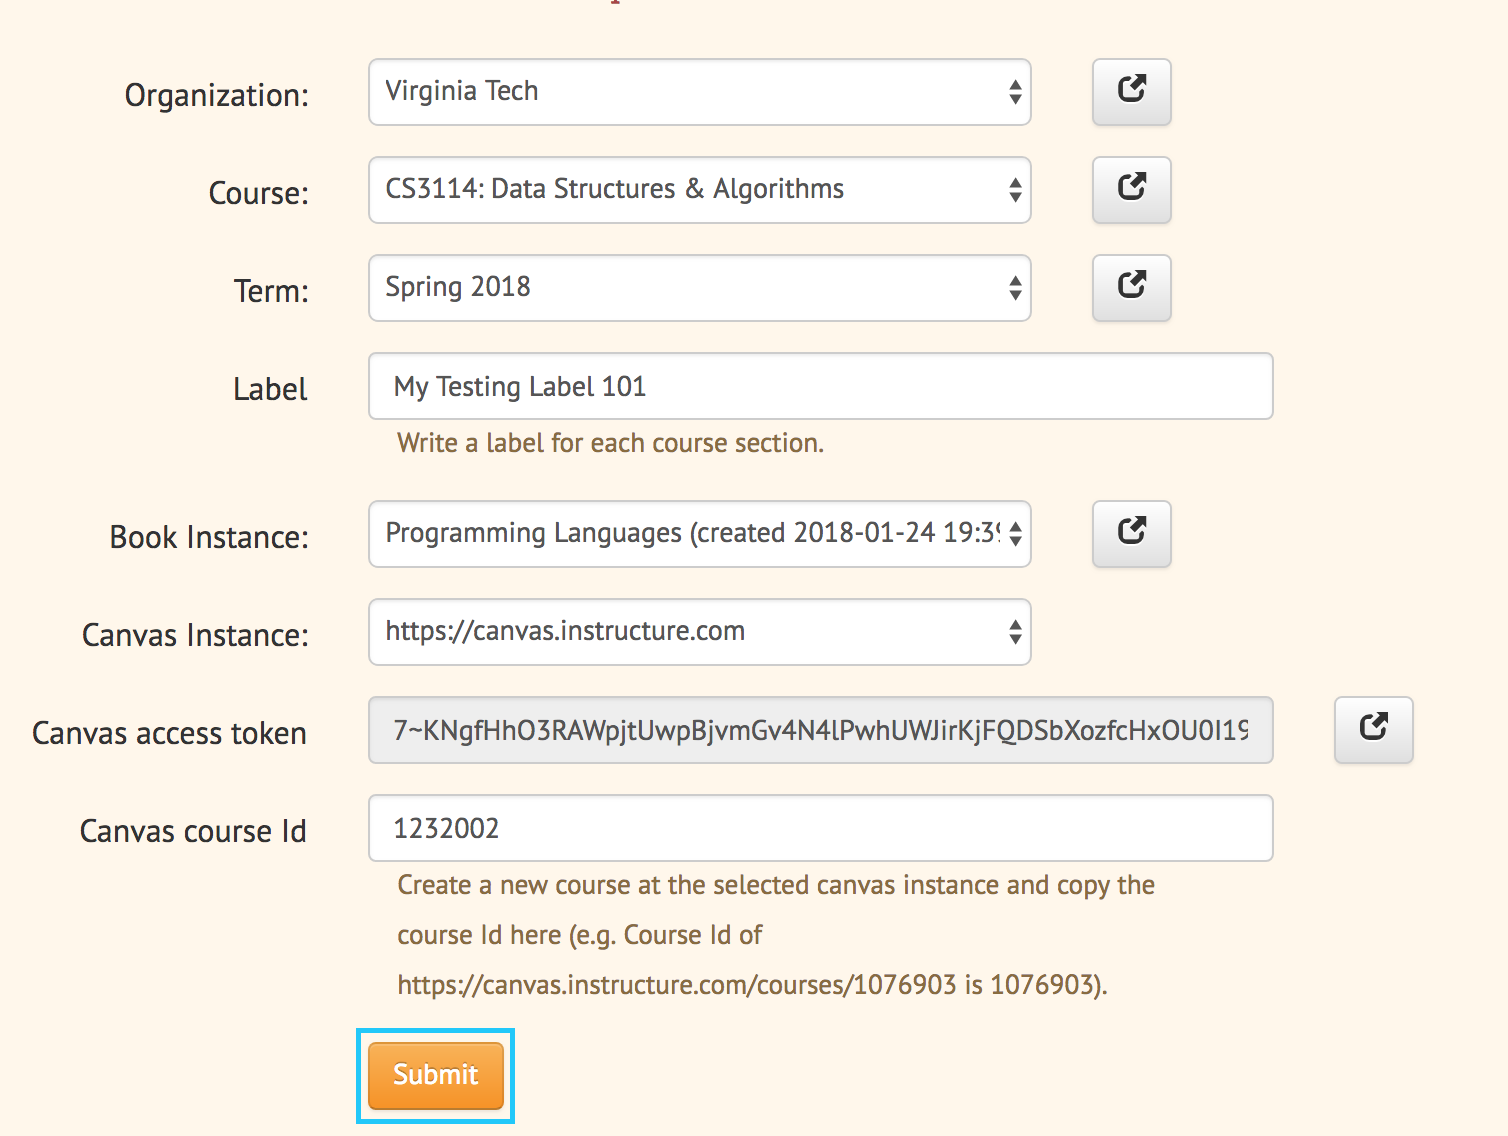
Step 4: You should be redirected to a page where you can create a new course. Select your organization from the Organization dropdown. Organization will be the name of your university.
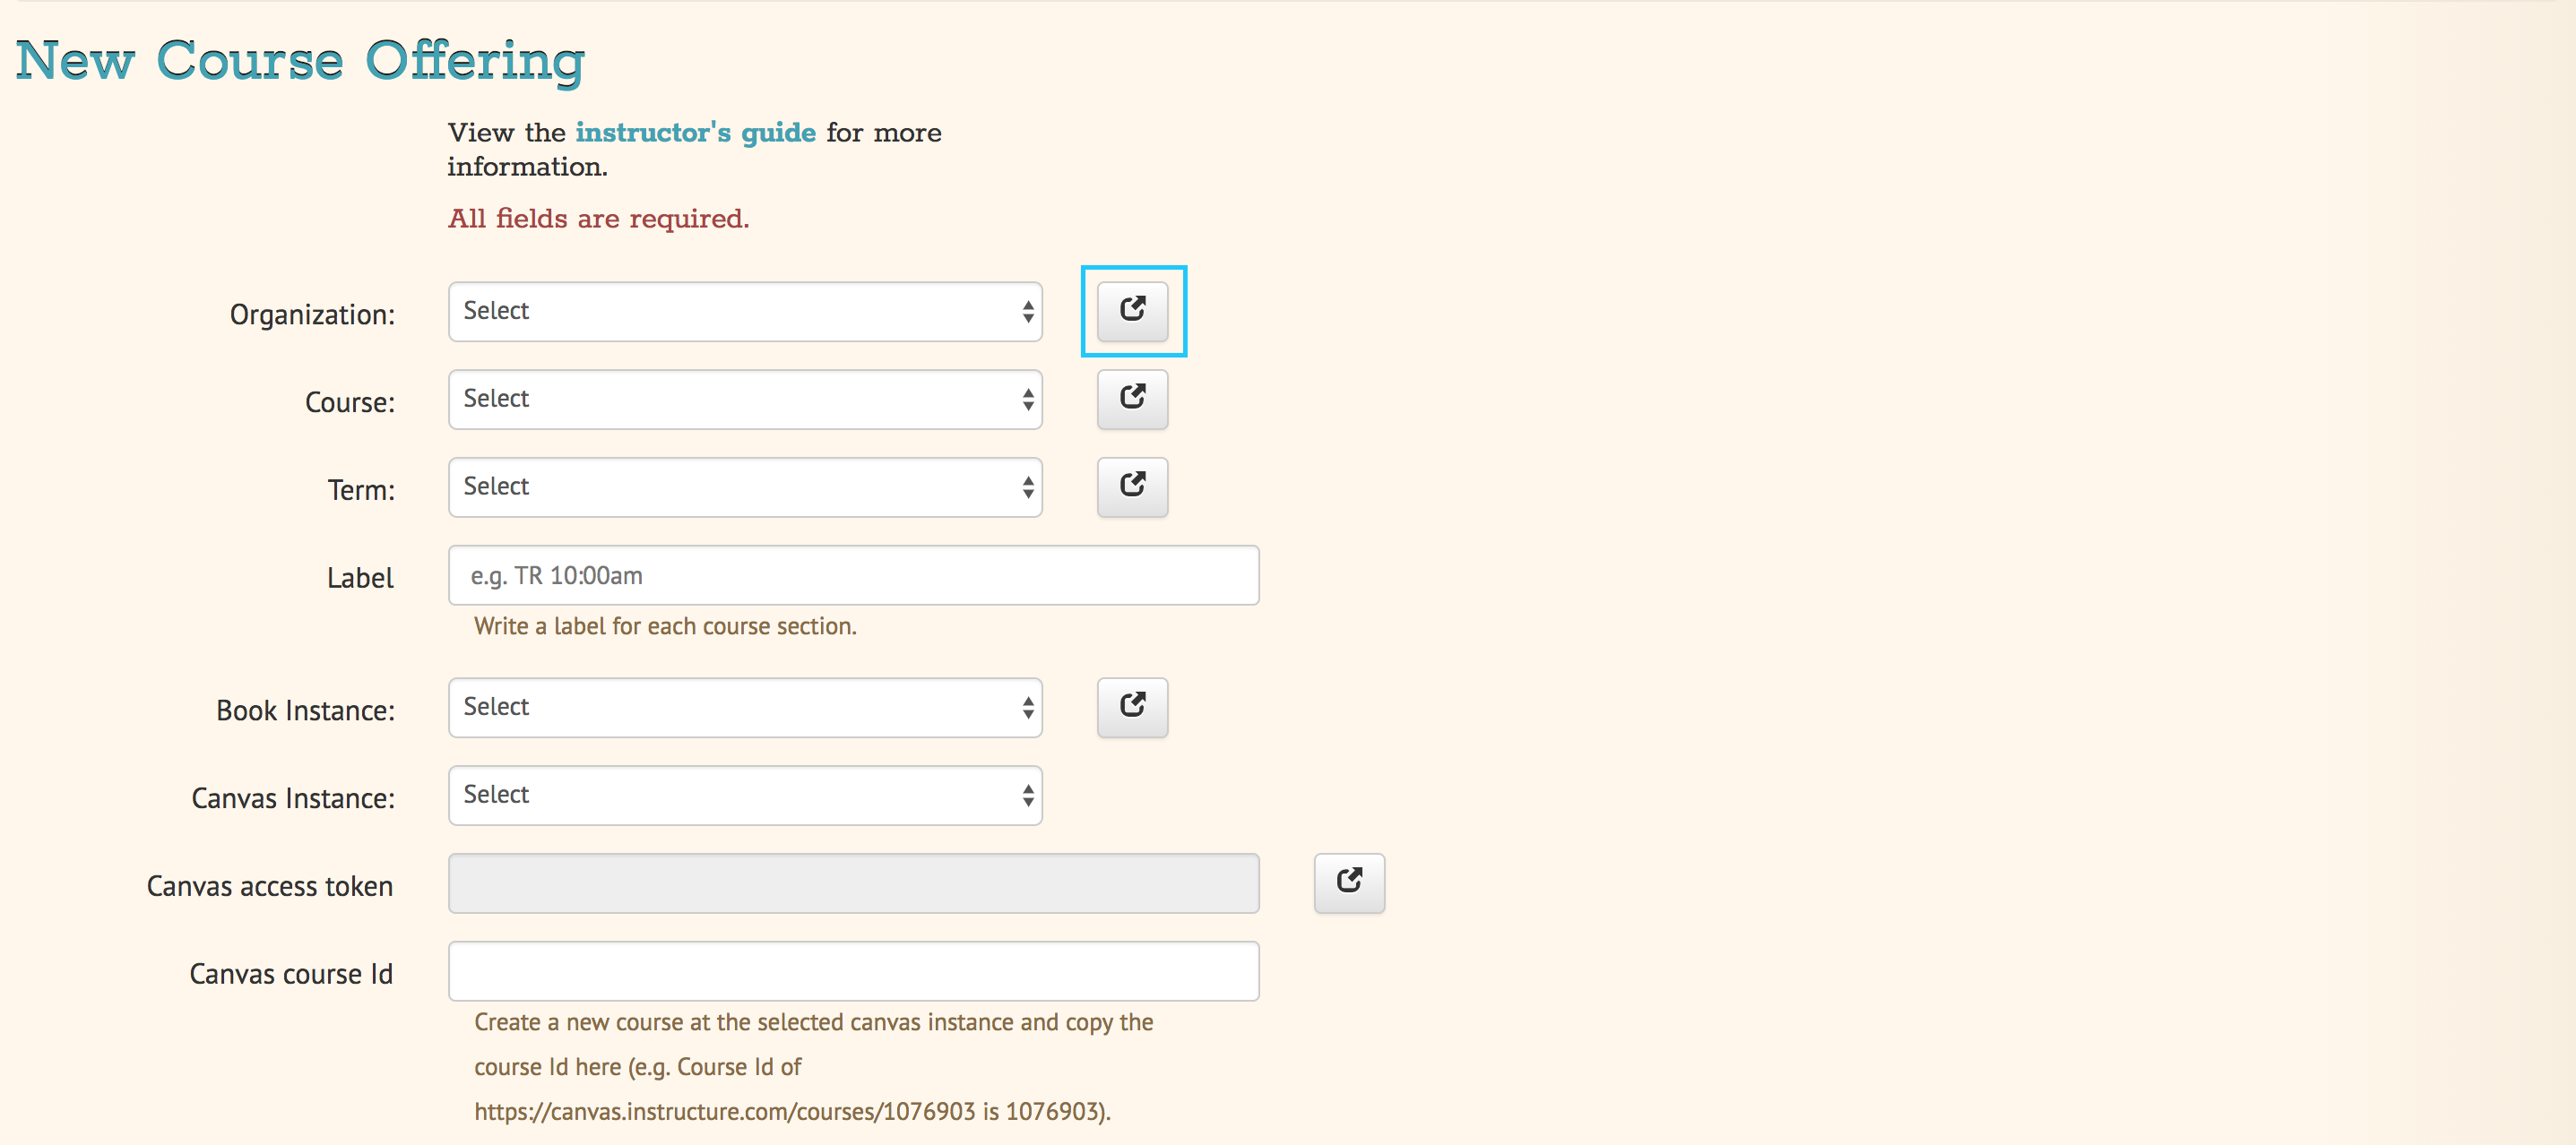
Step 5: If your university is not present under the Organization dropdown, click on a button to the right of the Organization dropdown.
You will be redirected to the page shown below. Click on the New Organization button to the top right of the page.
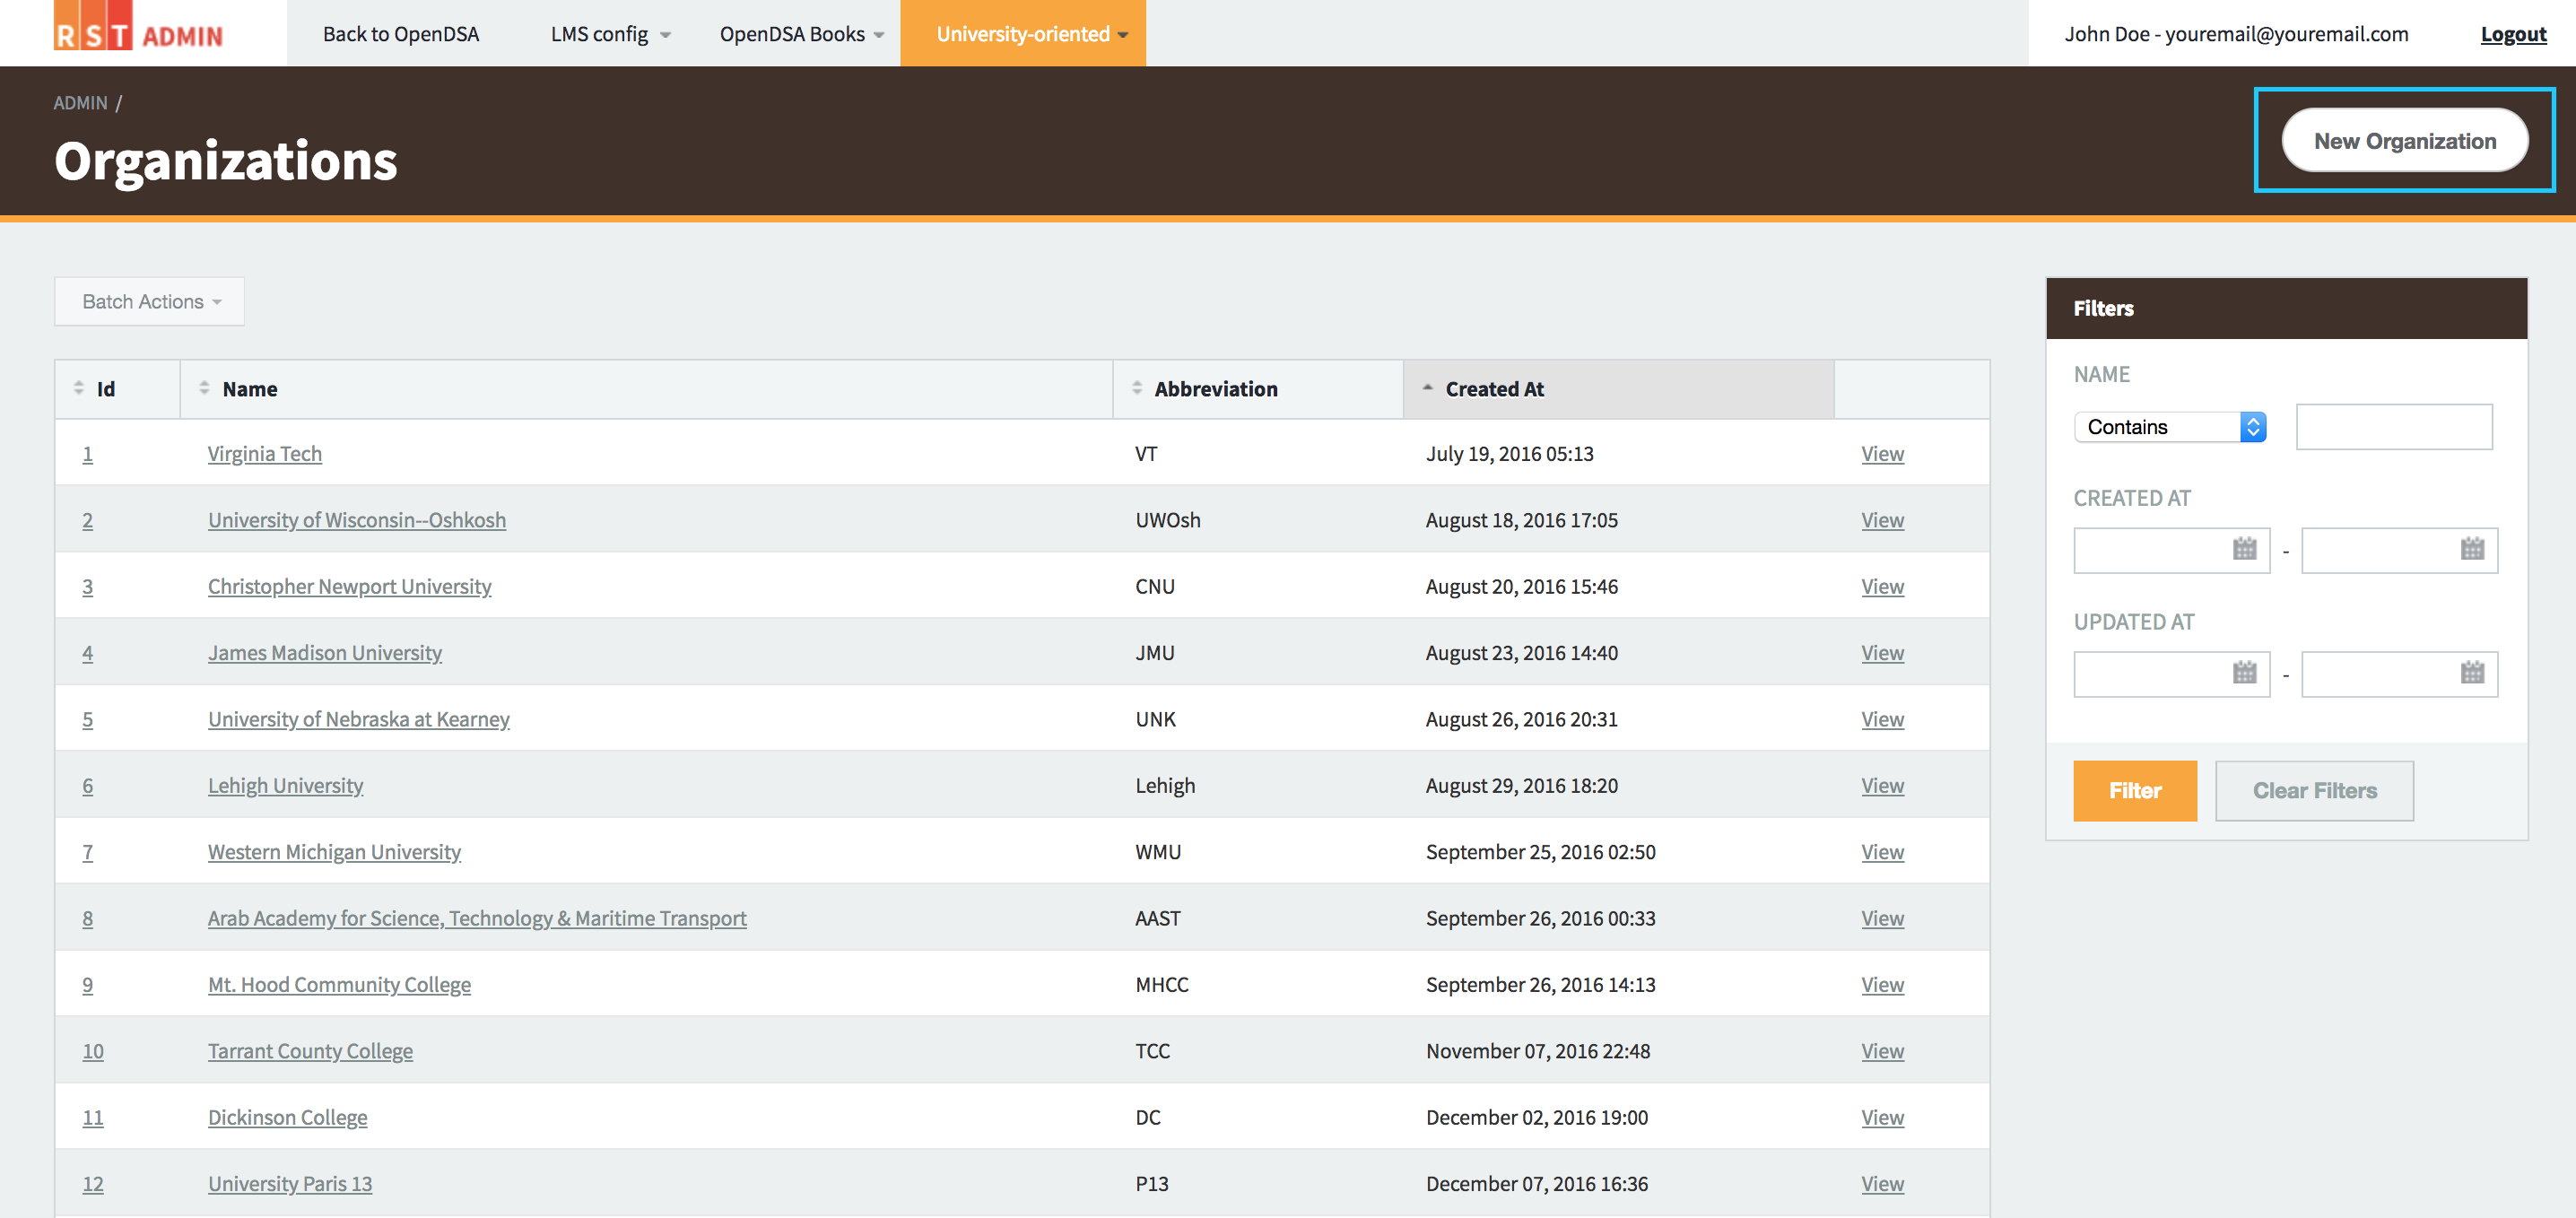
Step 6: You will be taken to a new page where you can add new Organization. Enter the name and abbreviation of your organization and click on the Create Organization button.

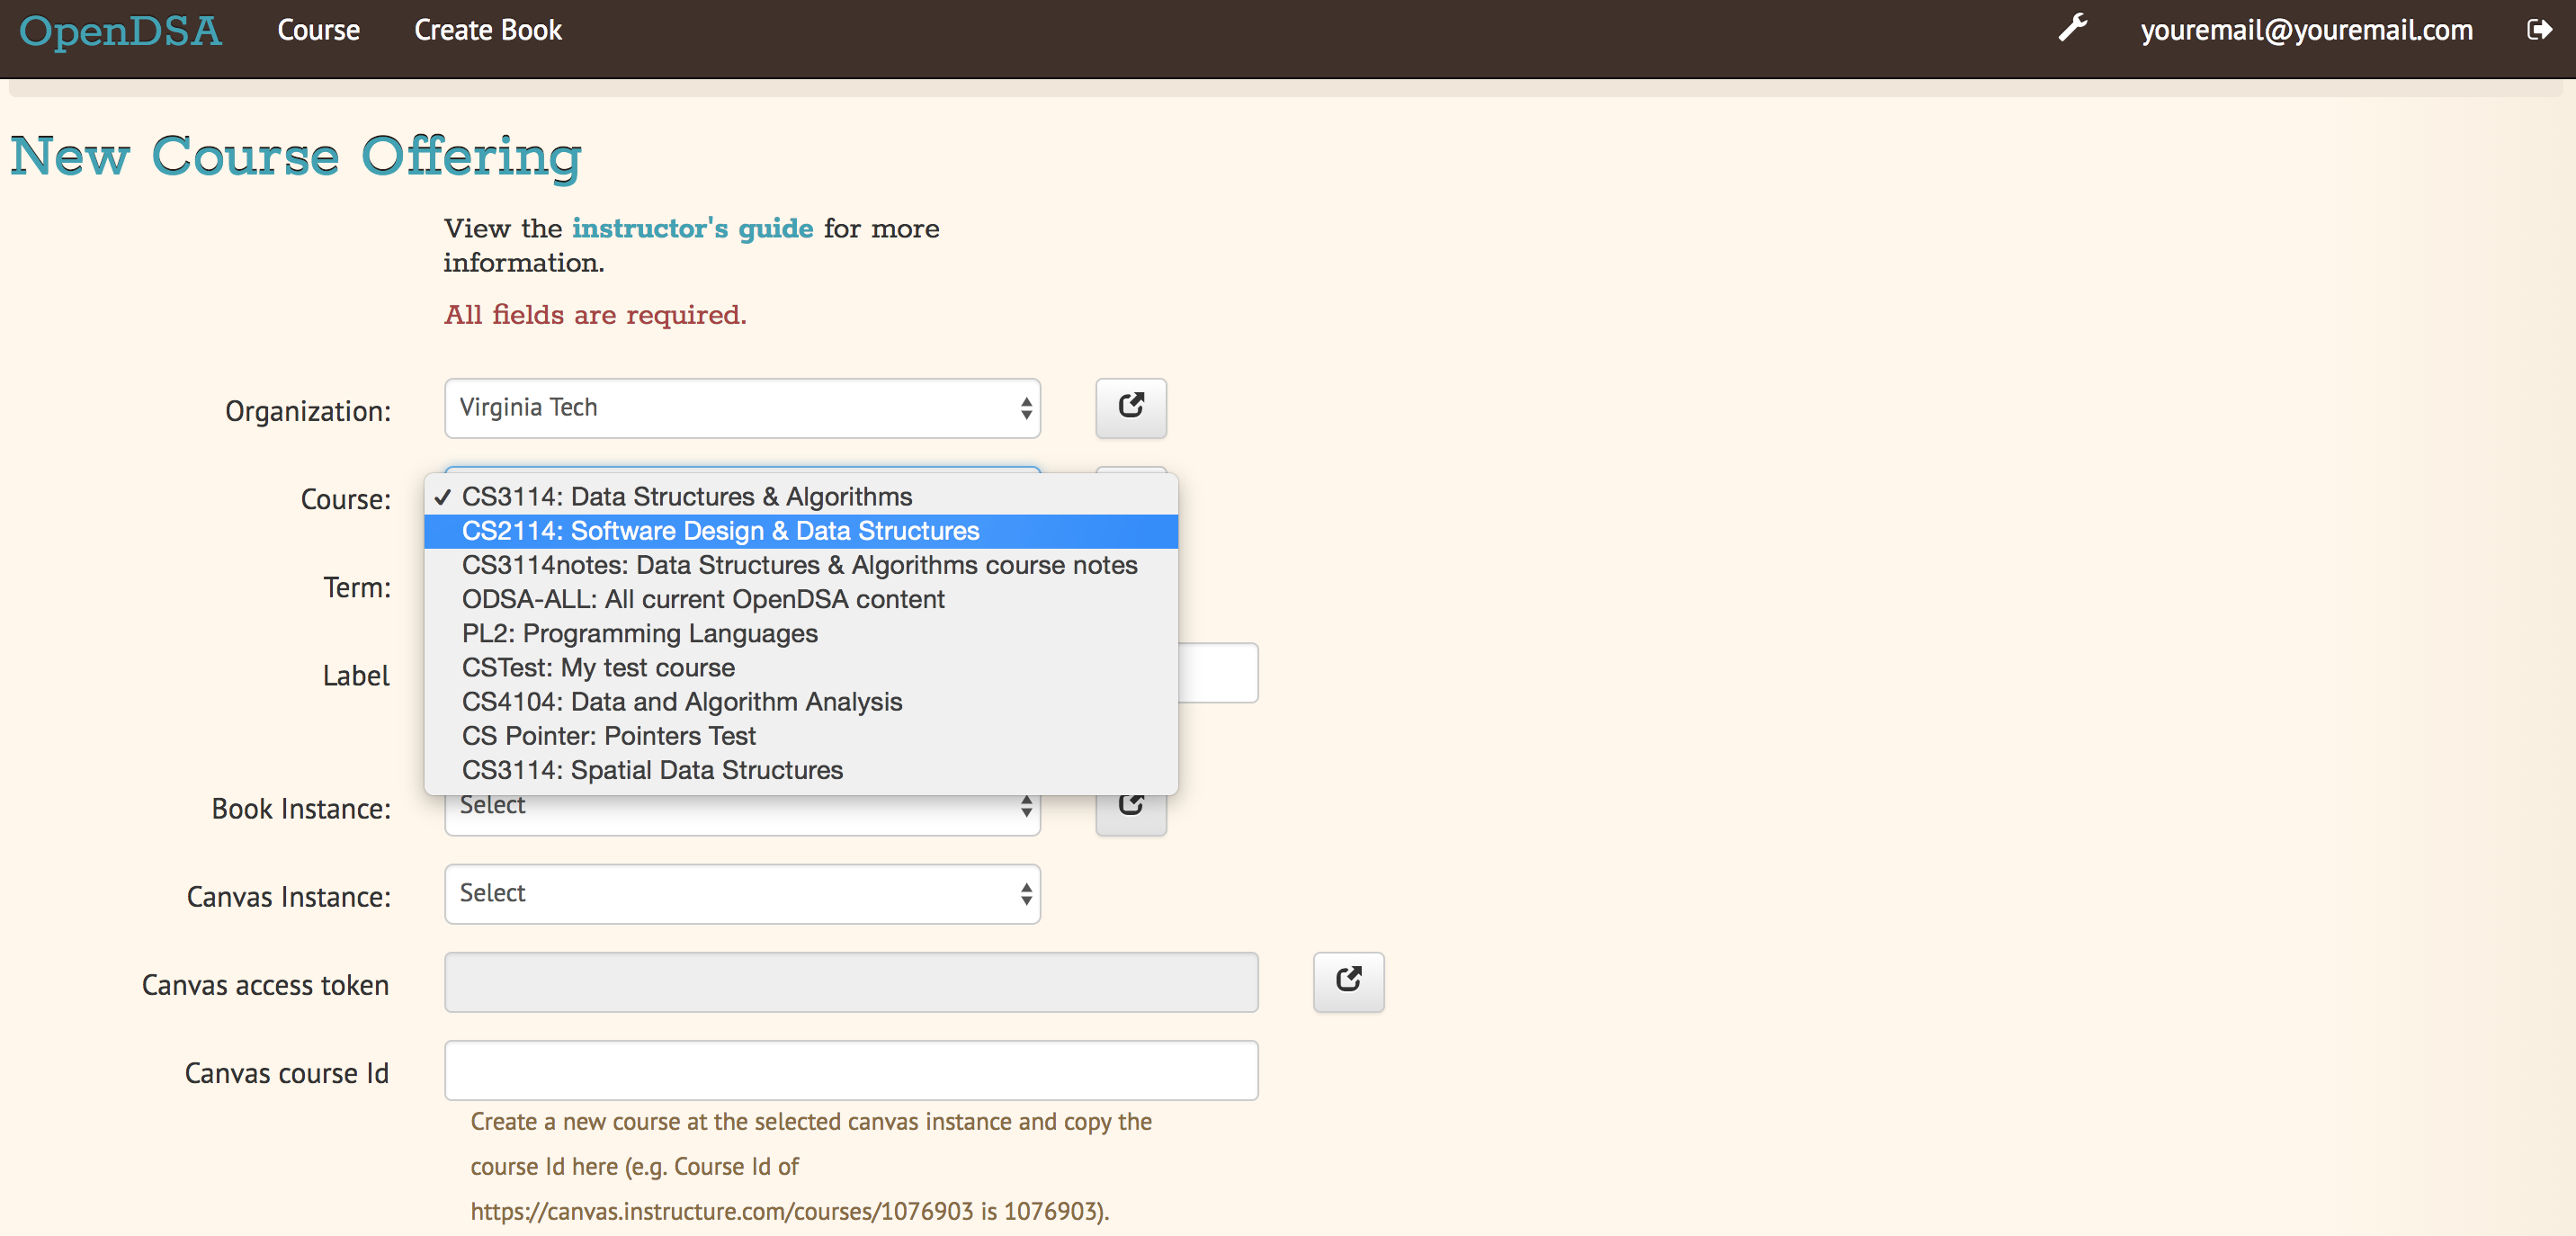
Step 7: Go back to the New Course page and refresh it. Select the organization you created from the Organization dropdown. After that, select your course from the Course dropdown.
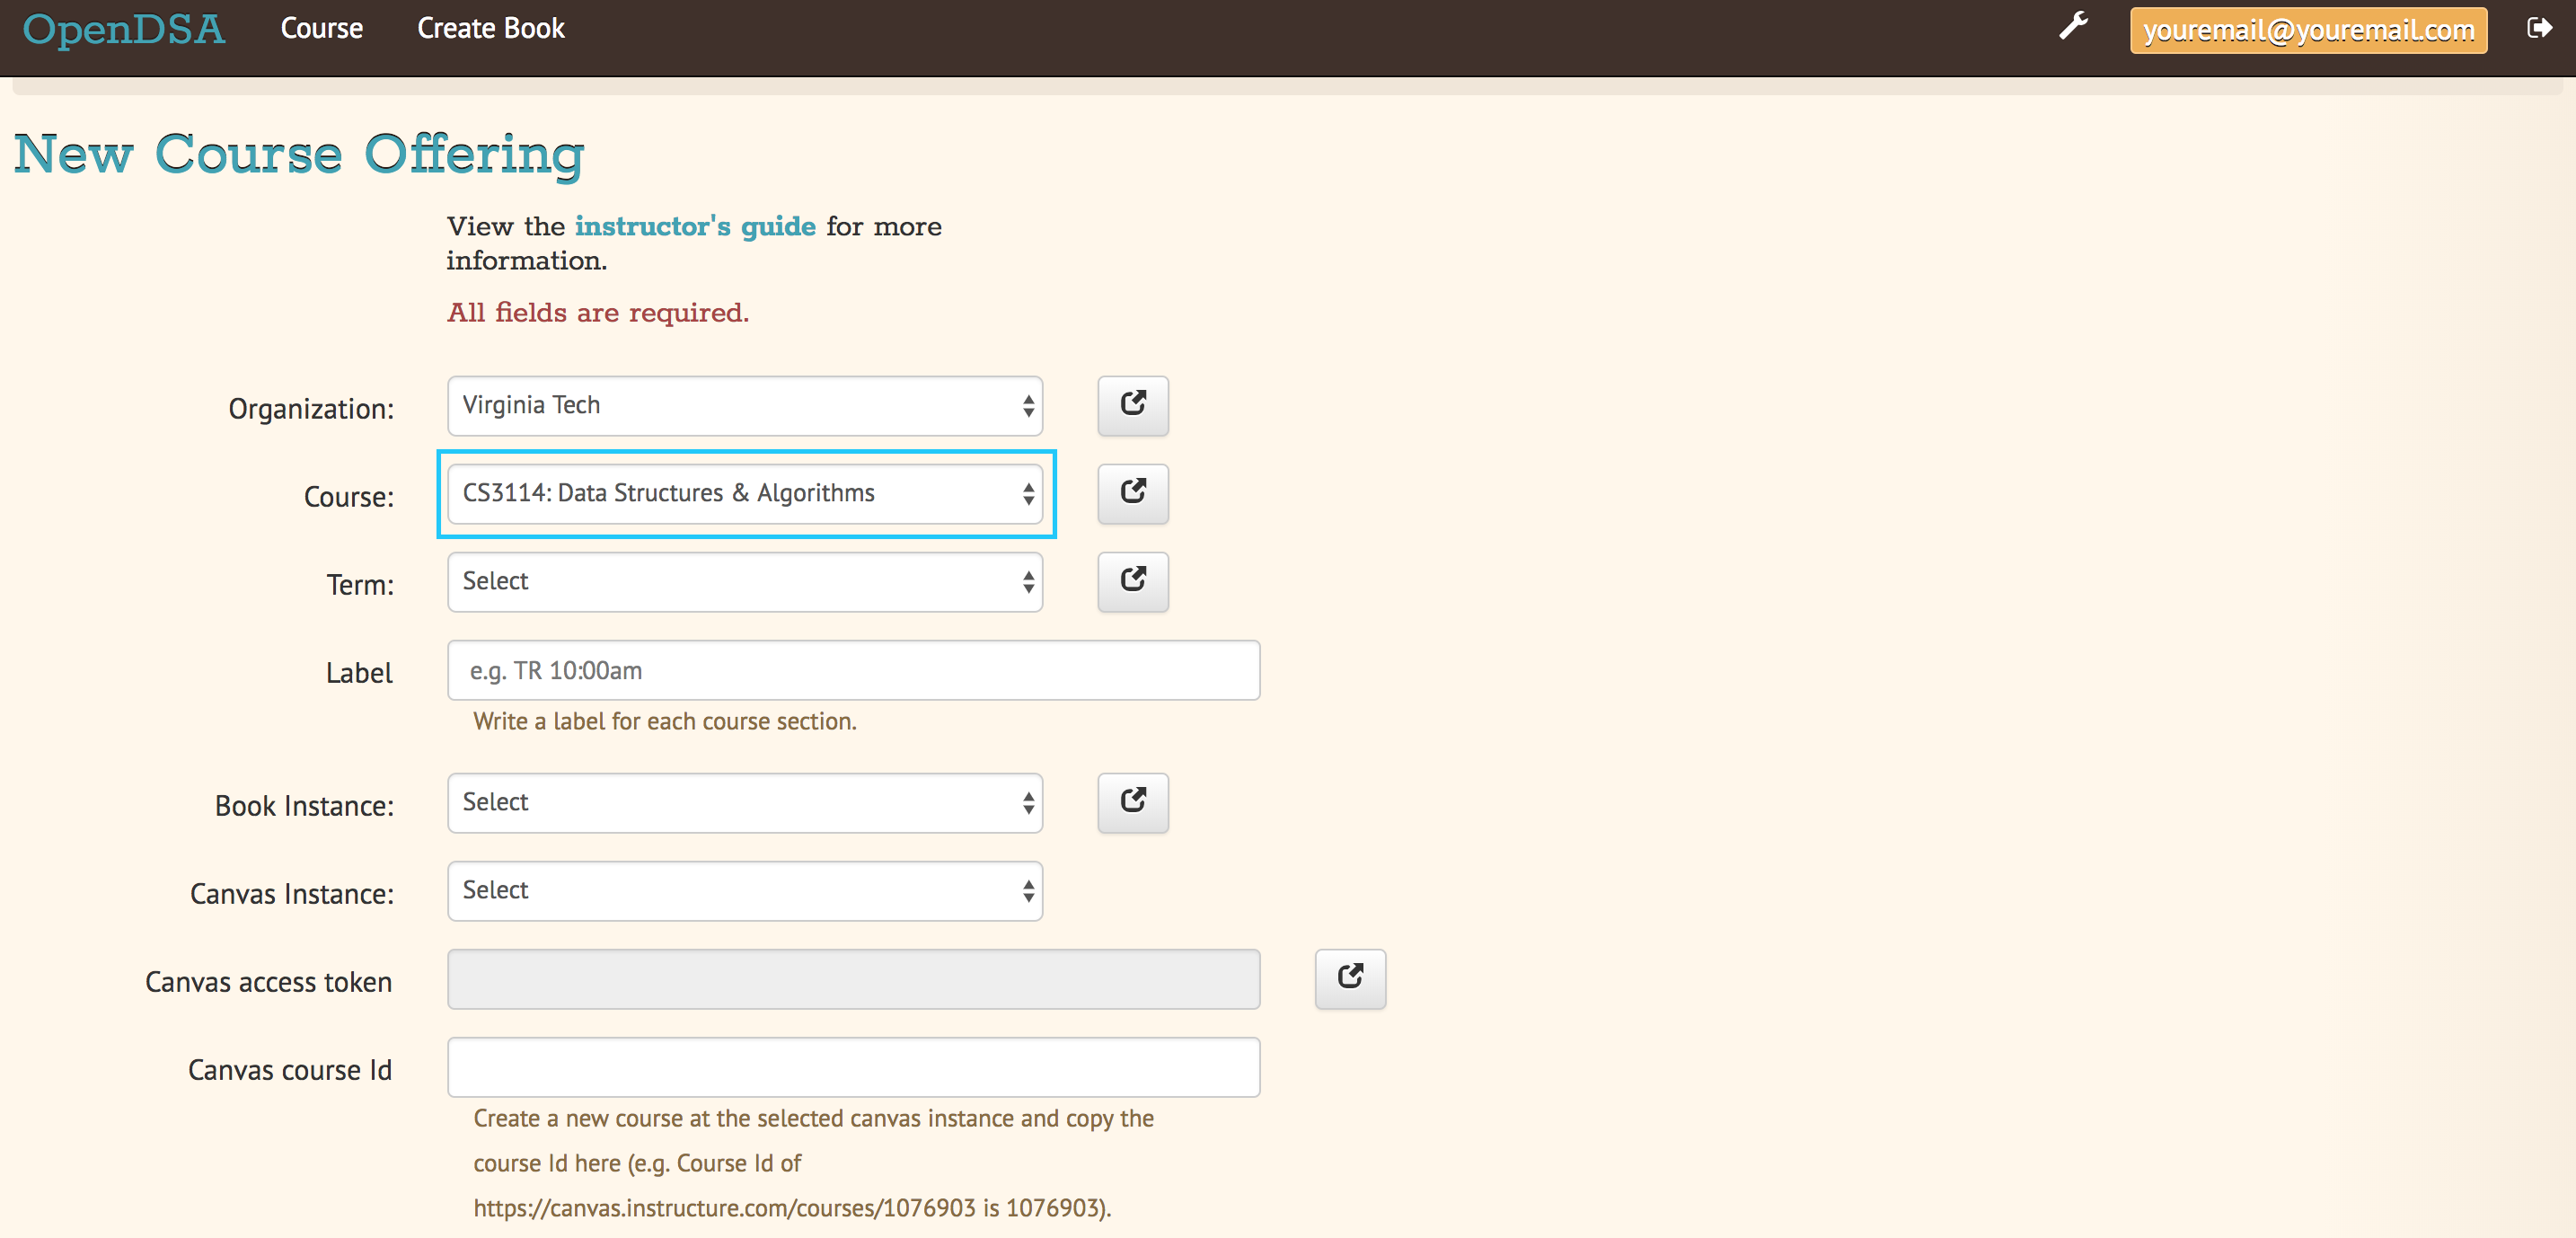
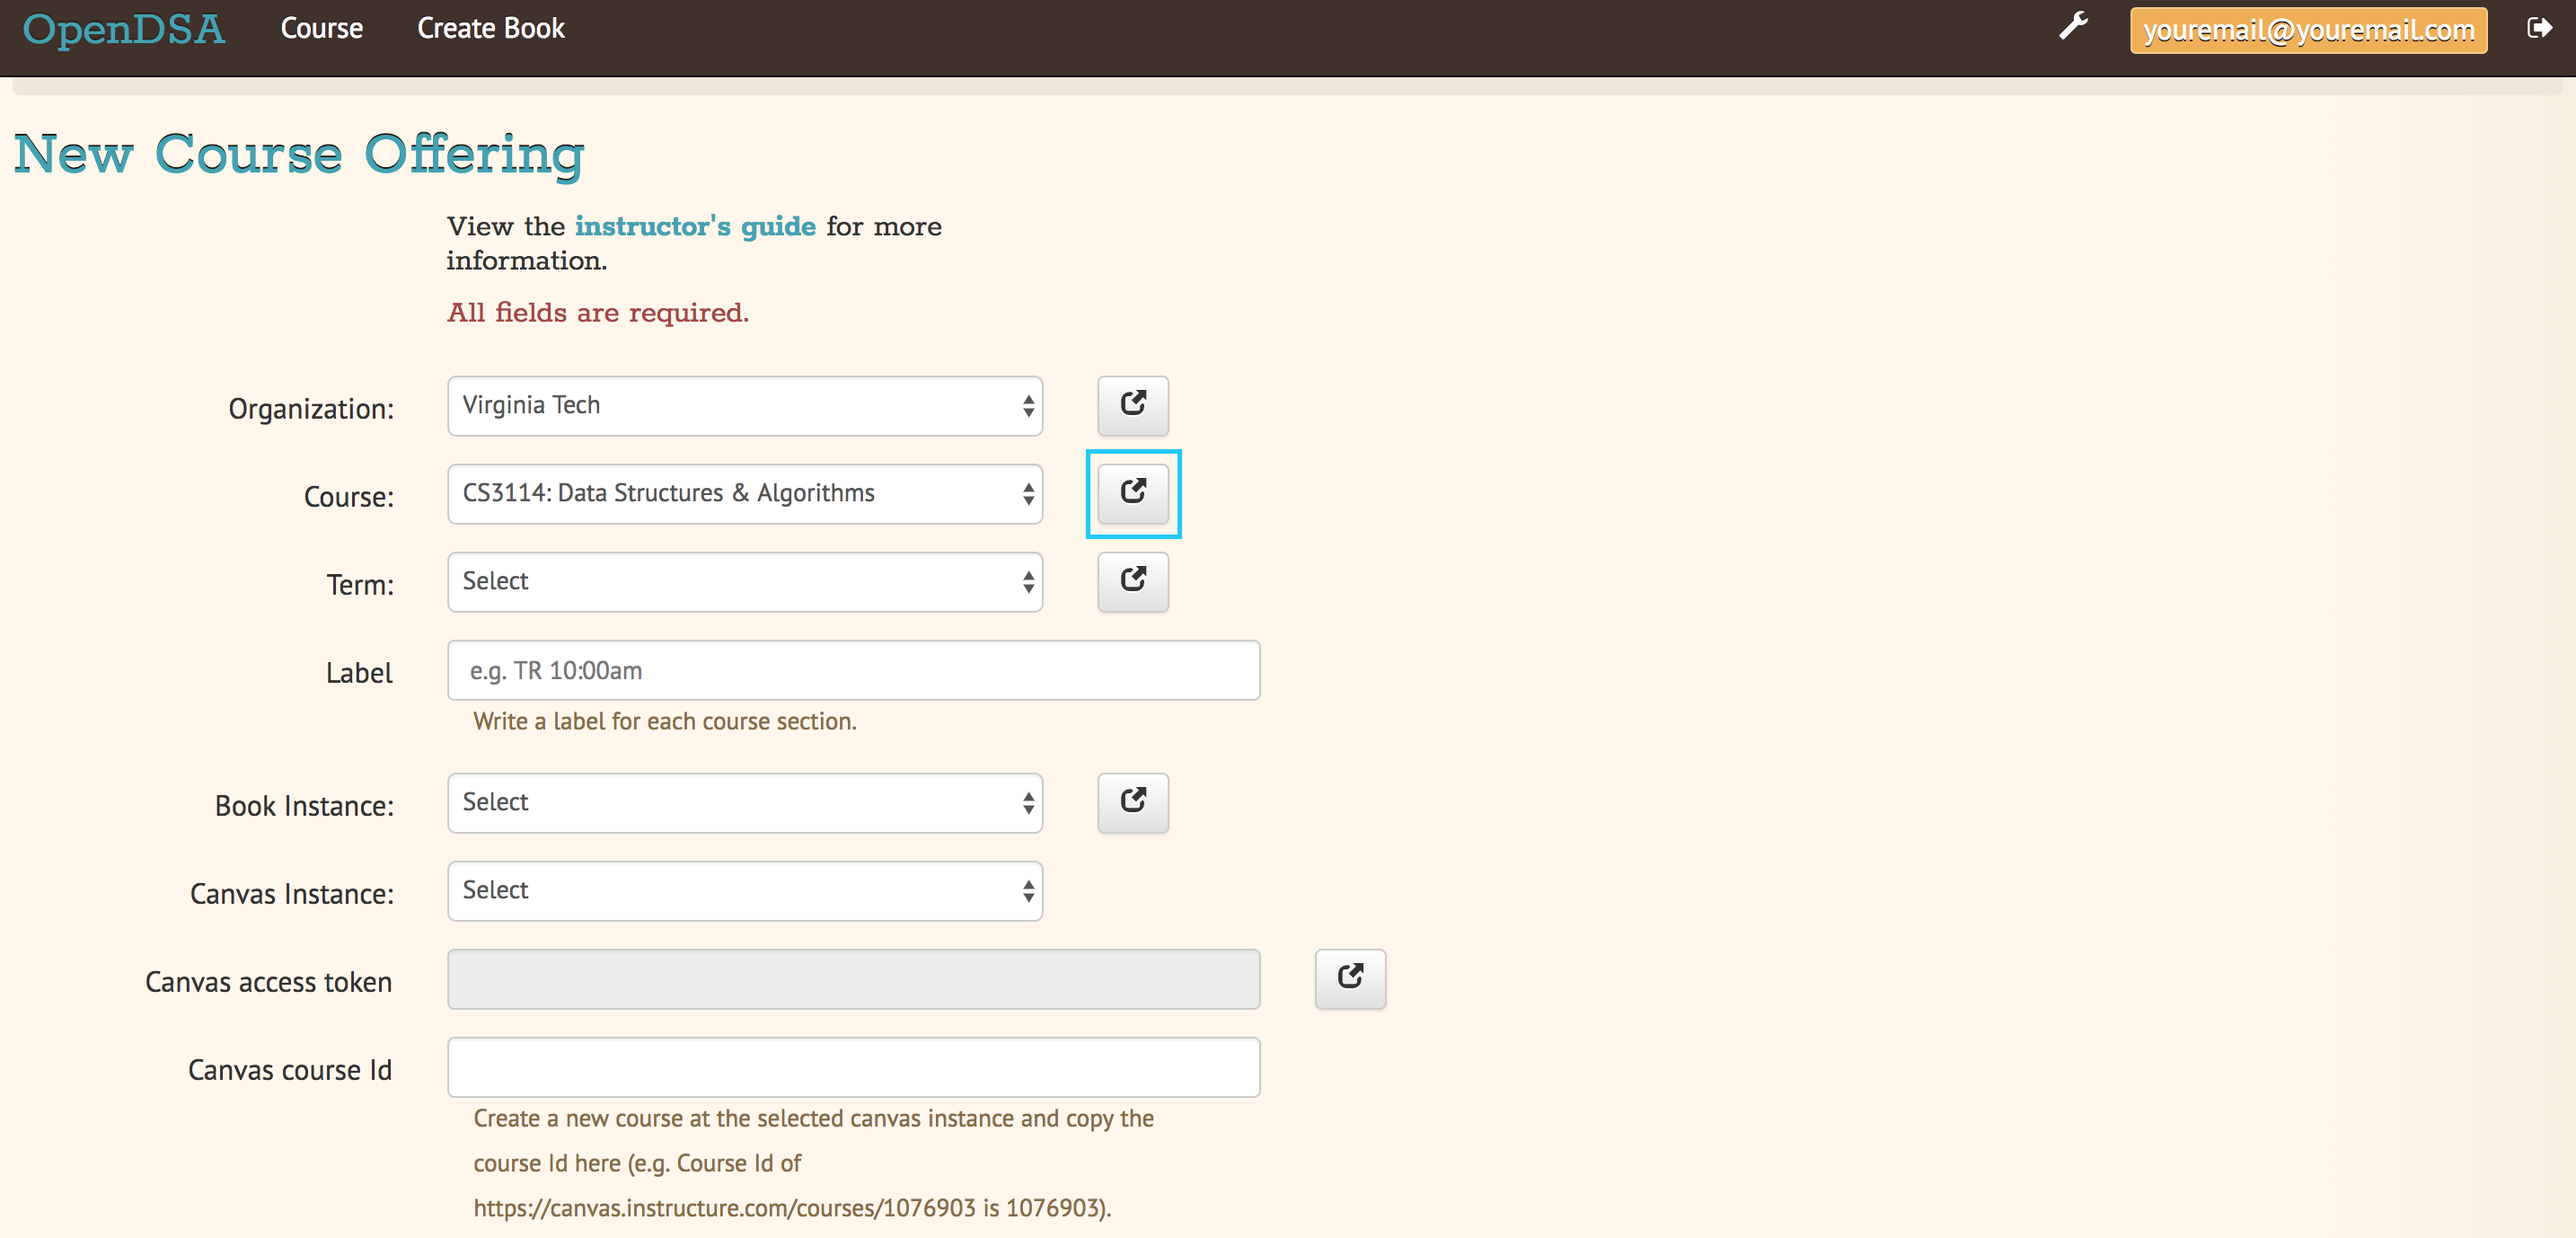
Step 8: If your course is not present under the Course dropdown, click on a button to the right of the Course dropdown.
You will be redirected to the page shown below. Click on the New Course button to the top right of the page.
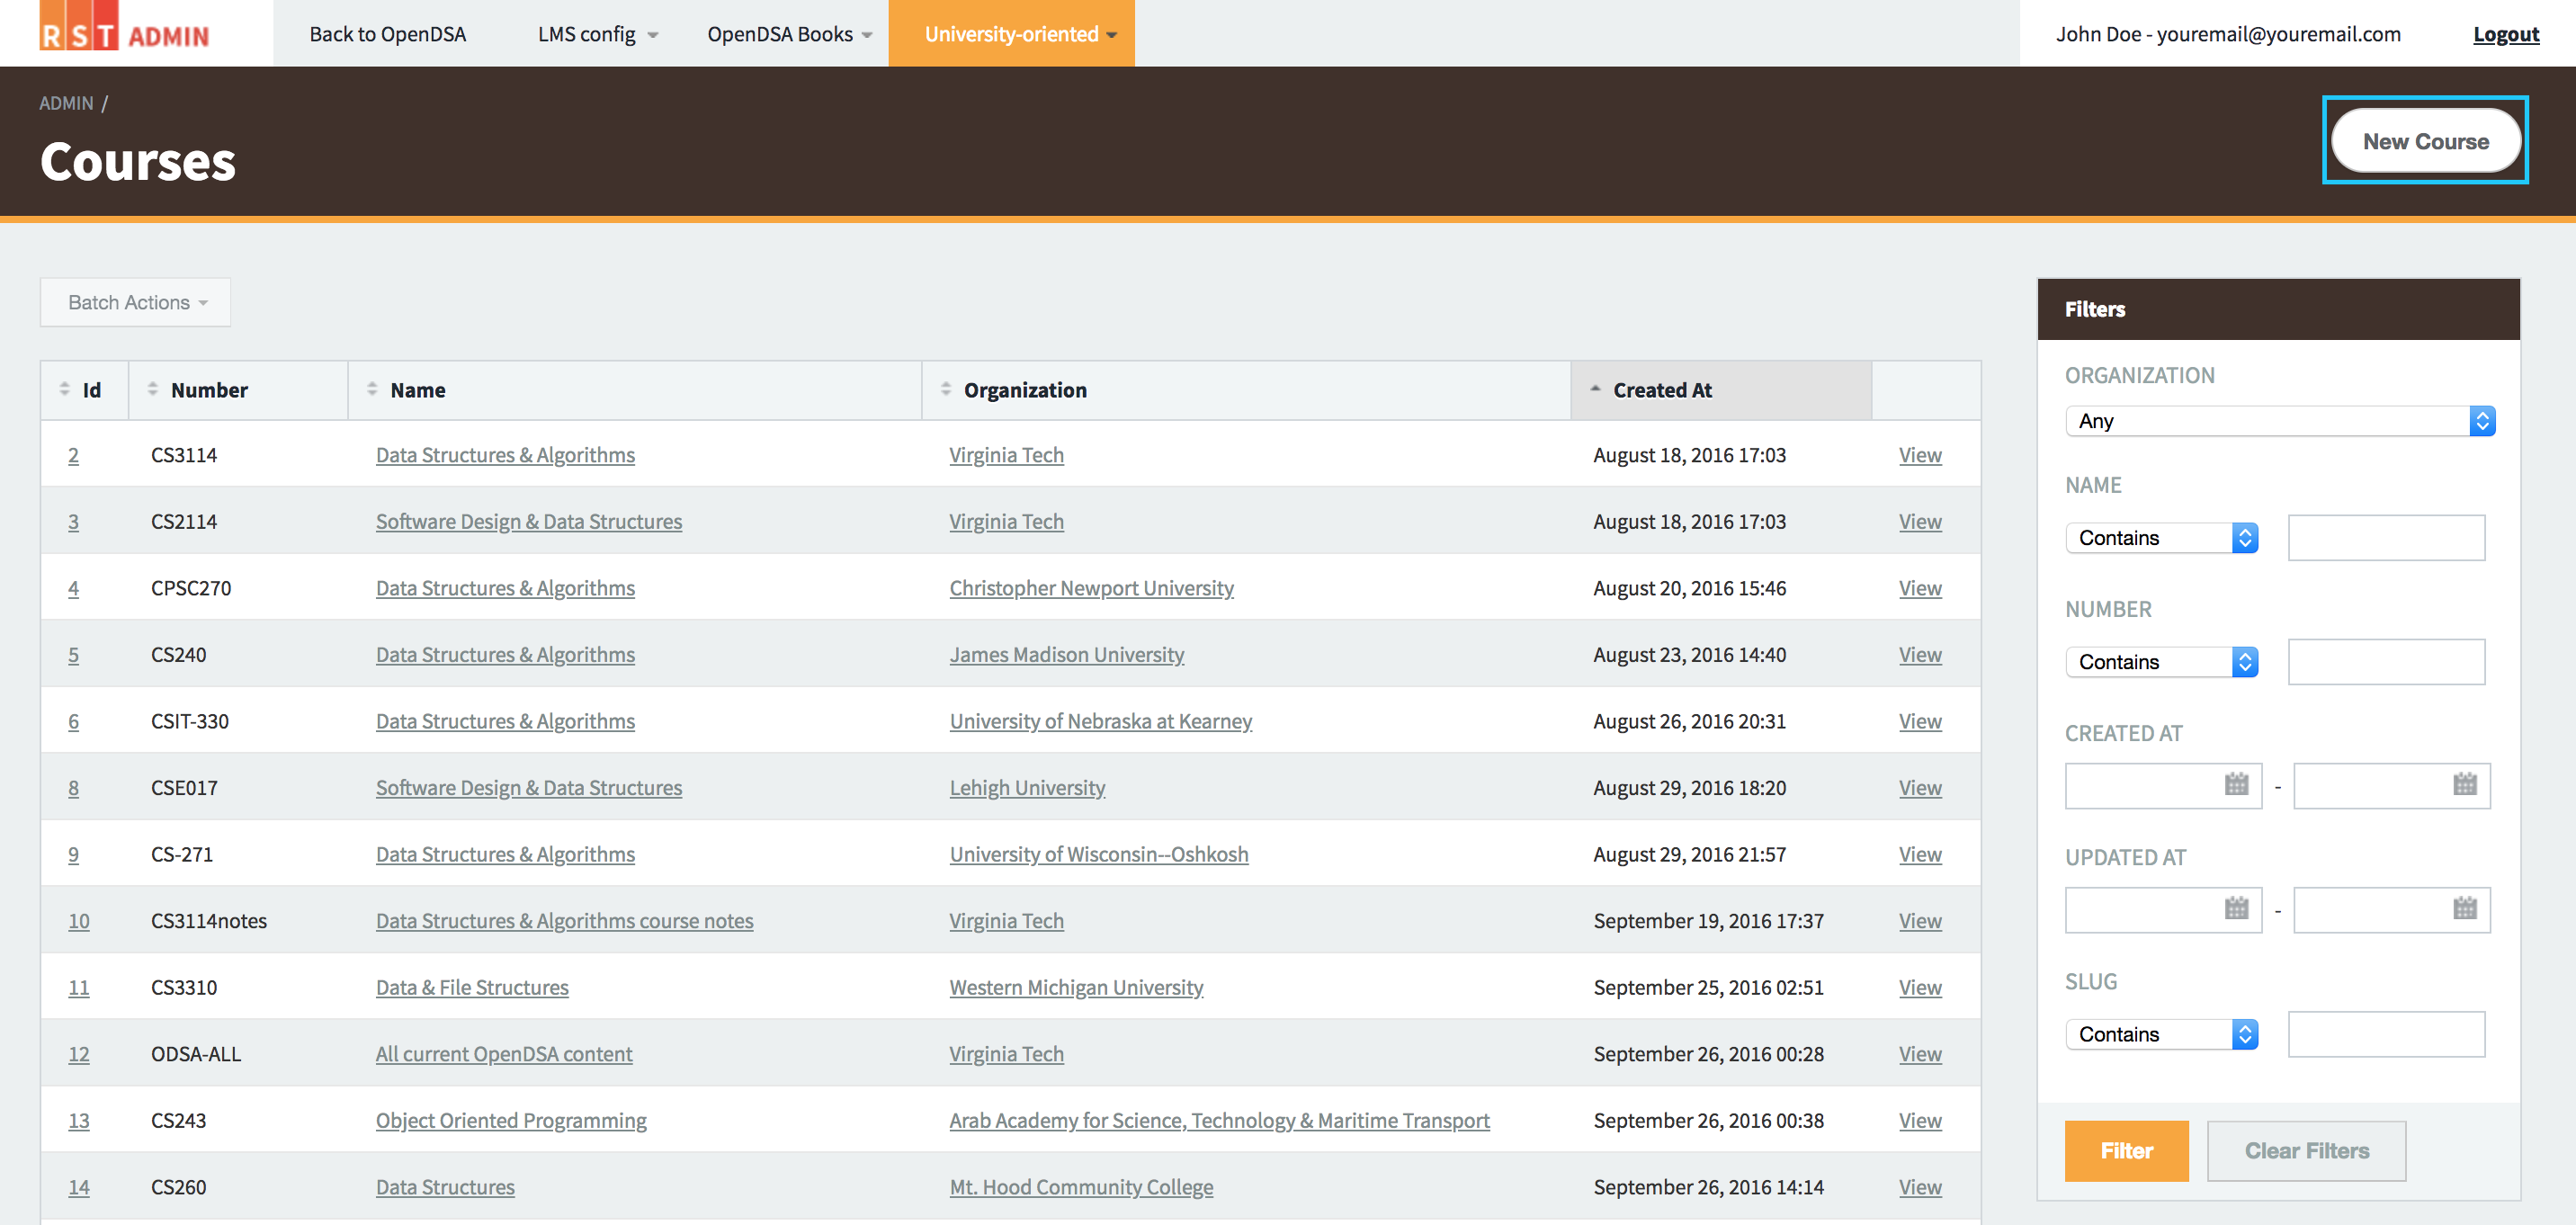
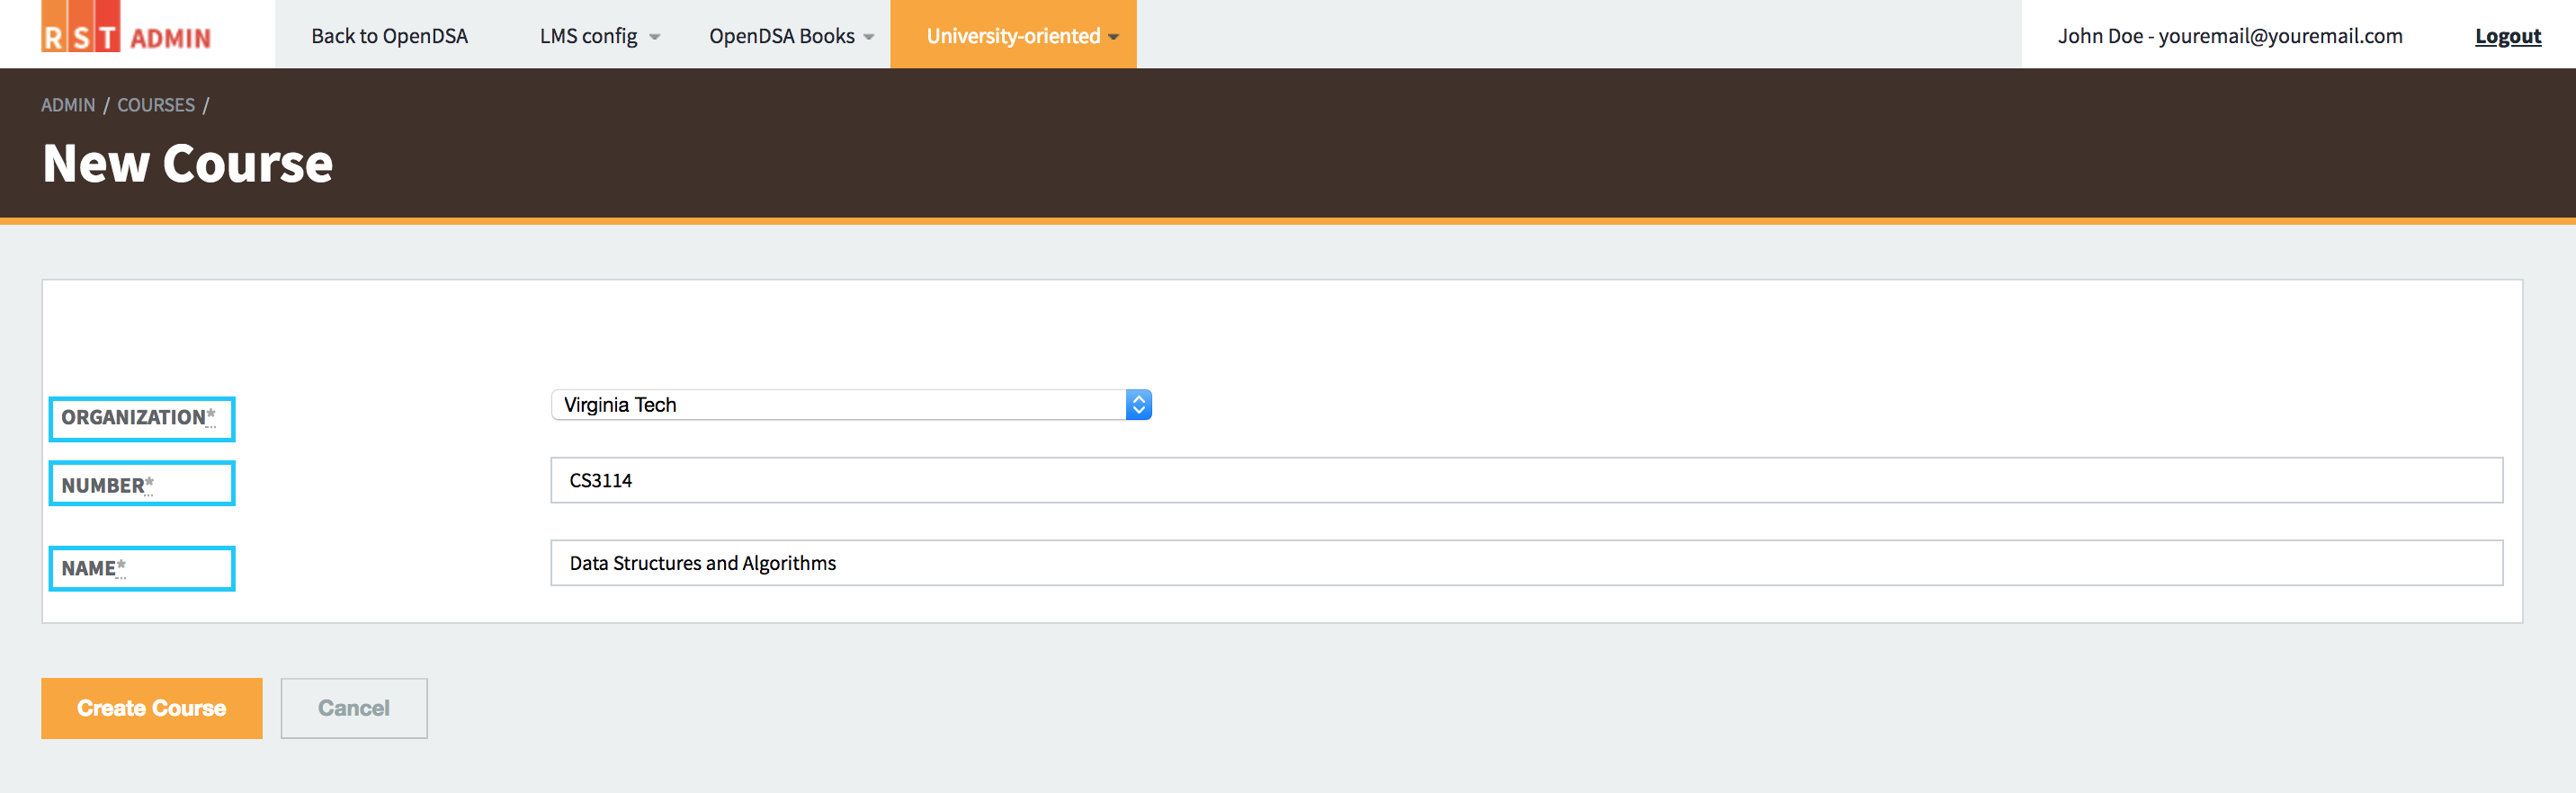
Step 9: You will be taken to a new page where you can add new Course. Select your organization, enter the number and name of your course and click on the Create Course button.
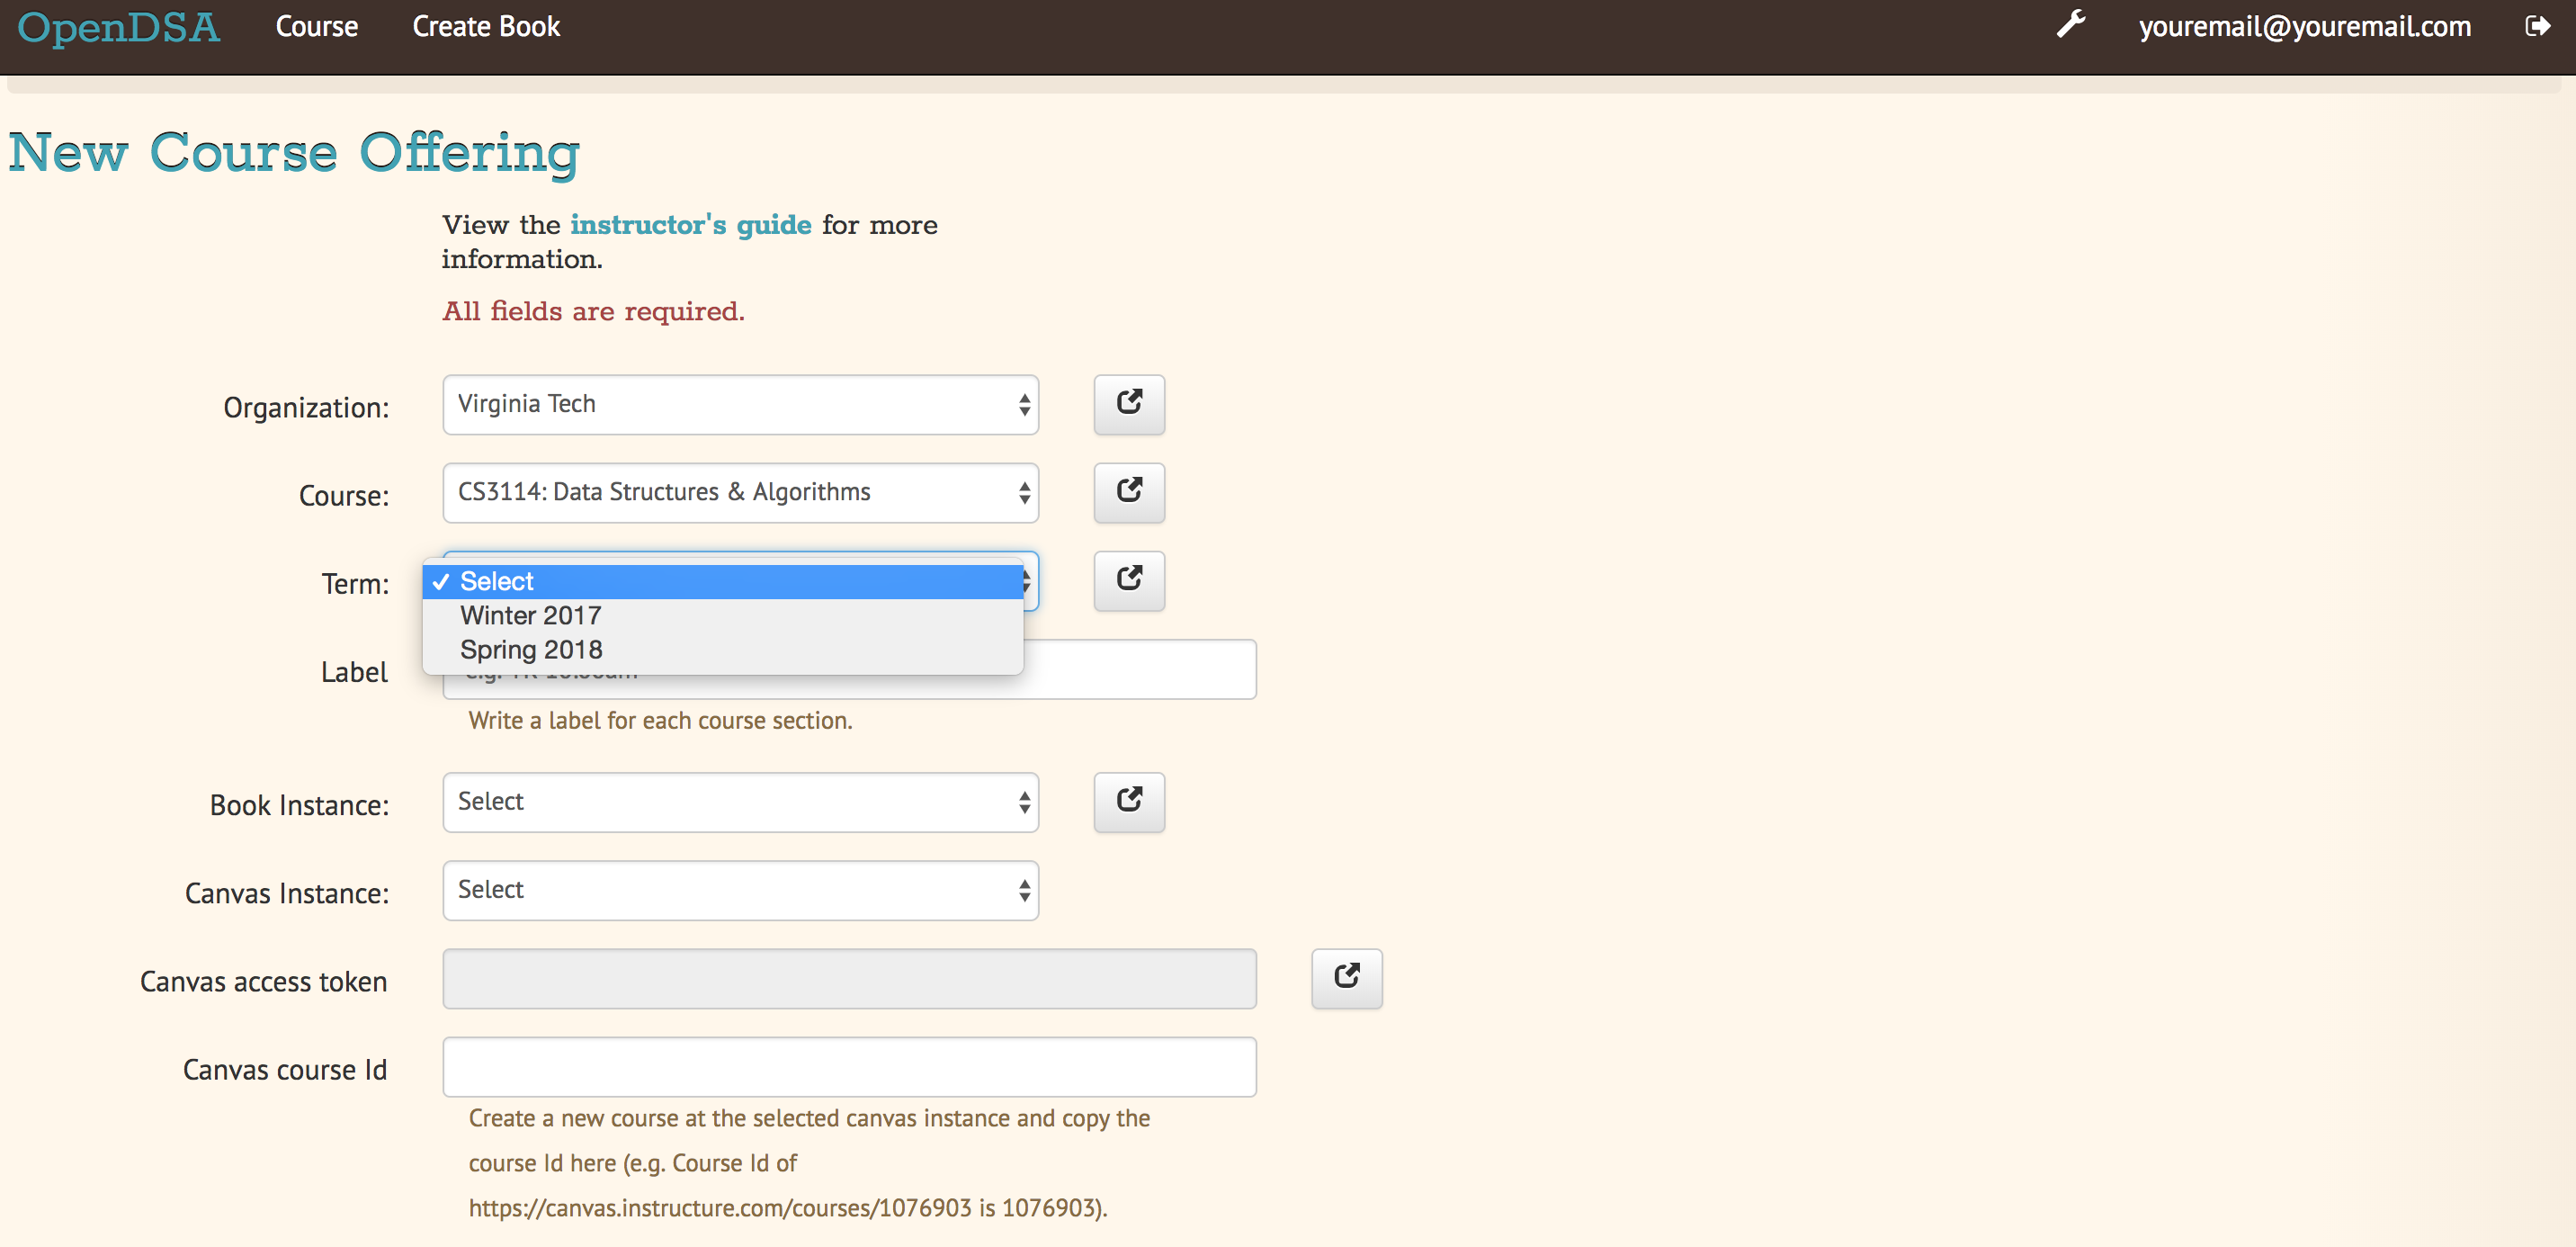
Step 10: Go back to the New Course page and refresh it. Select your organization and course.
After that, select your term from the Term dropdown.
Step 11: If your term is not present under the Term dropdown, click on a button to the right of the Term dropdown.
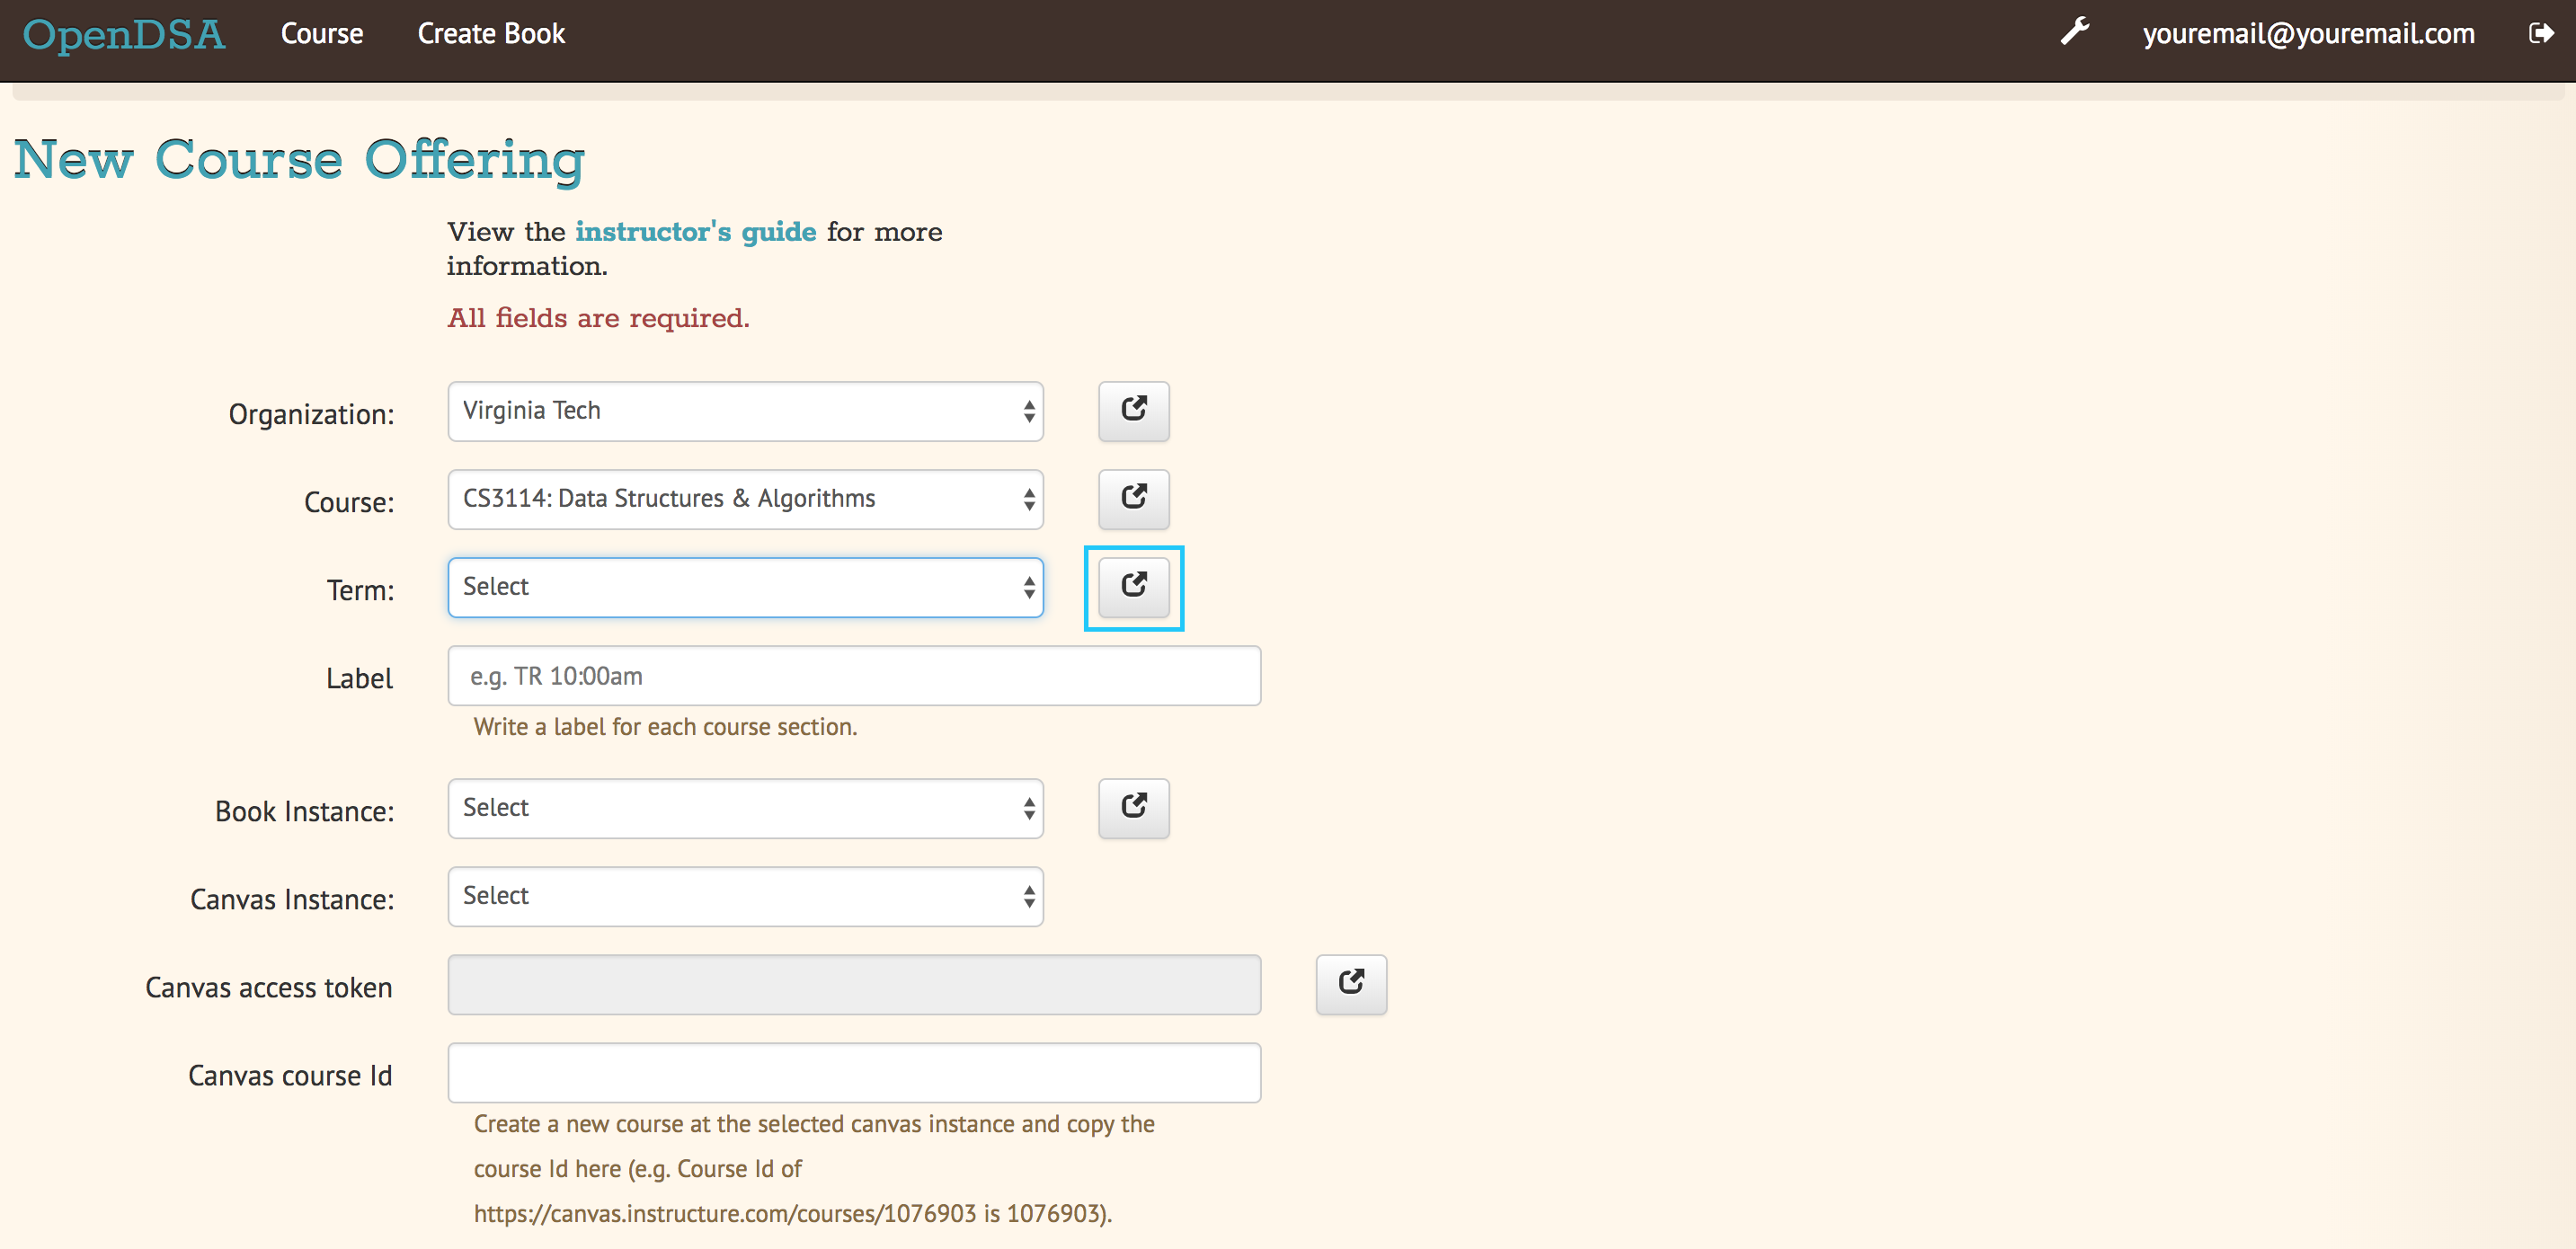
You will be redirected to the page shown below. Click on the New Term button to the top right of the page.
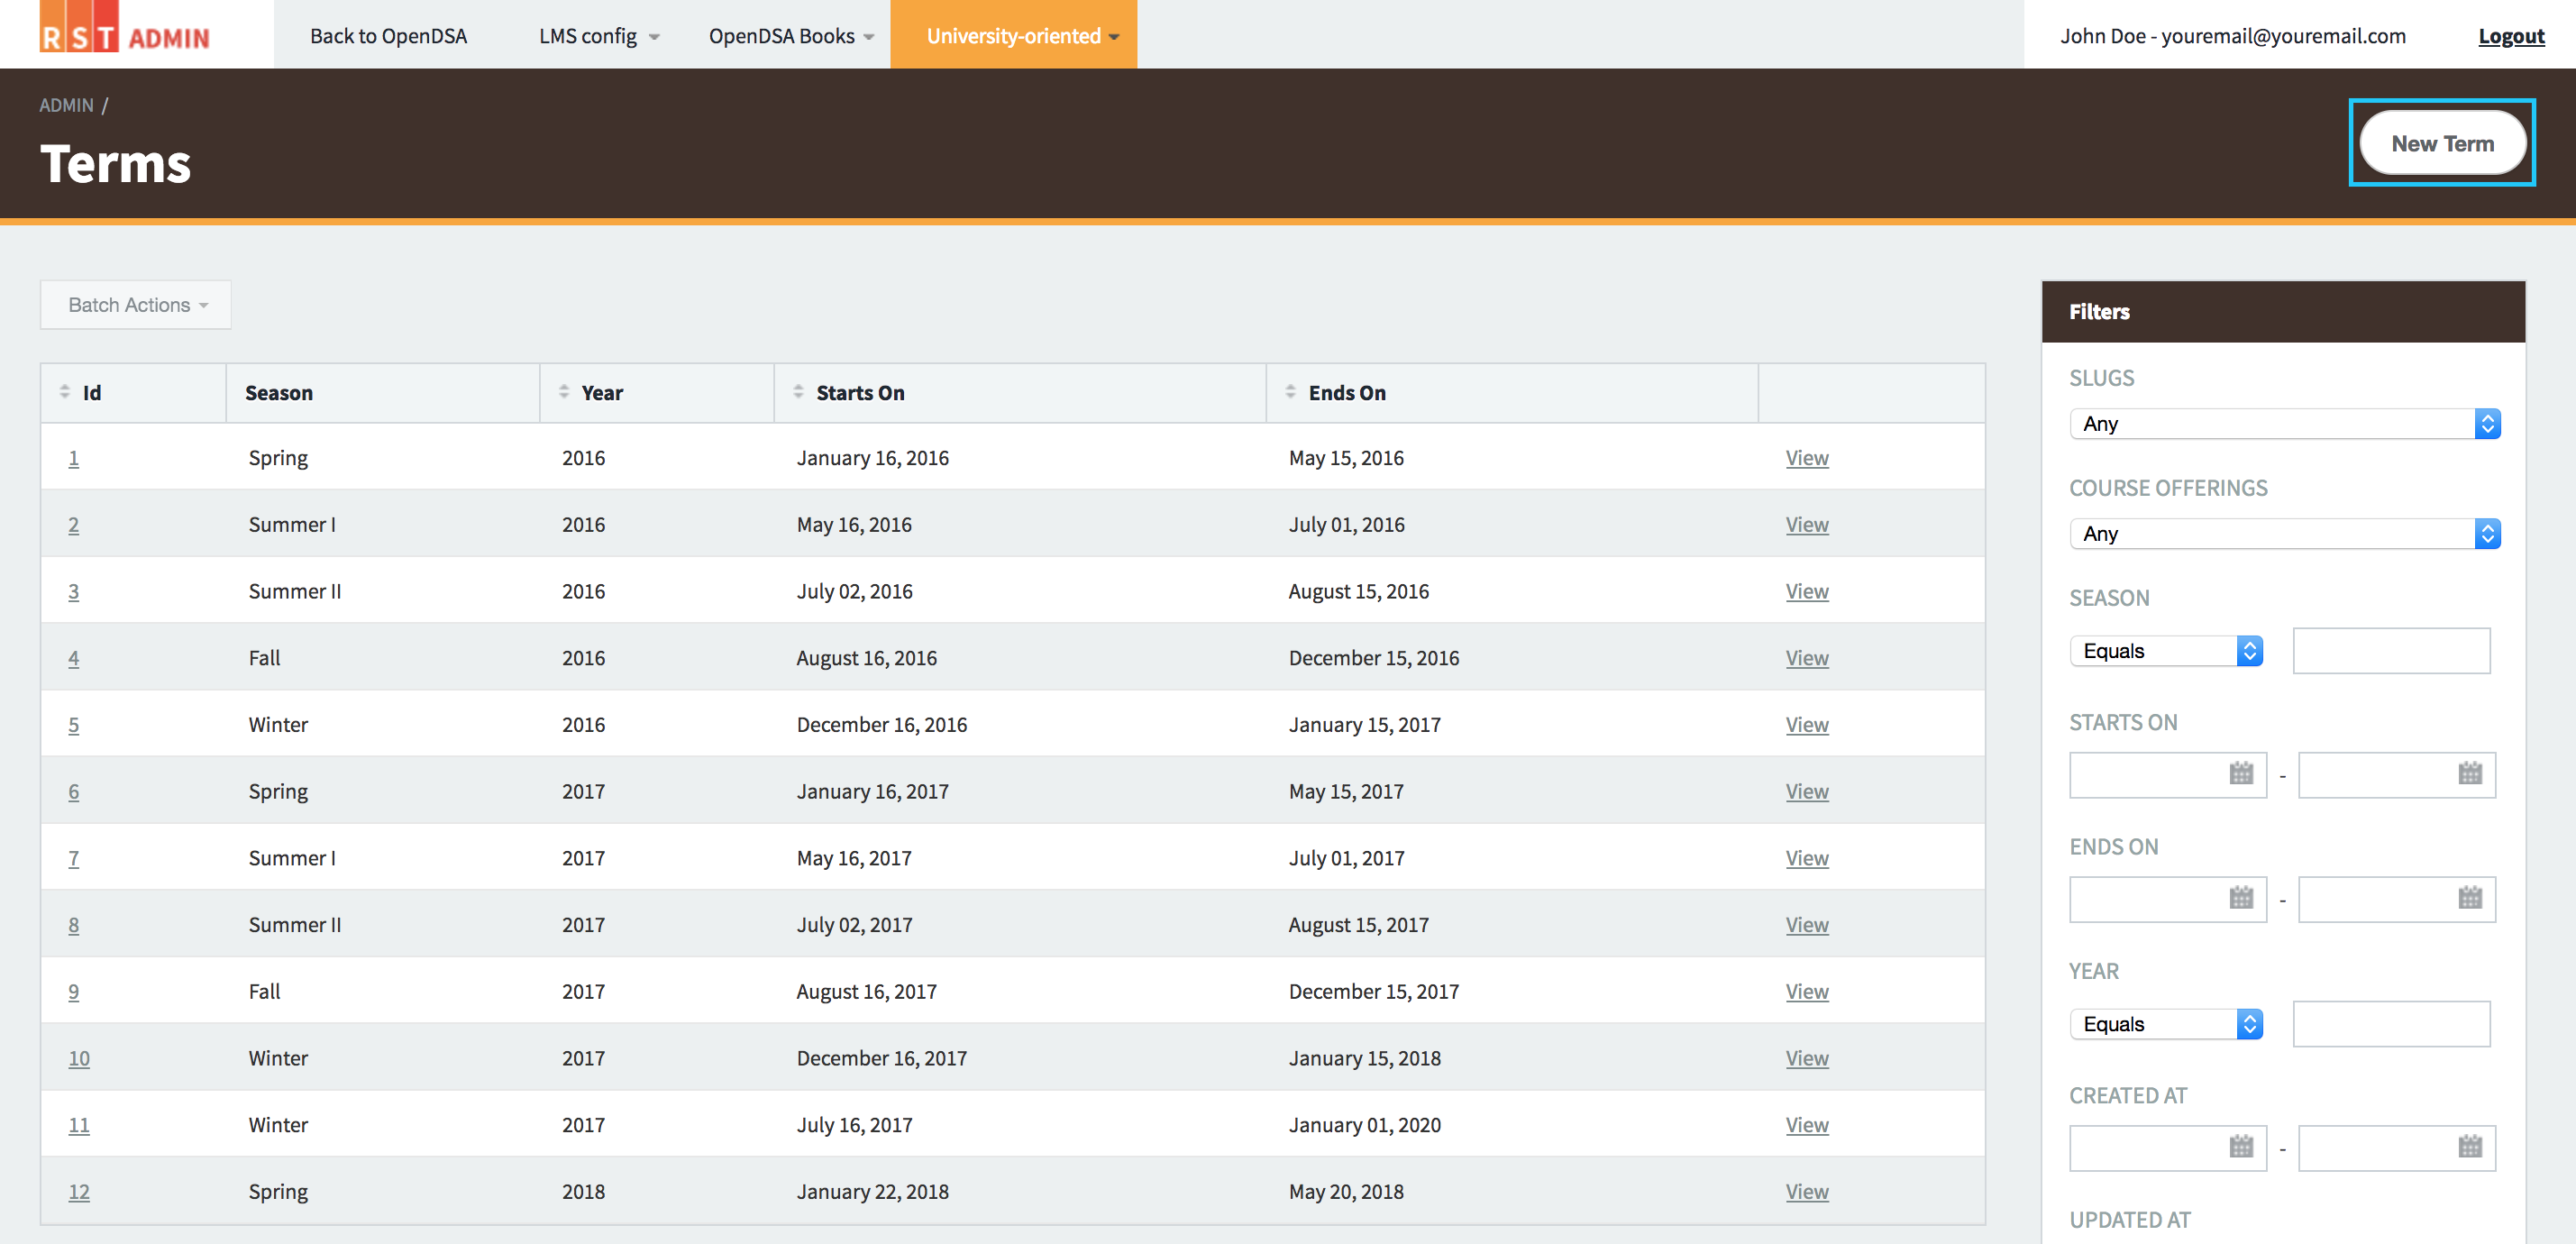
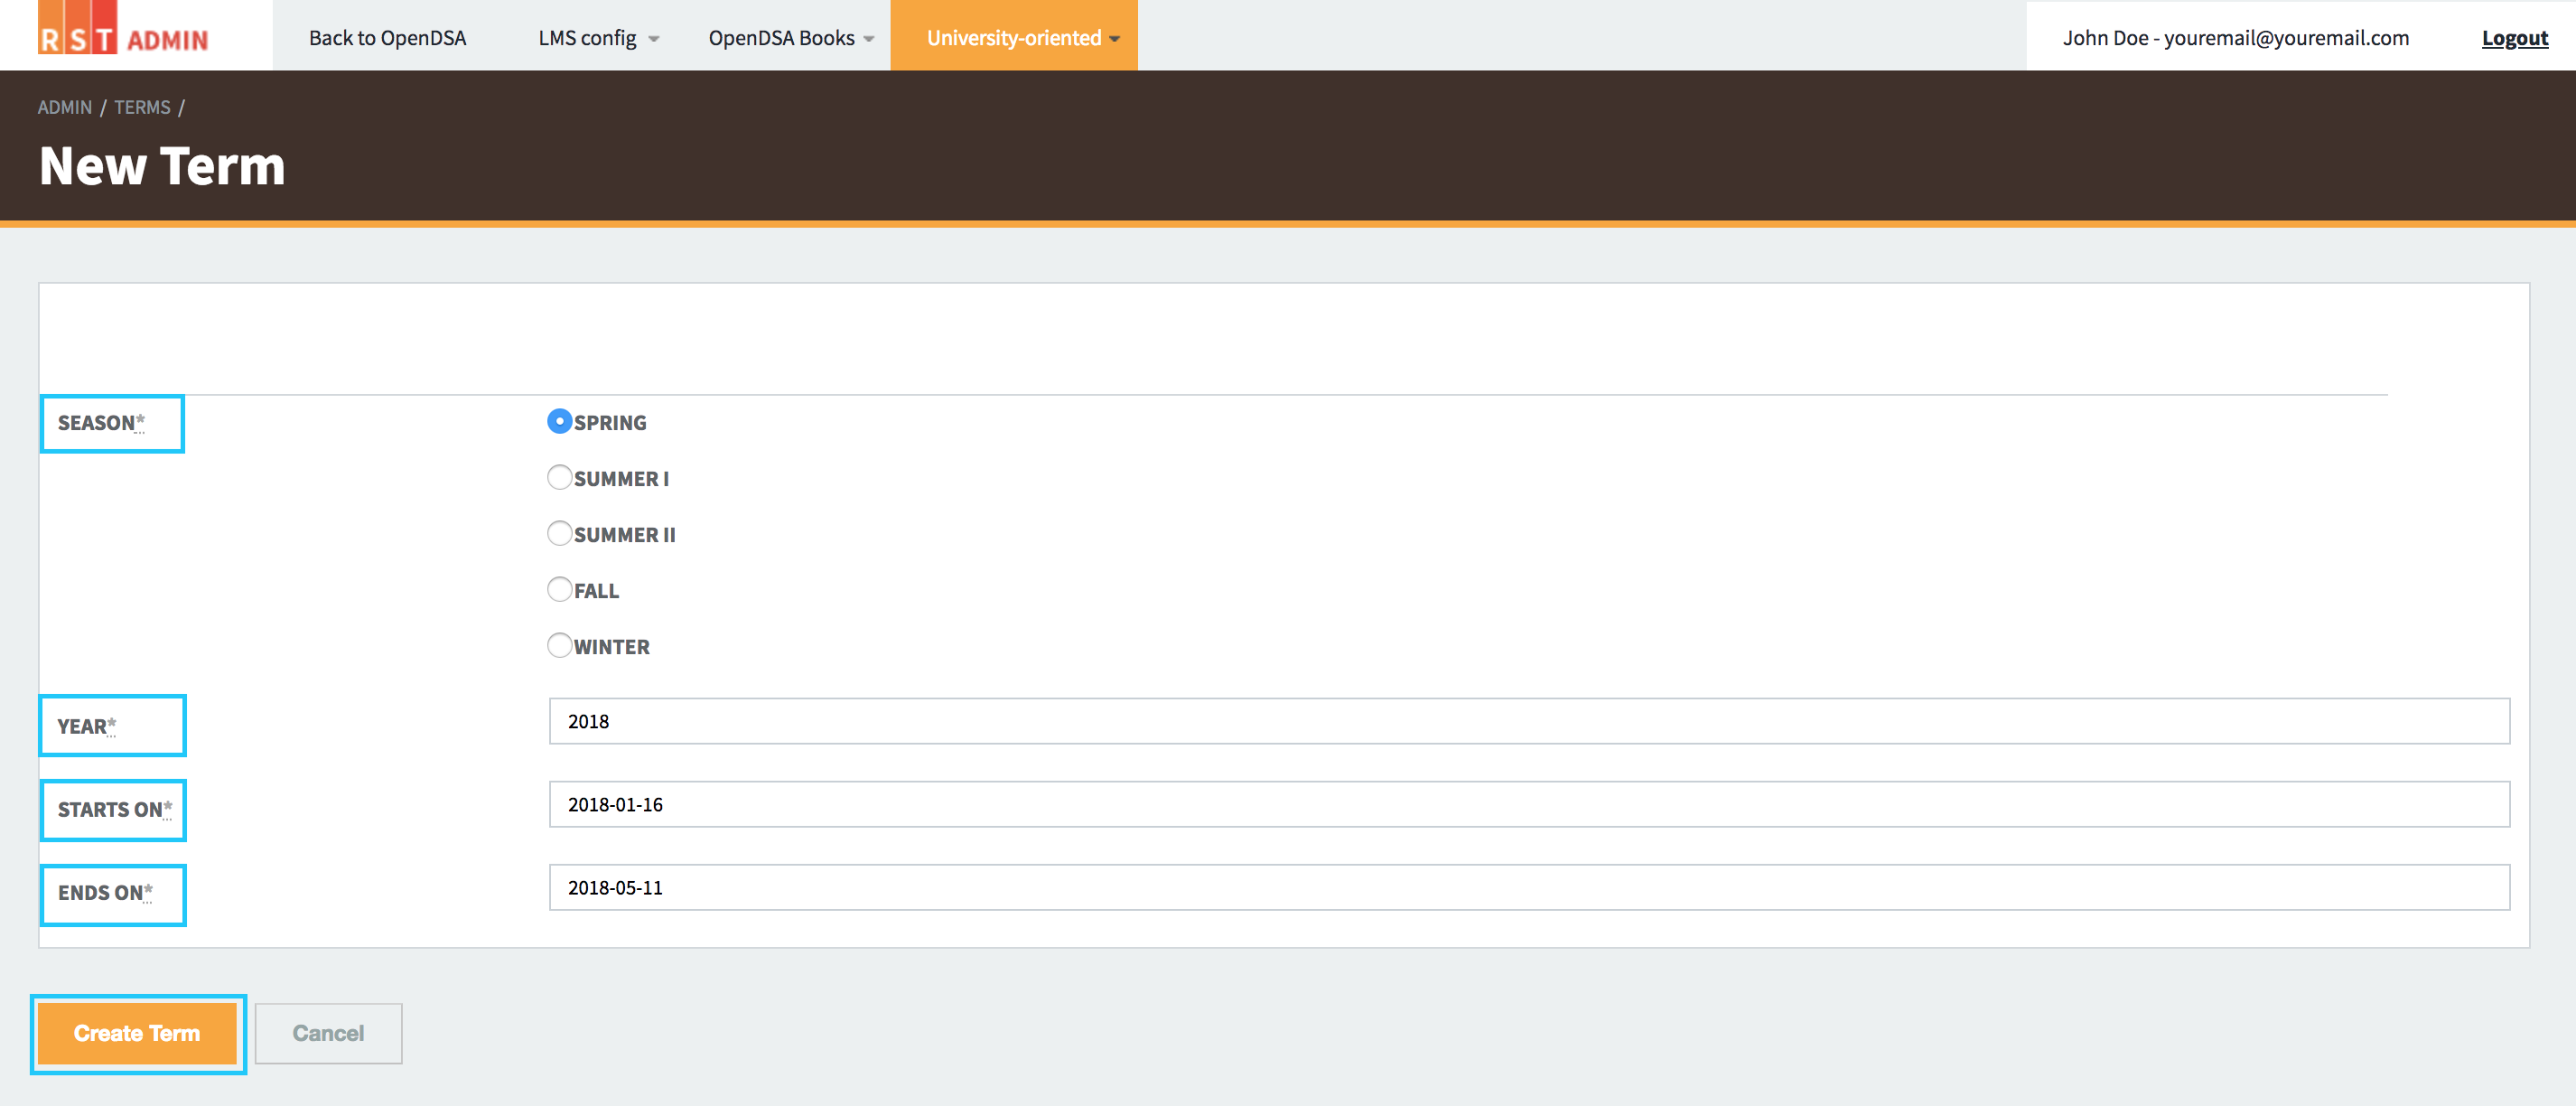
Step 12: You will be taken to a new page where you can add new Term. Select the season, year, start and end date and click on the Create Term button.
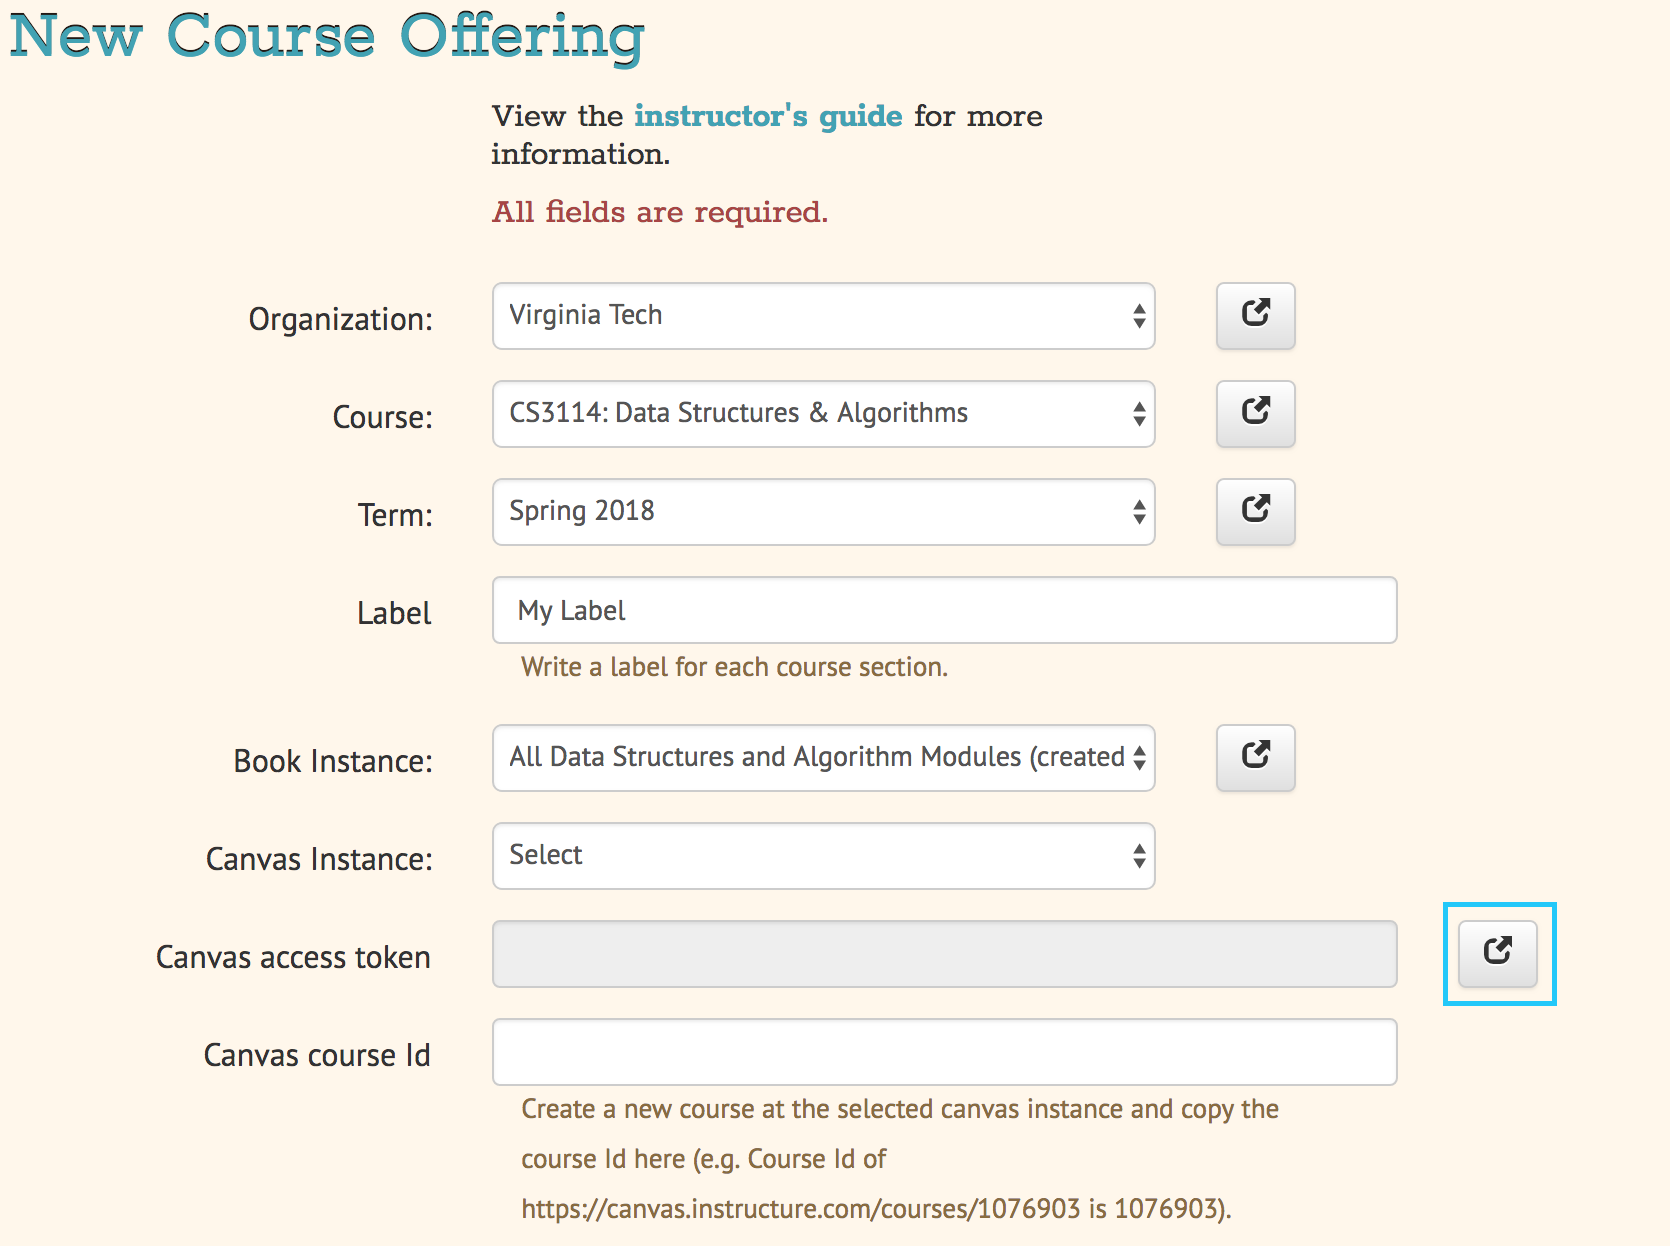
Step 13: Go back to the New Course page and refresh it. Select your organization, course, and Term. After that, enter the label you want to assign to this course.
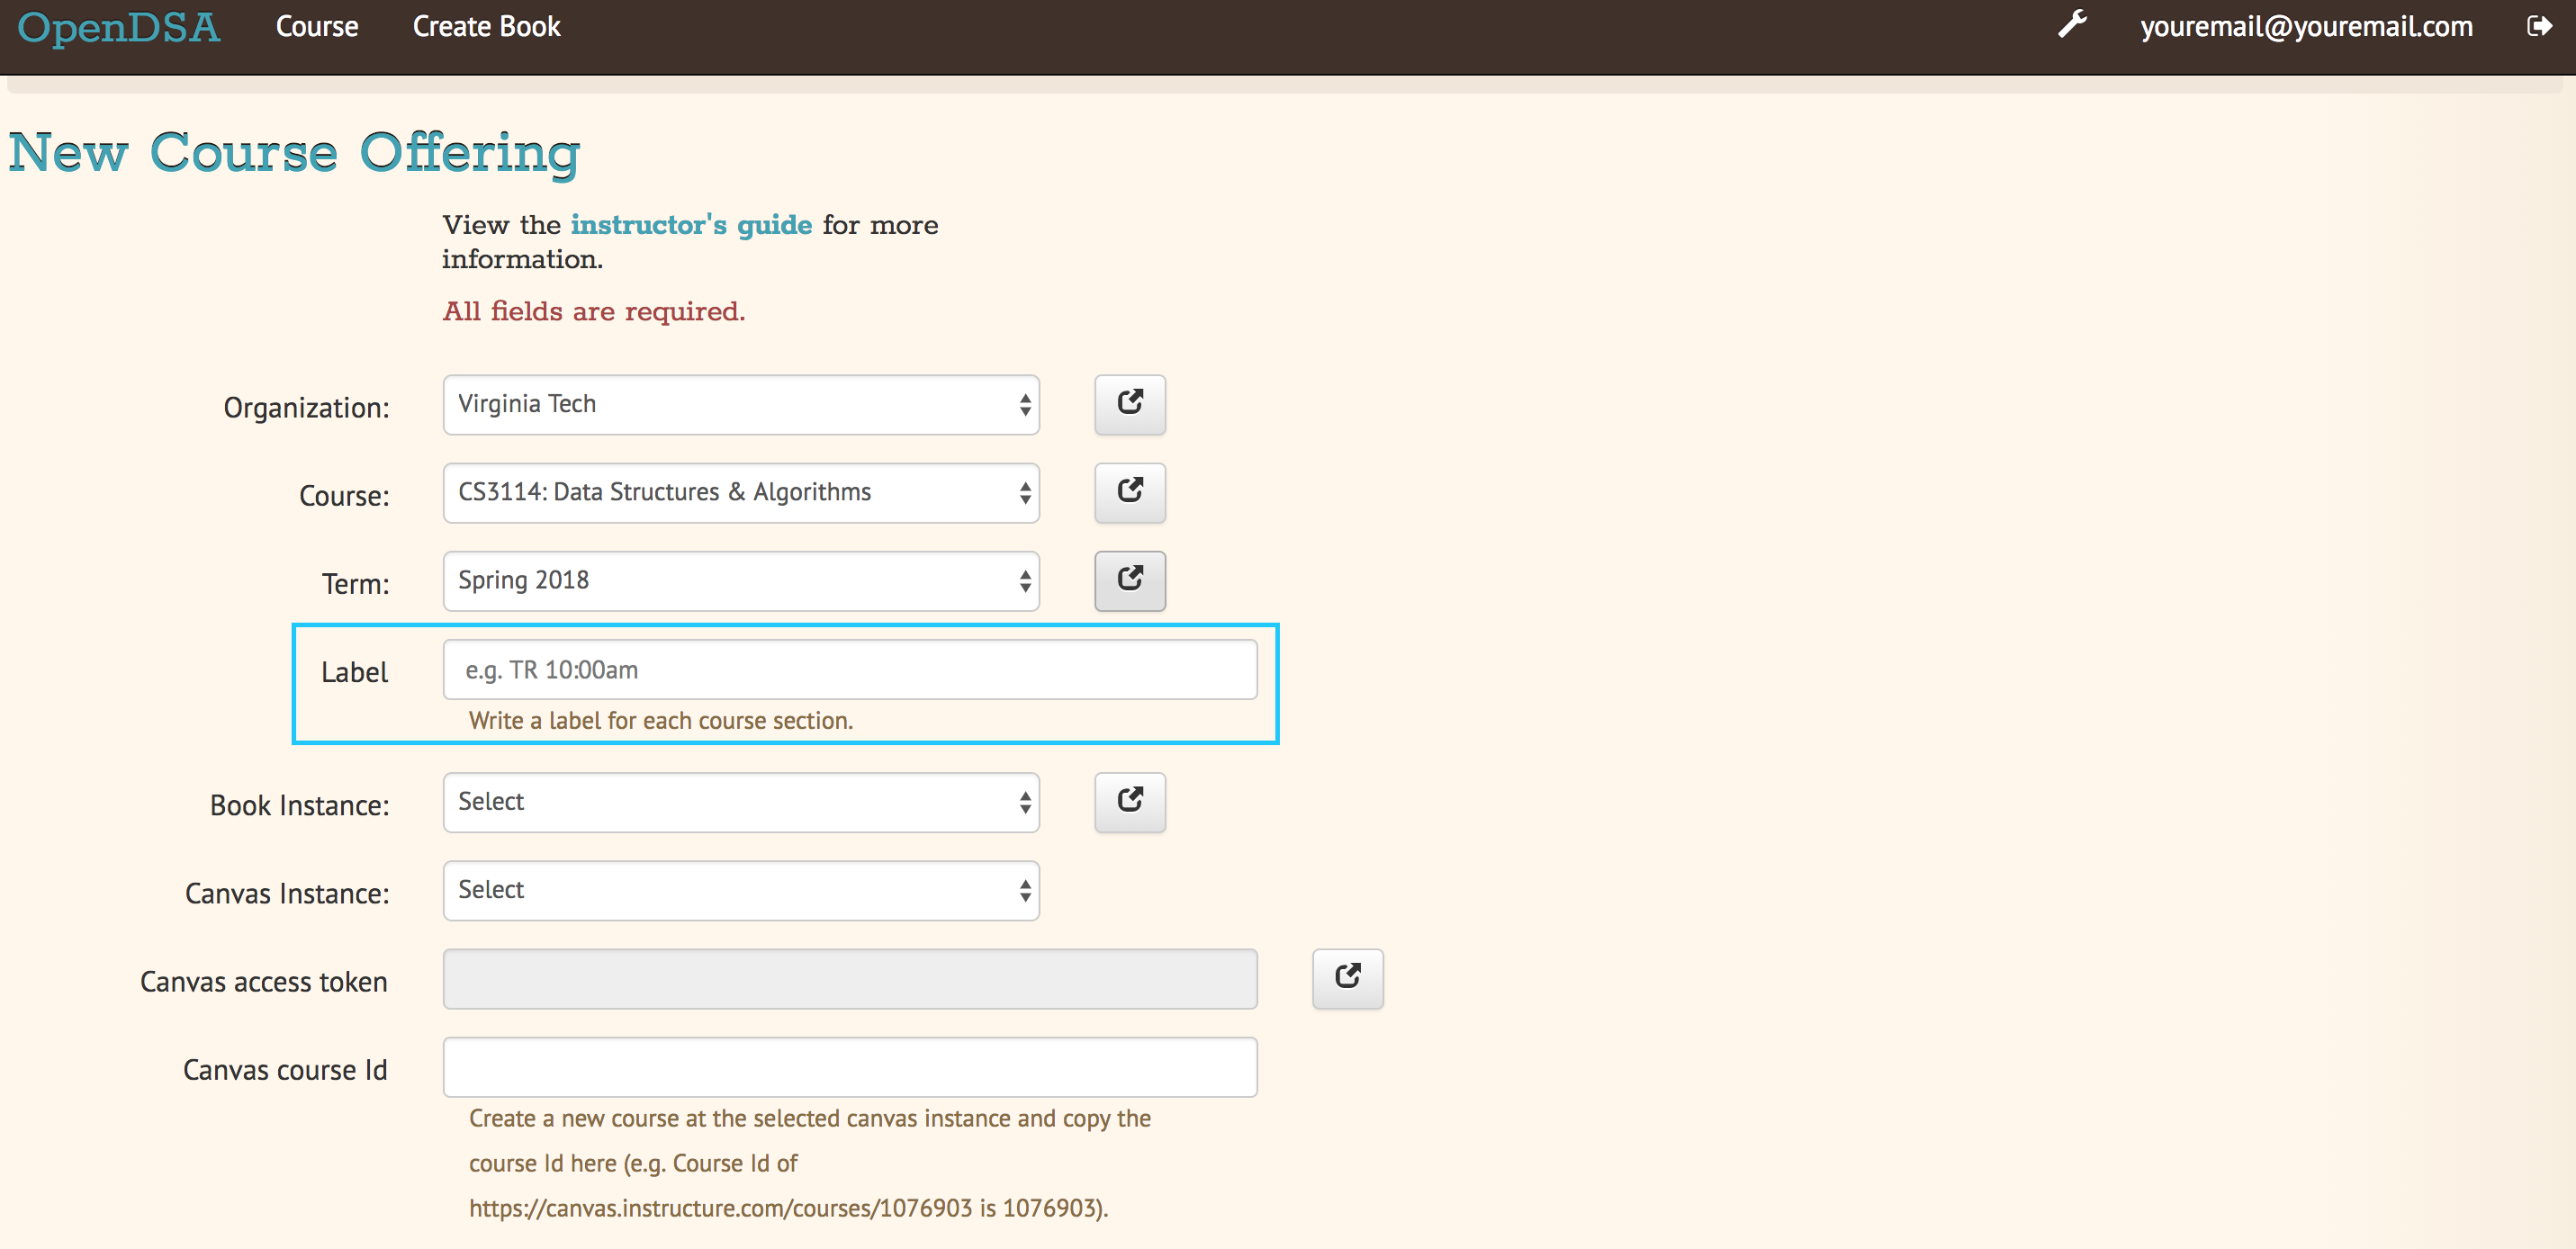
Step 14: Select the Book Instance you want to use for this course. Modules collected together form an OpenDSA Book Instance.
Step 15: If you want to configure a new OpenDSA Book, follow this link.
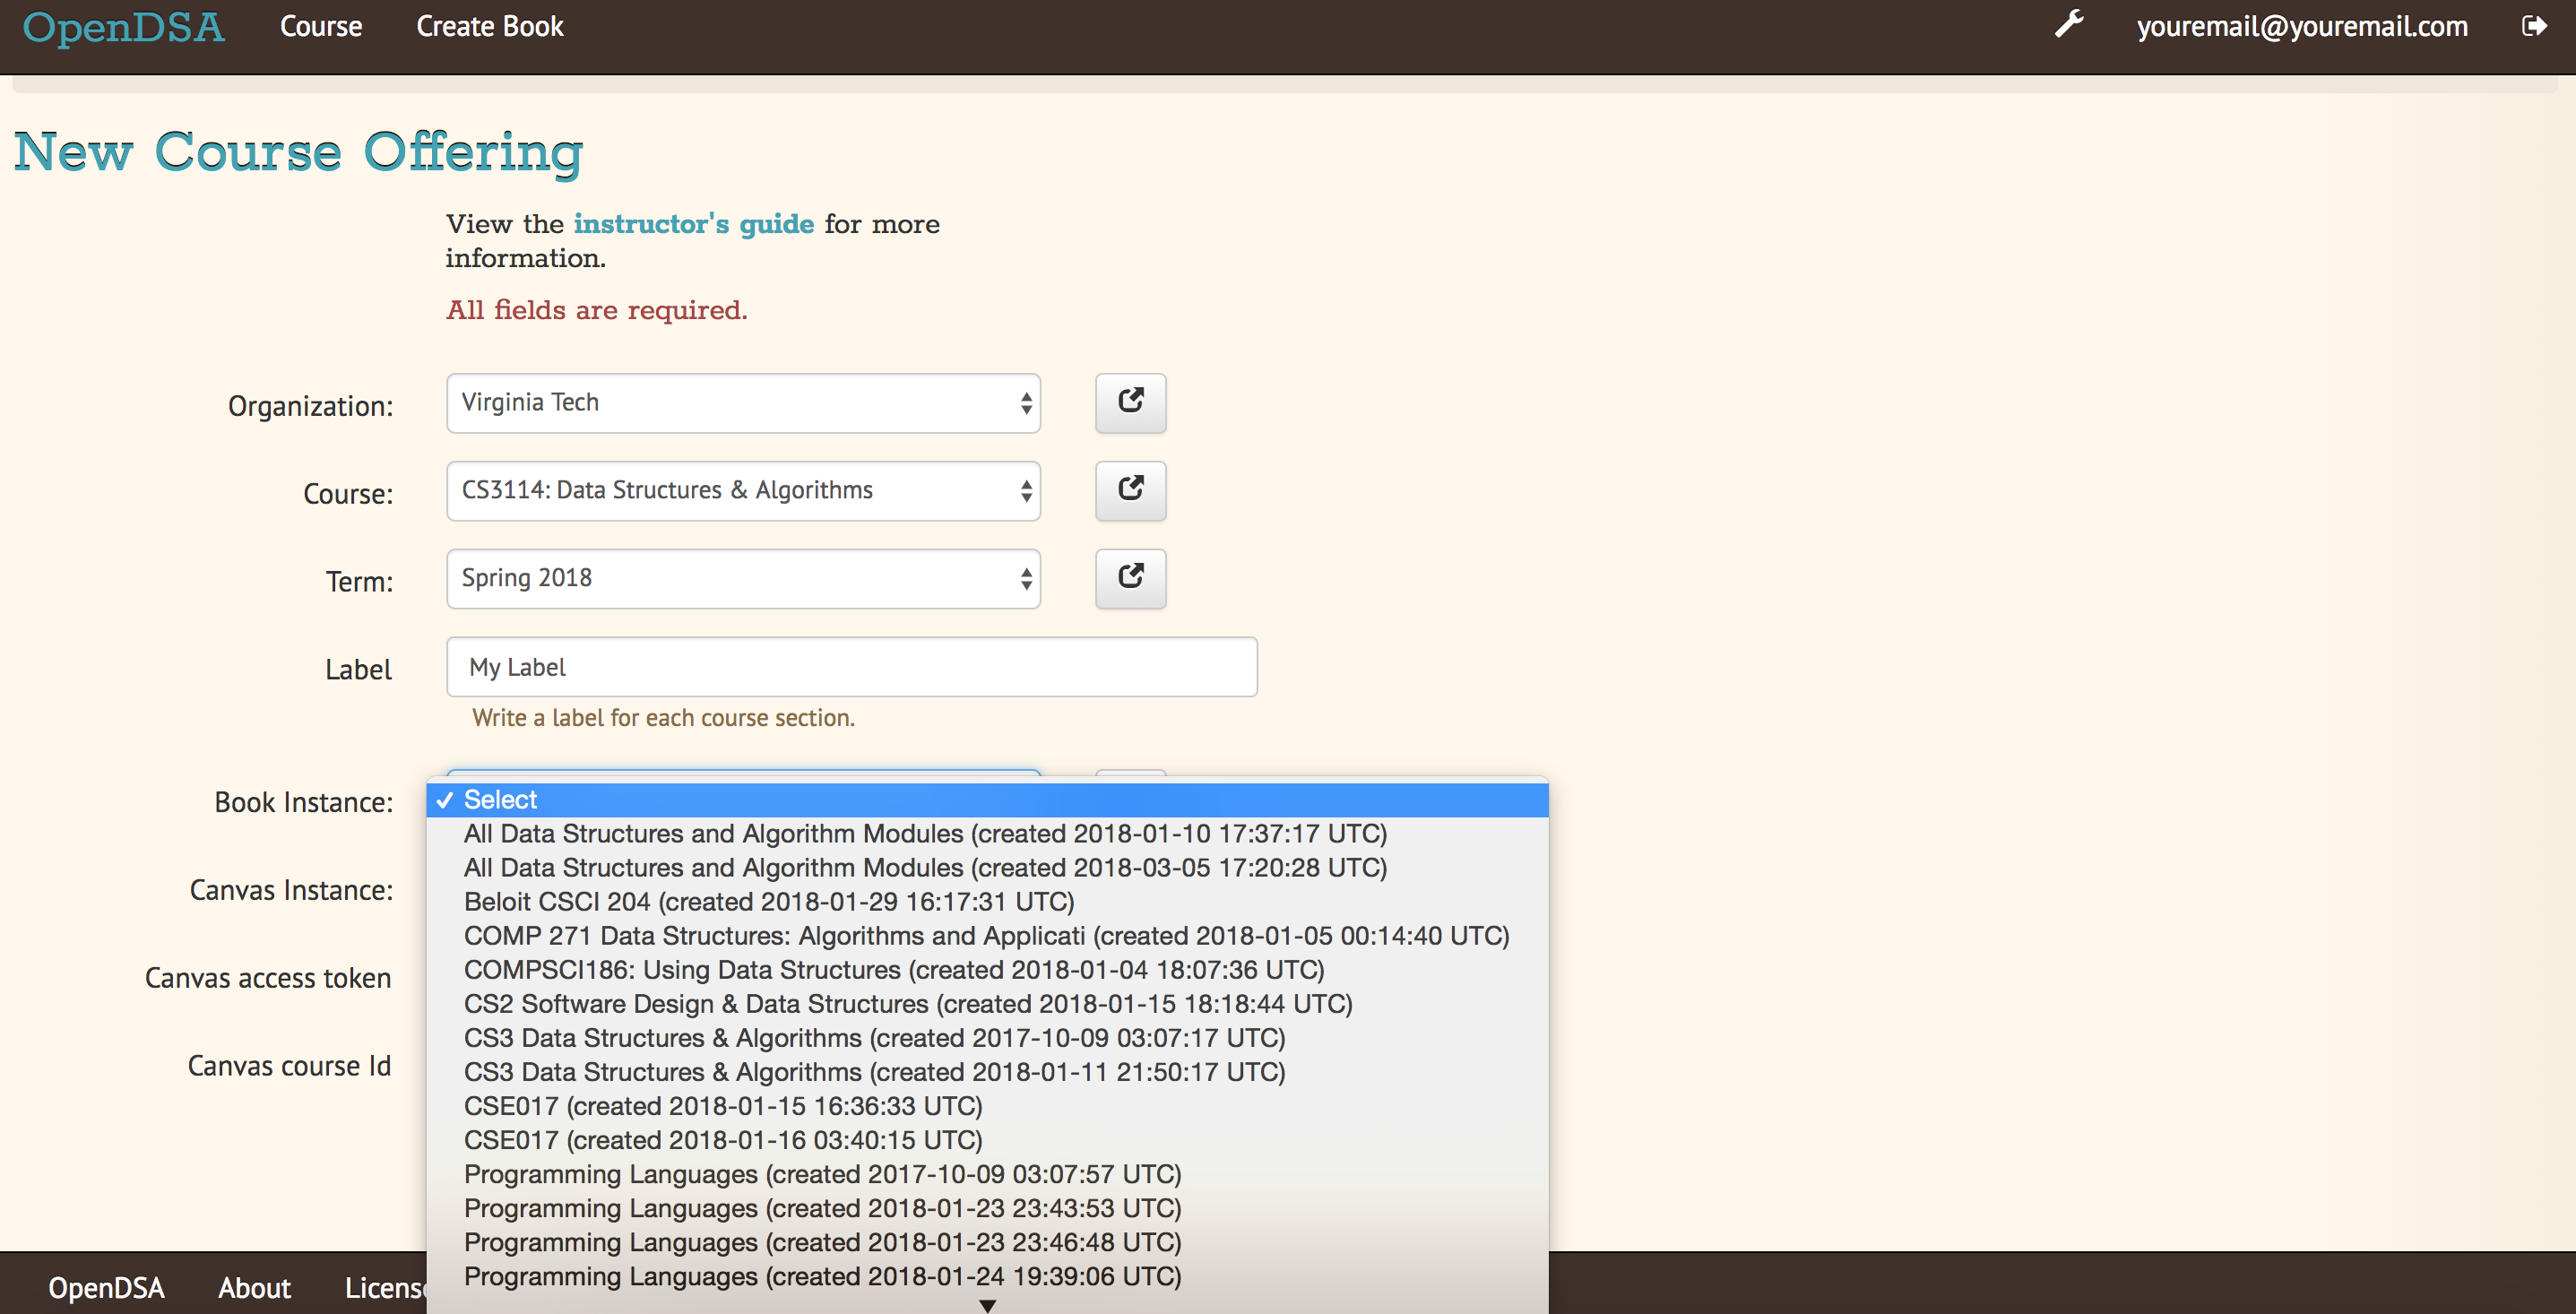
Step 16: Select the Book you want from the Book Instance dropdown to use for this course.
Step 17: Select your Canvas URL from the Canvas Instance dropdown.

If your Canvas URL is not present in the dropdown, send an email with the URL of your Canvas instance to opendsa@cs.vt.edu and ask to add your Canvas URL.
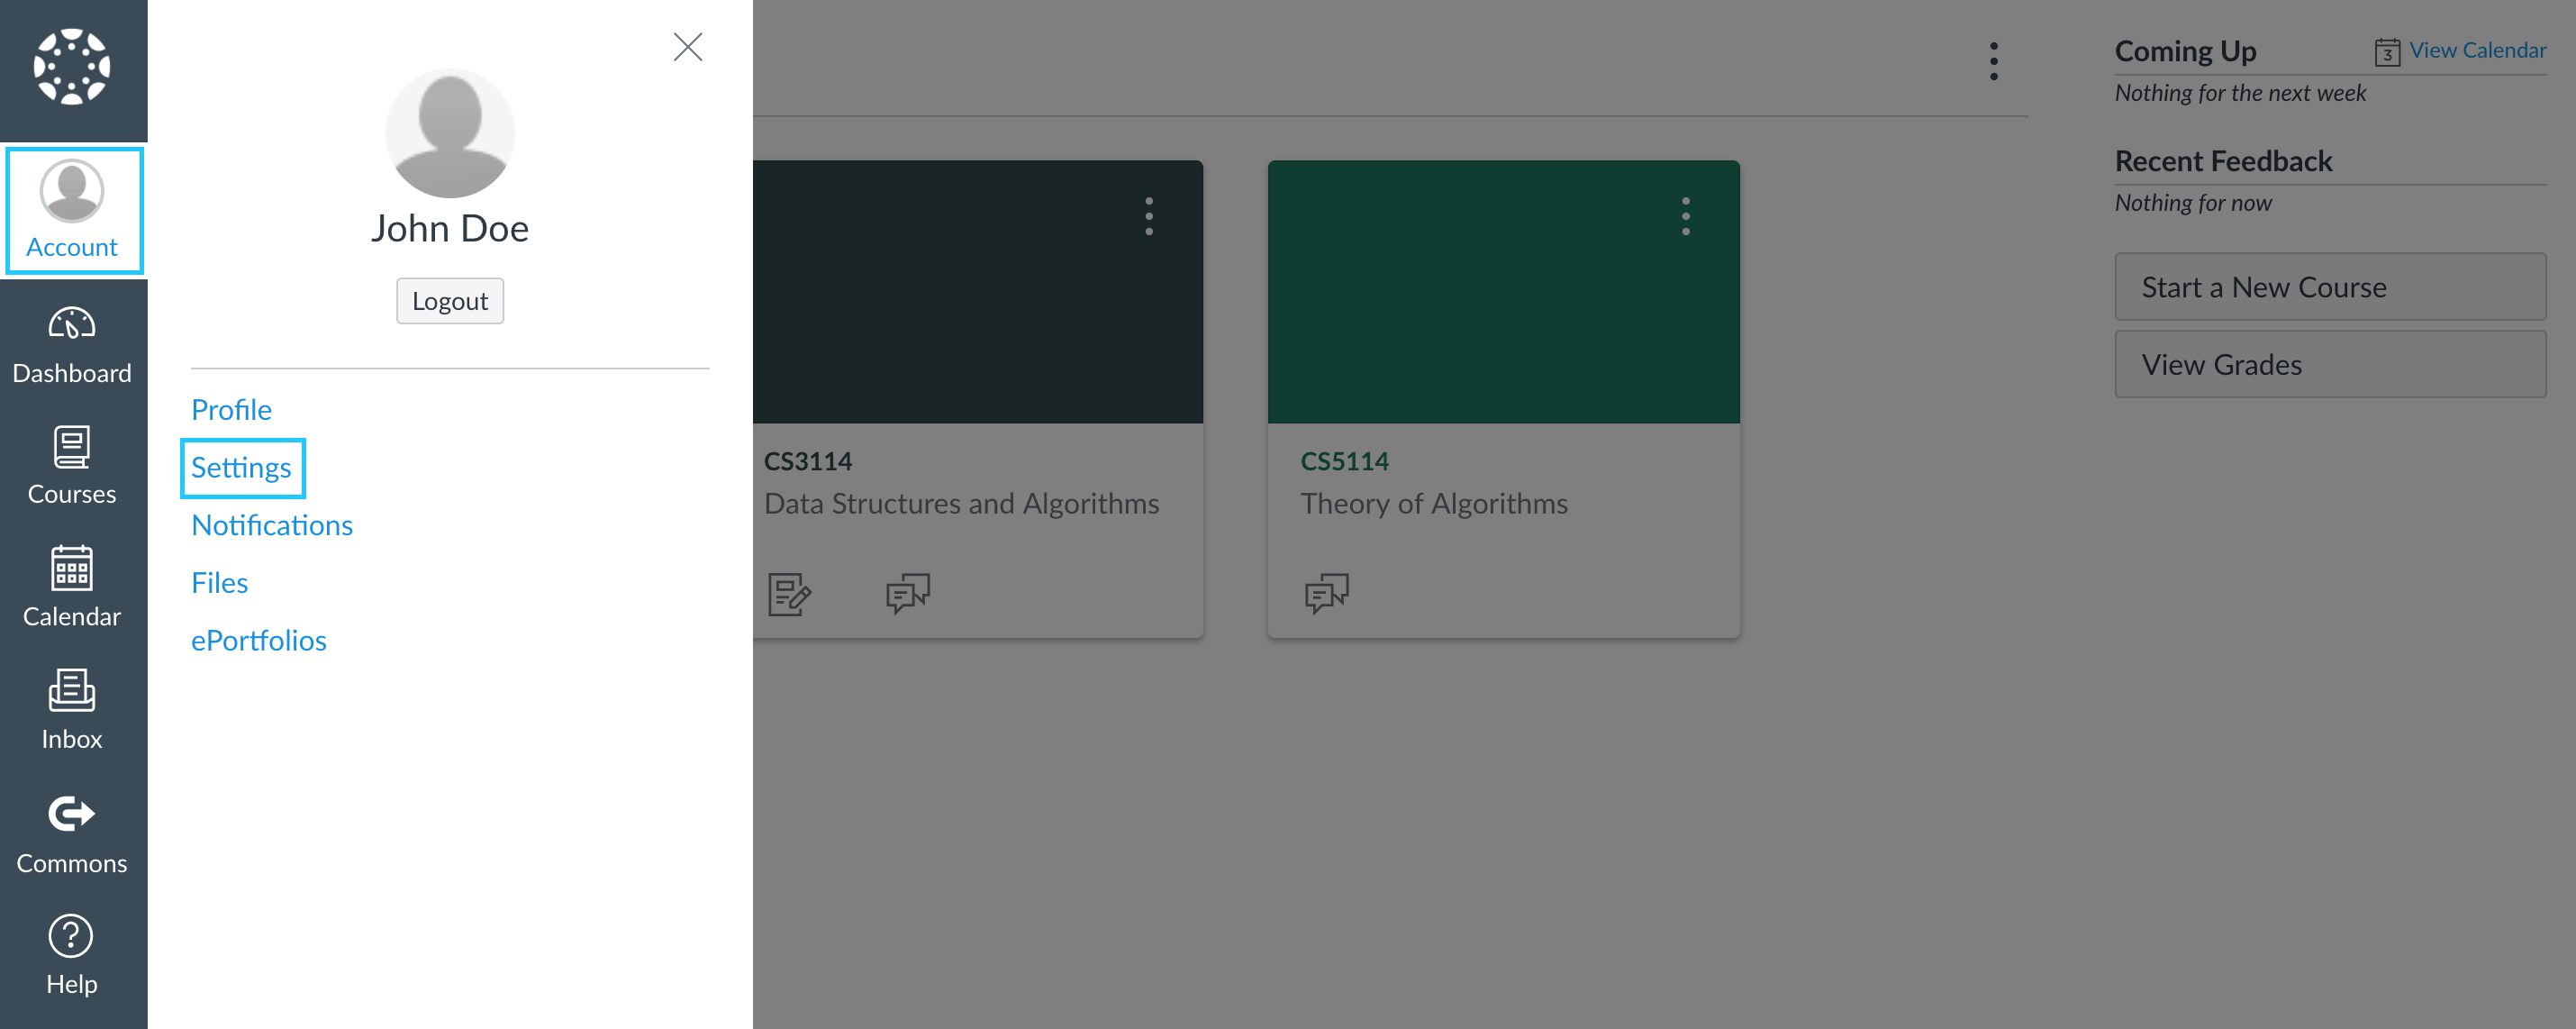
Step 18: You need to have the access token for the selected Canvas instance. To get your access token, go to your Canvas, click on Account and then click on Settings.
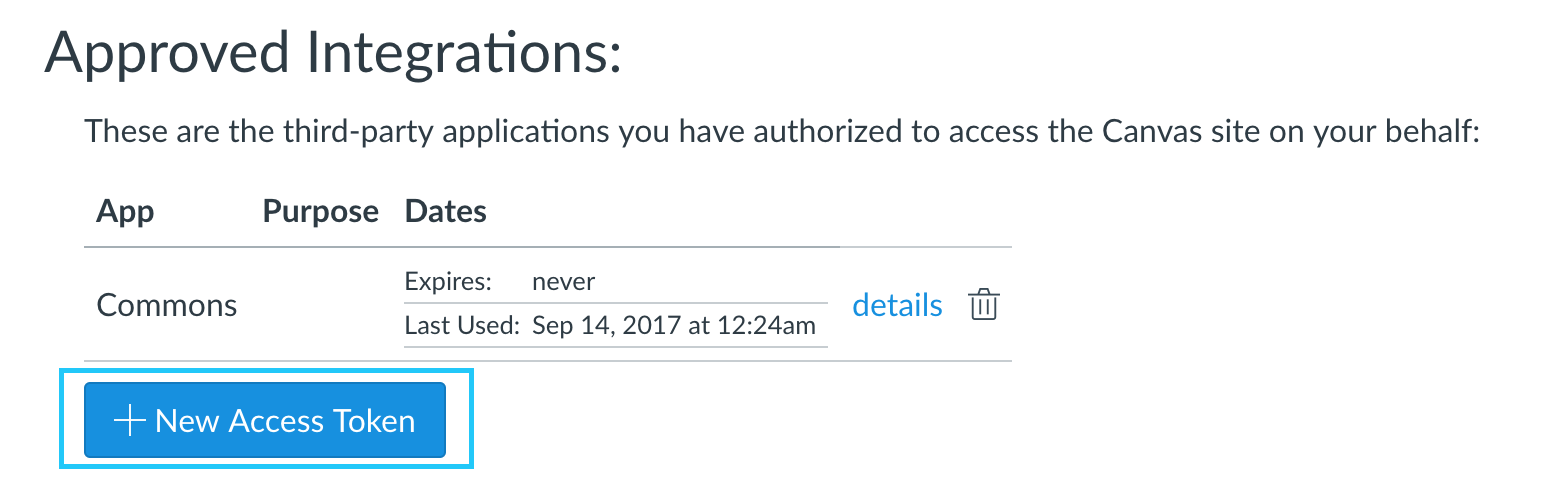
Step 19: In the Canvas settings, click on the + New Access Token button under Approved Integrations.
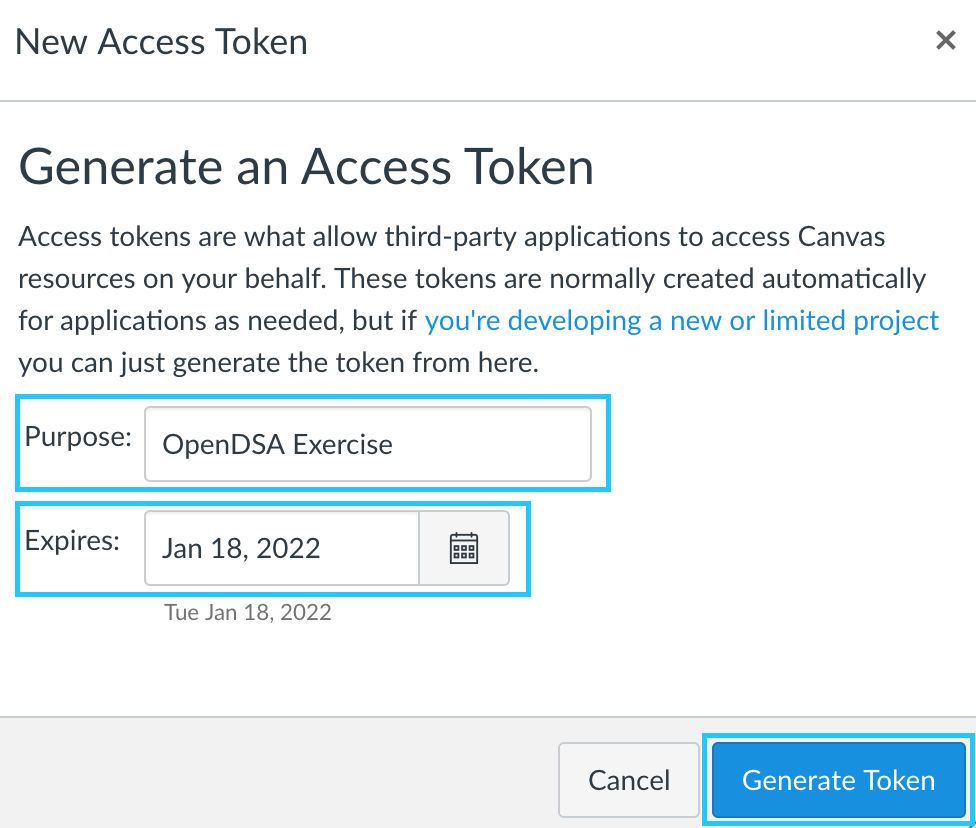
Step 20: Enter the Purpose and Expiry Date for your new access token and click Generate Token.
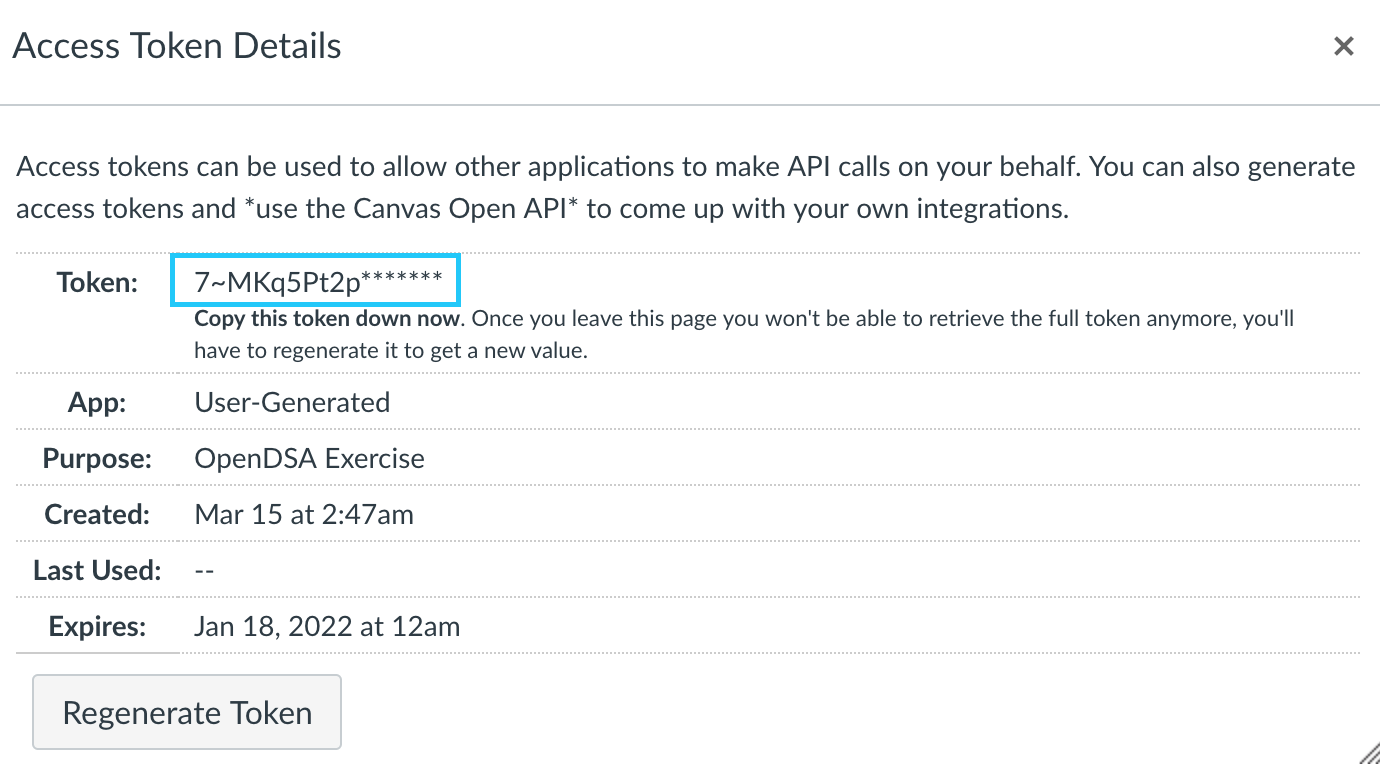
Step 21: Copy your token.
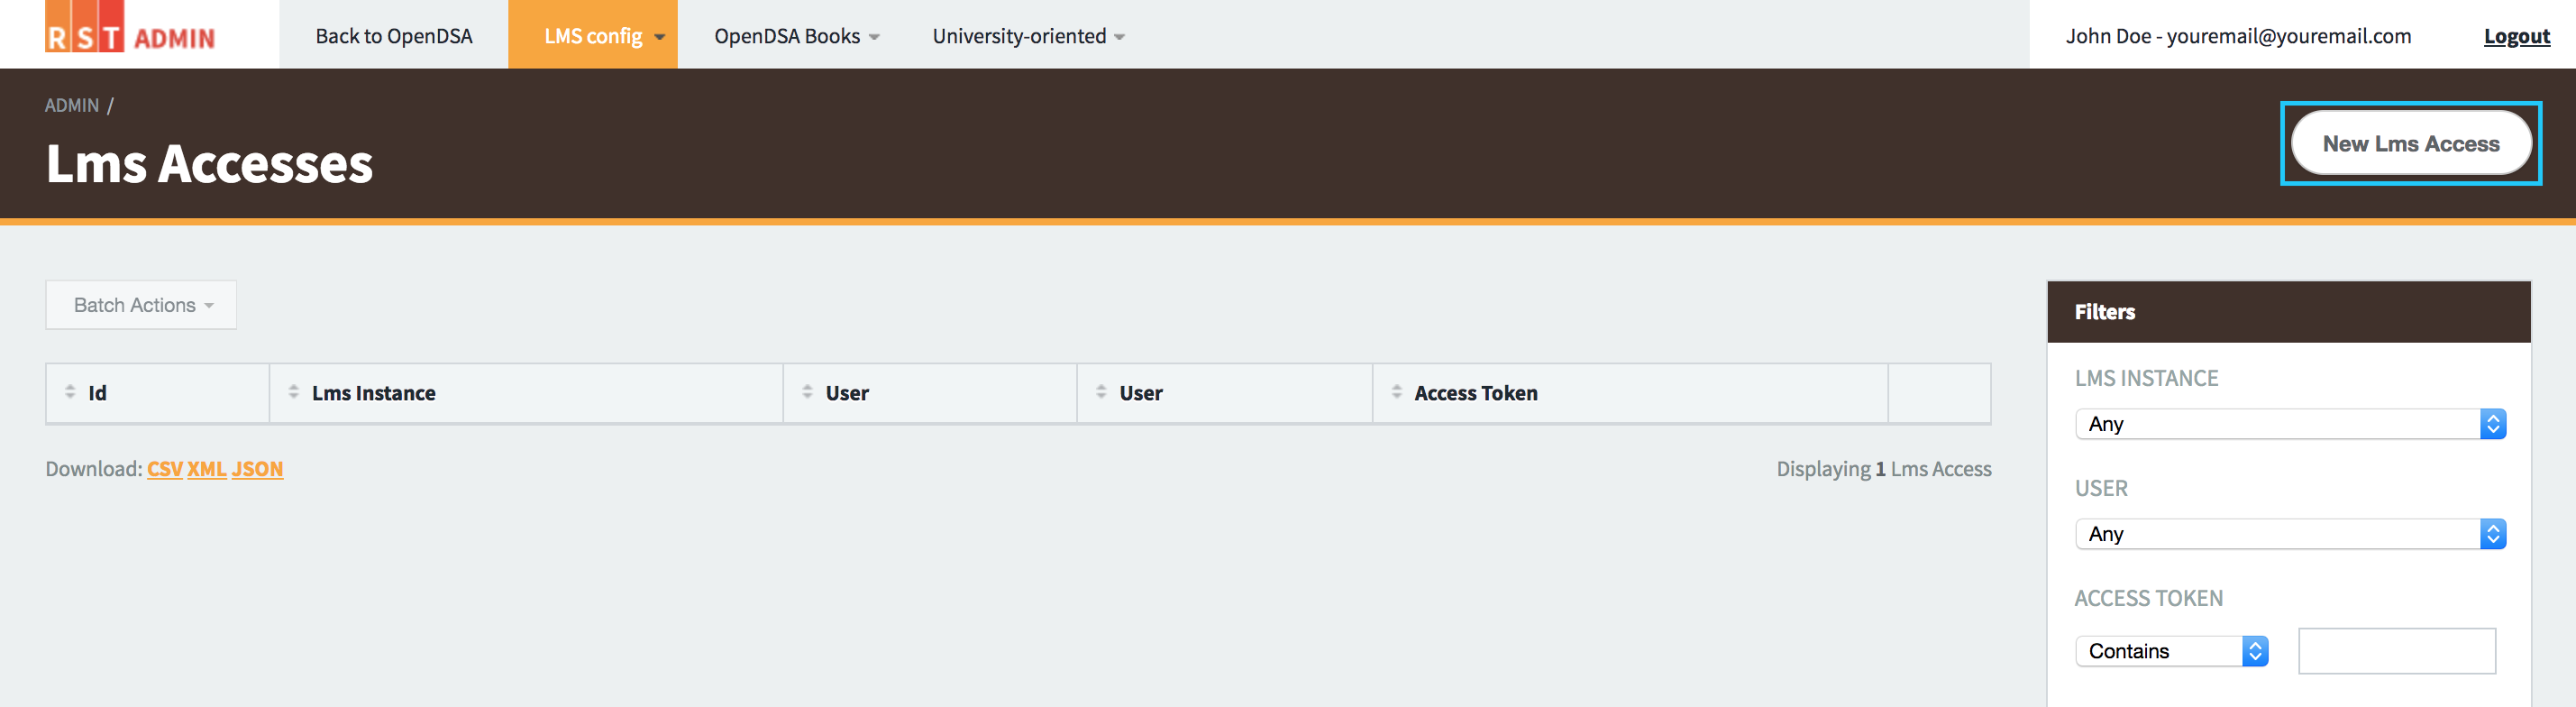
Step 22: Go back to Create Course page of OpenDSA and click on a button to the right of the Canvas access token.
You will be redirected to the page shown below. Click on the New LMS Access button to the top right of the page.
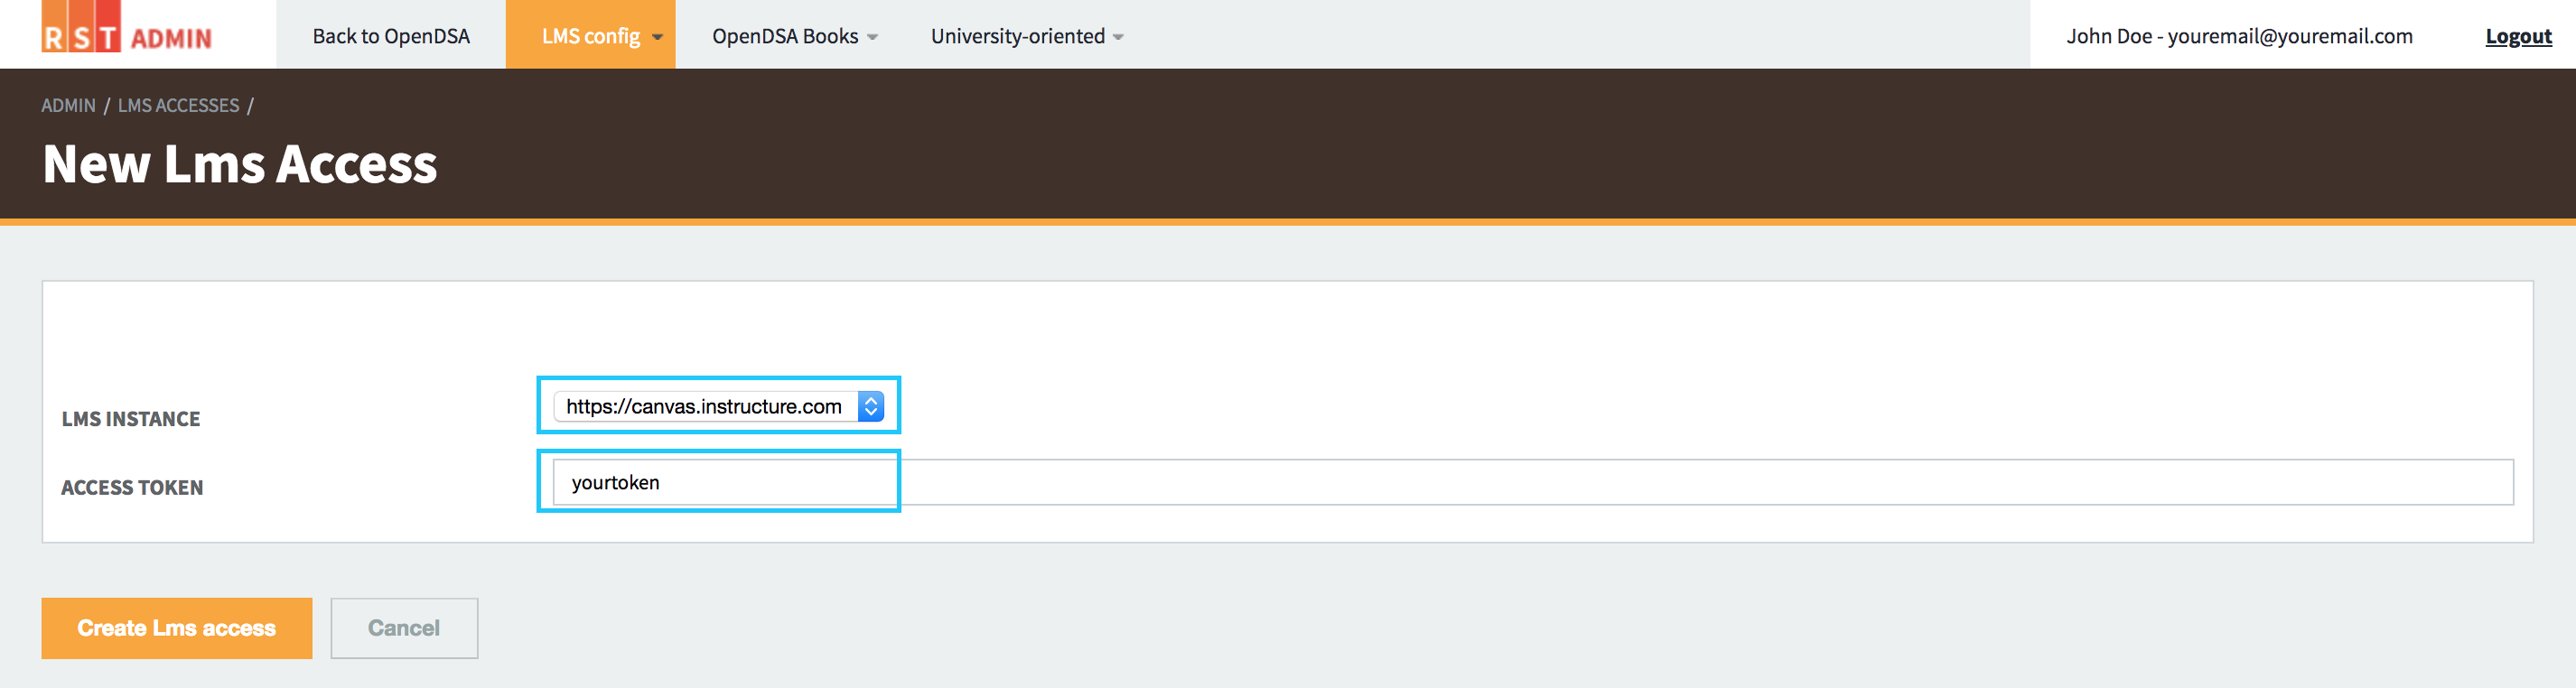
Step 23: You will be taken to a new page where you can add new Access Token. Select your Canvas instance and paste the access token you copied in Step 21.
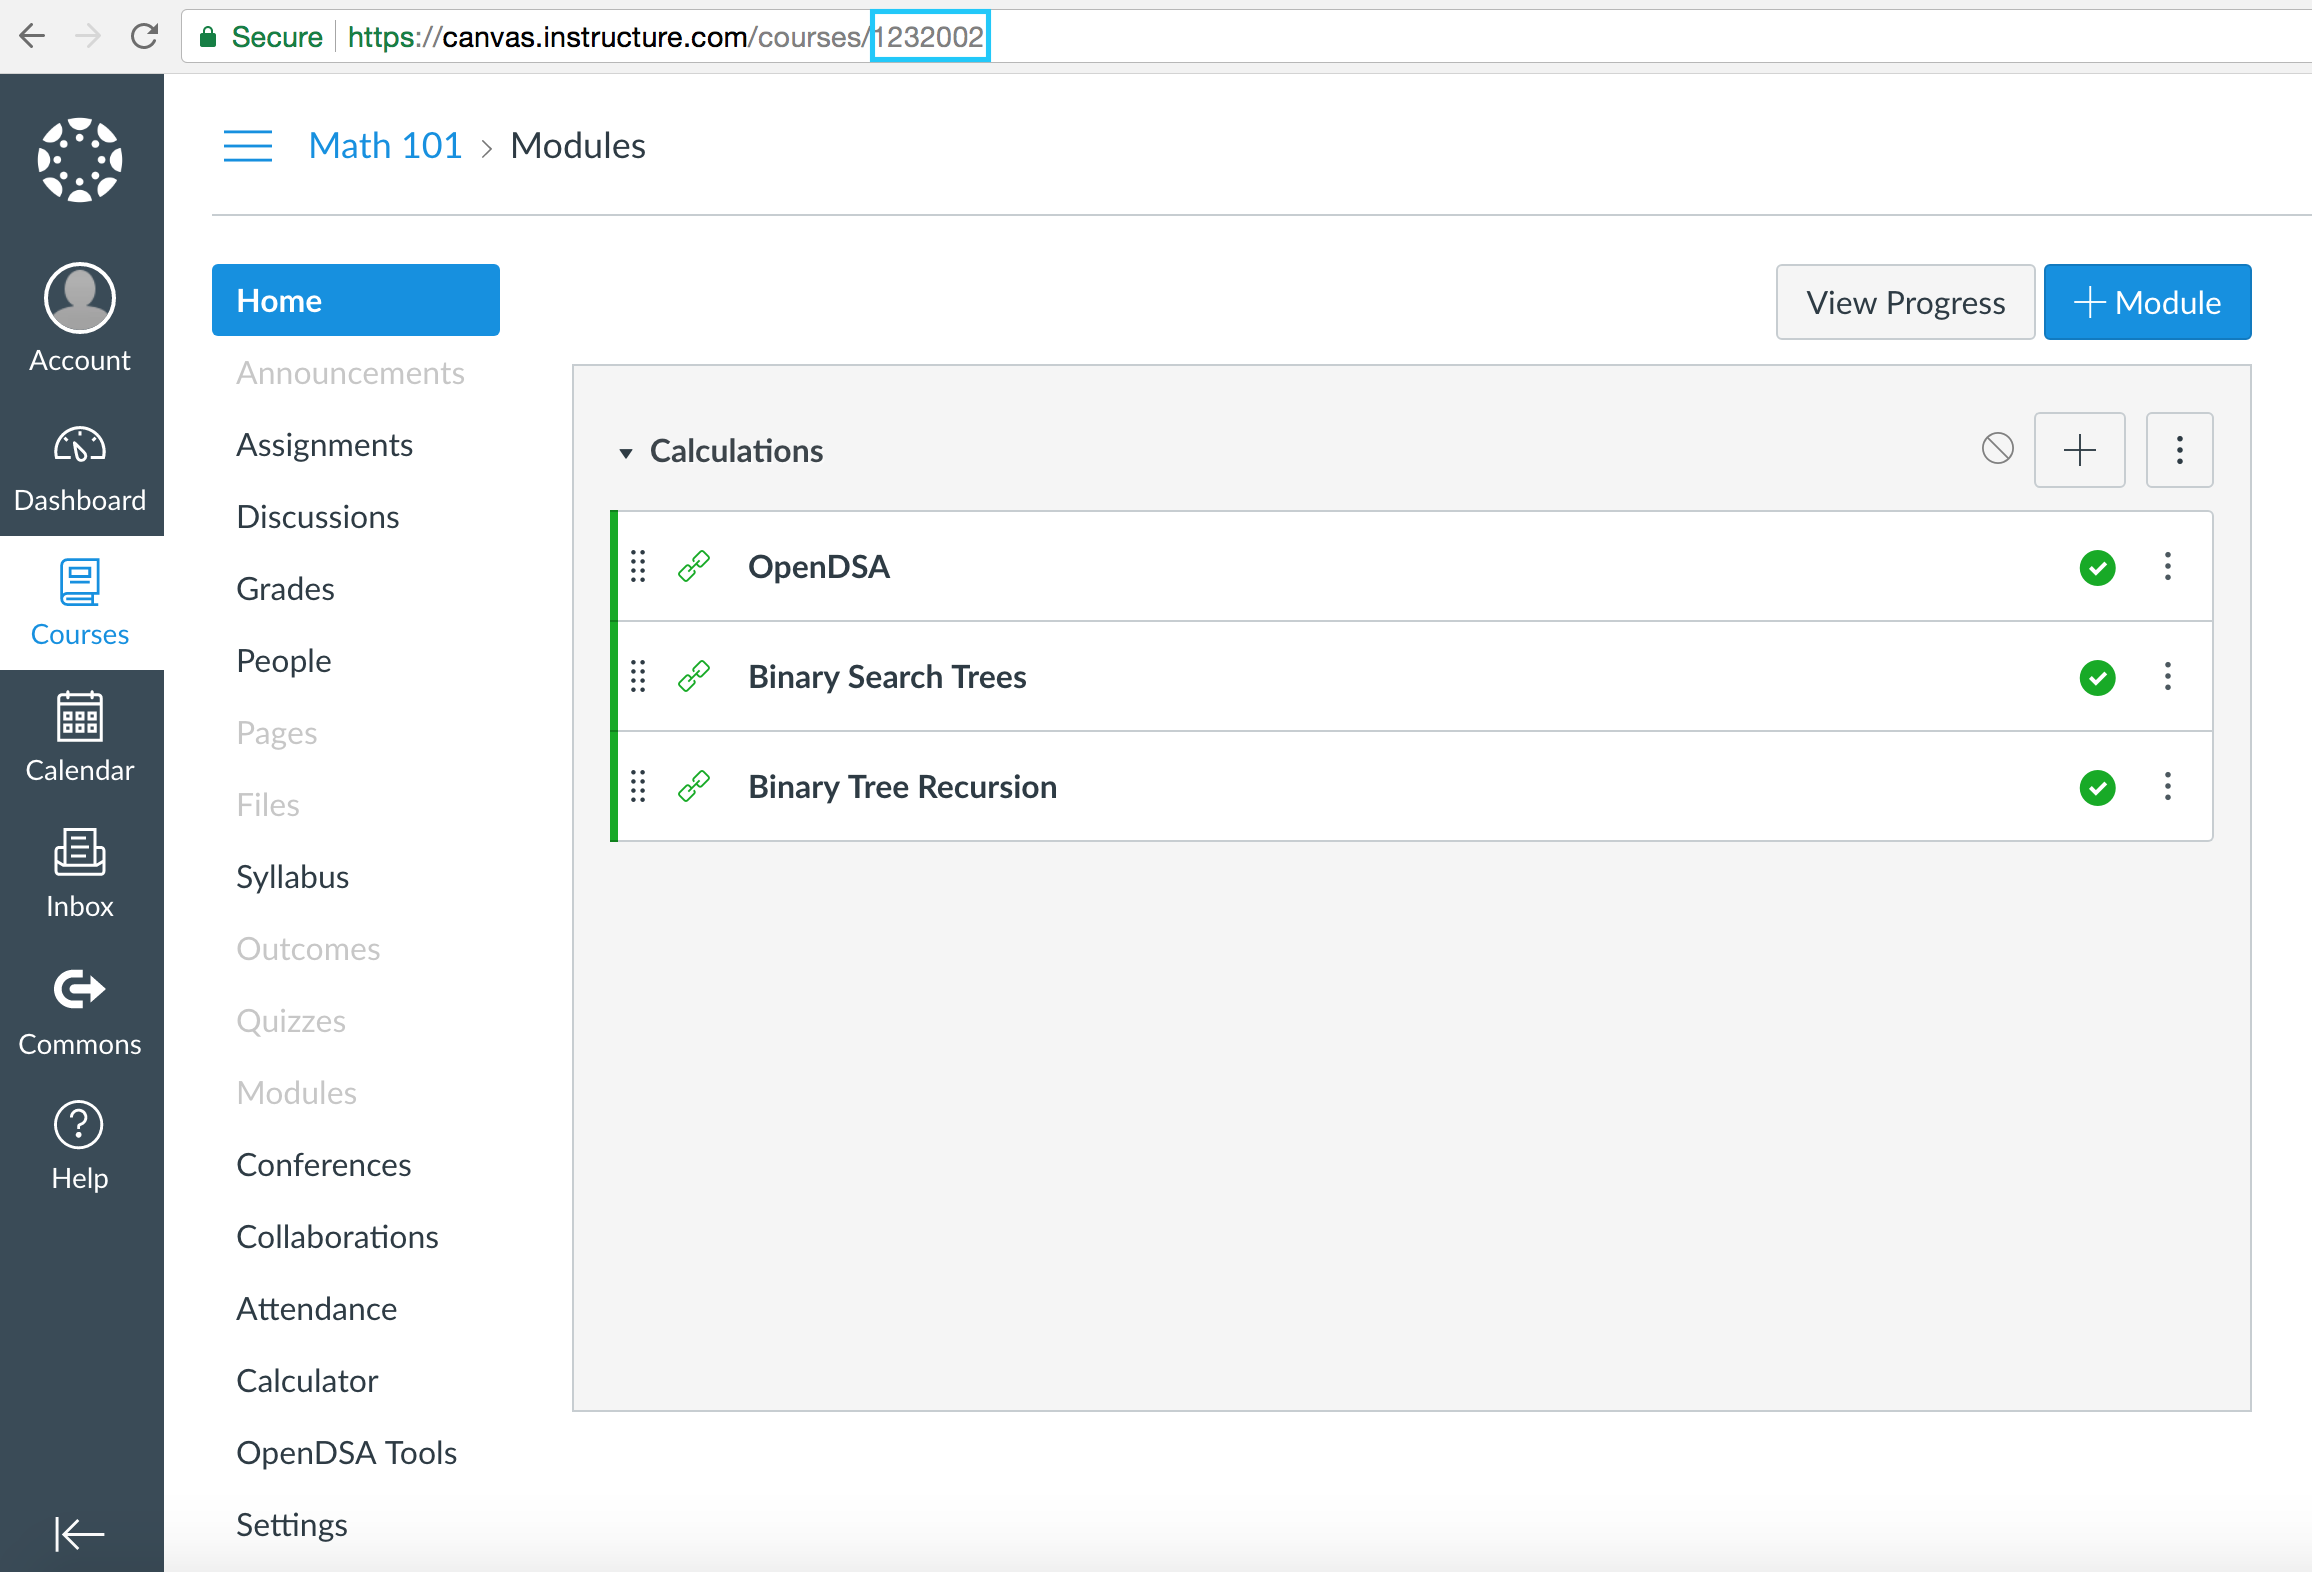
Step 24: For a final step in the course creation process, go to Canvas, copy your course ID and paste it into Canvas course Id field. You can get your Canvas course ID from the URL as shown below.
Step 25: Once you have filled all the information, click on the Submit button.
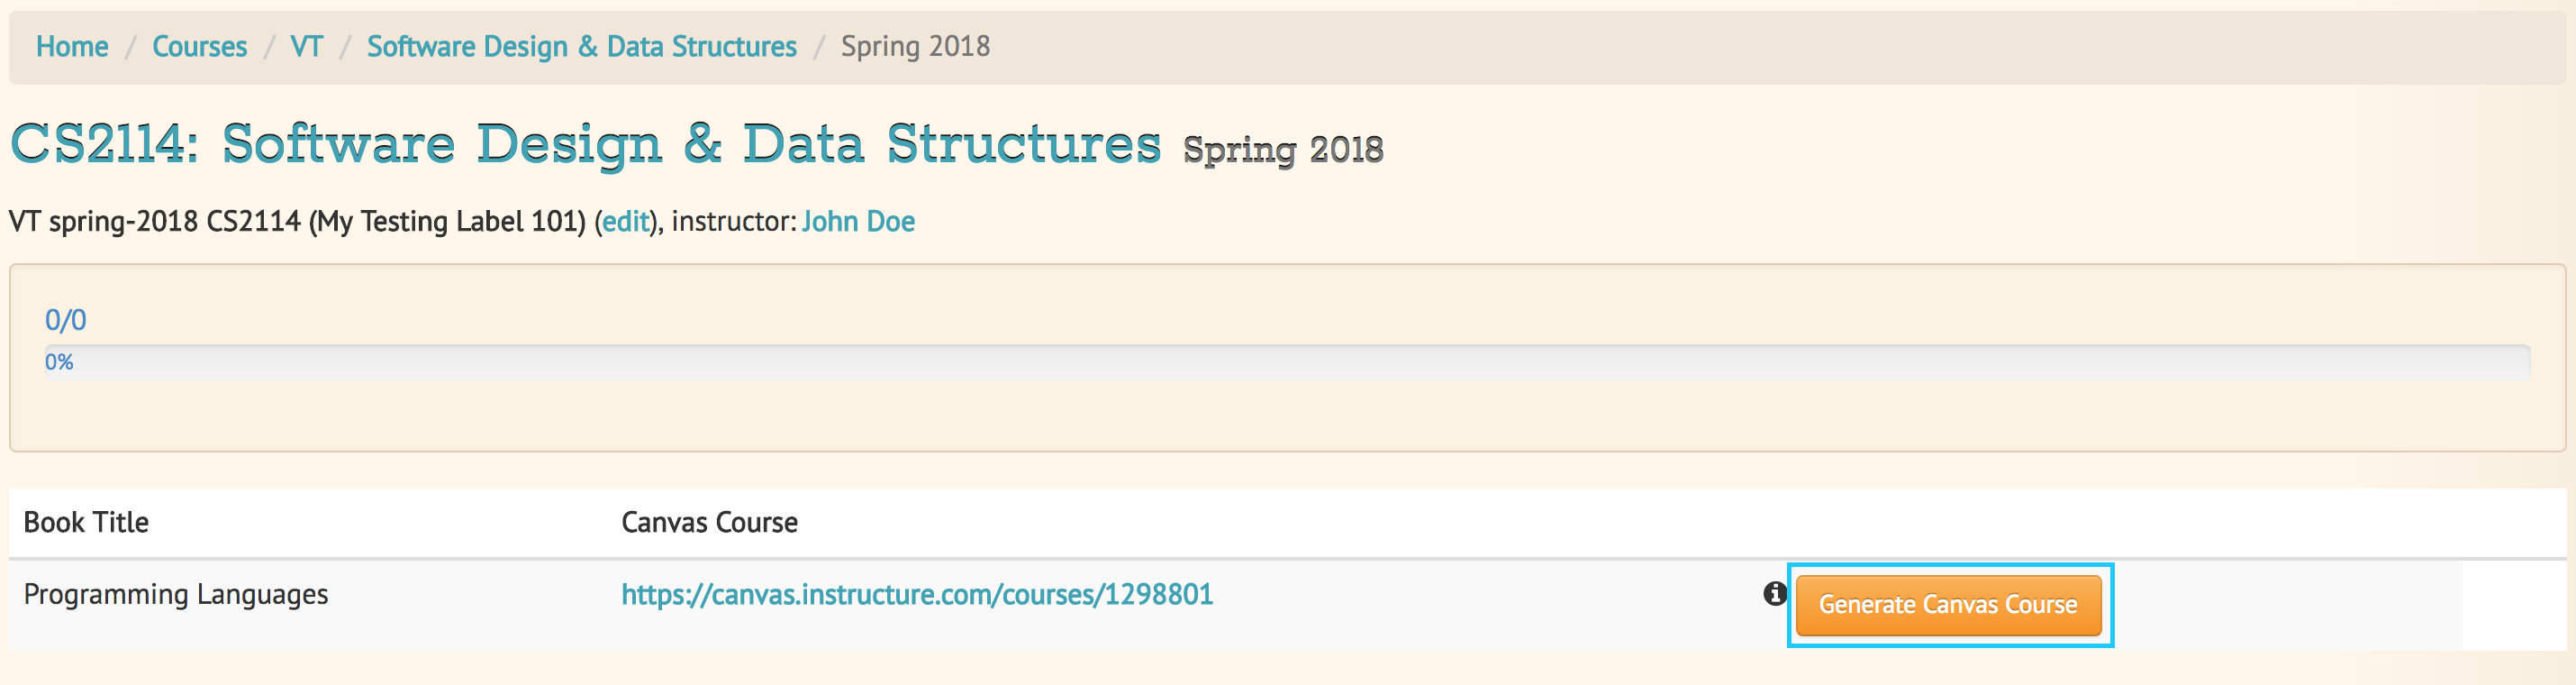
Step 26: You will be taken to a new page that will look similar to the one shown in the image below. Click on the Generate Canvas Course button and this process will use your book configuration to generate assignments and modules in your Canvas course.
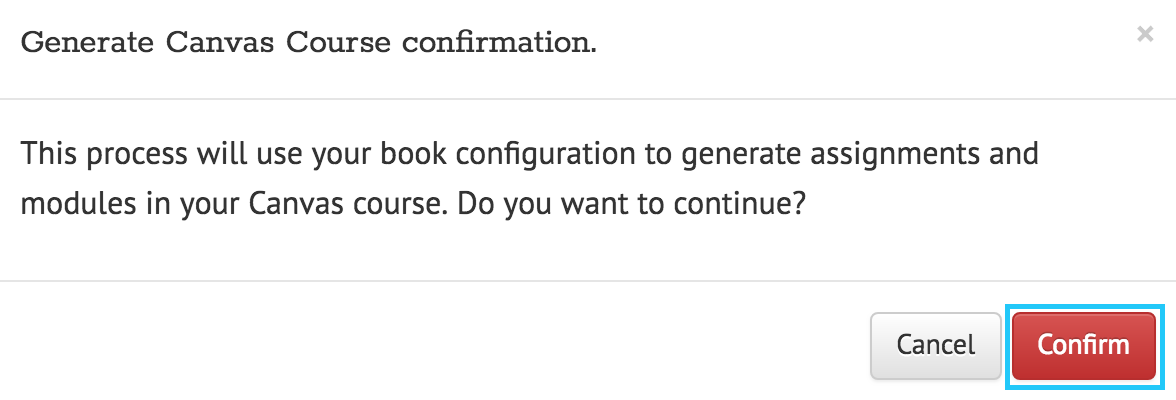
Step 27: You will see a pop-up dialog. Click on the Confirm button.
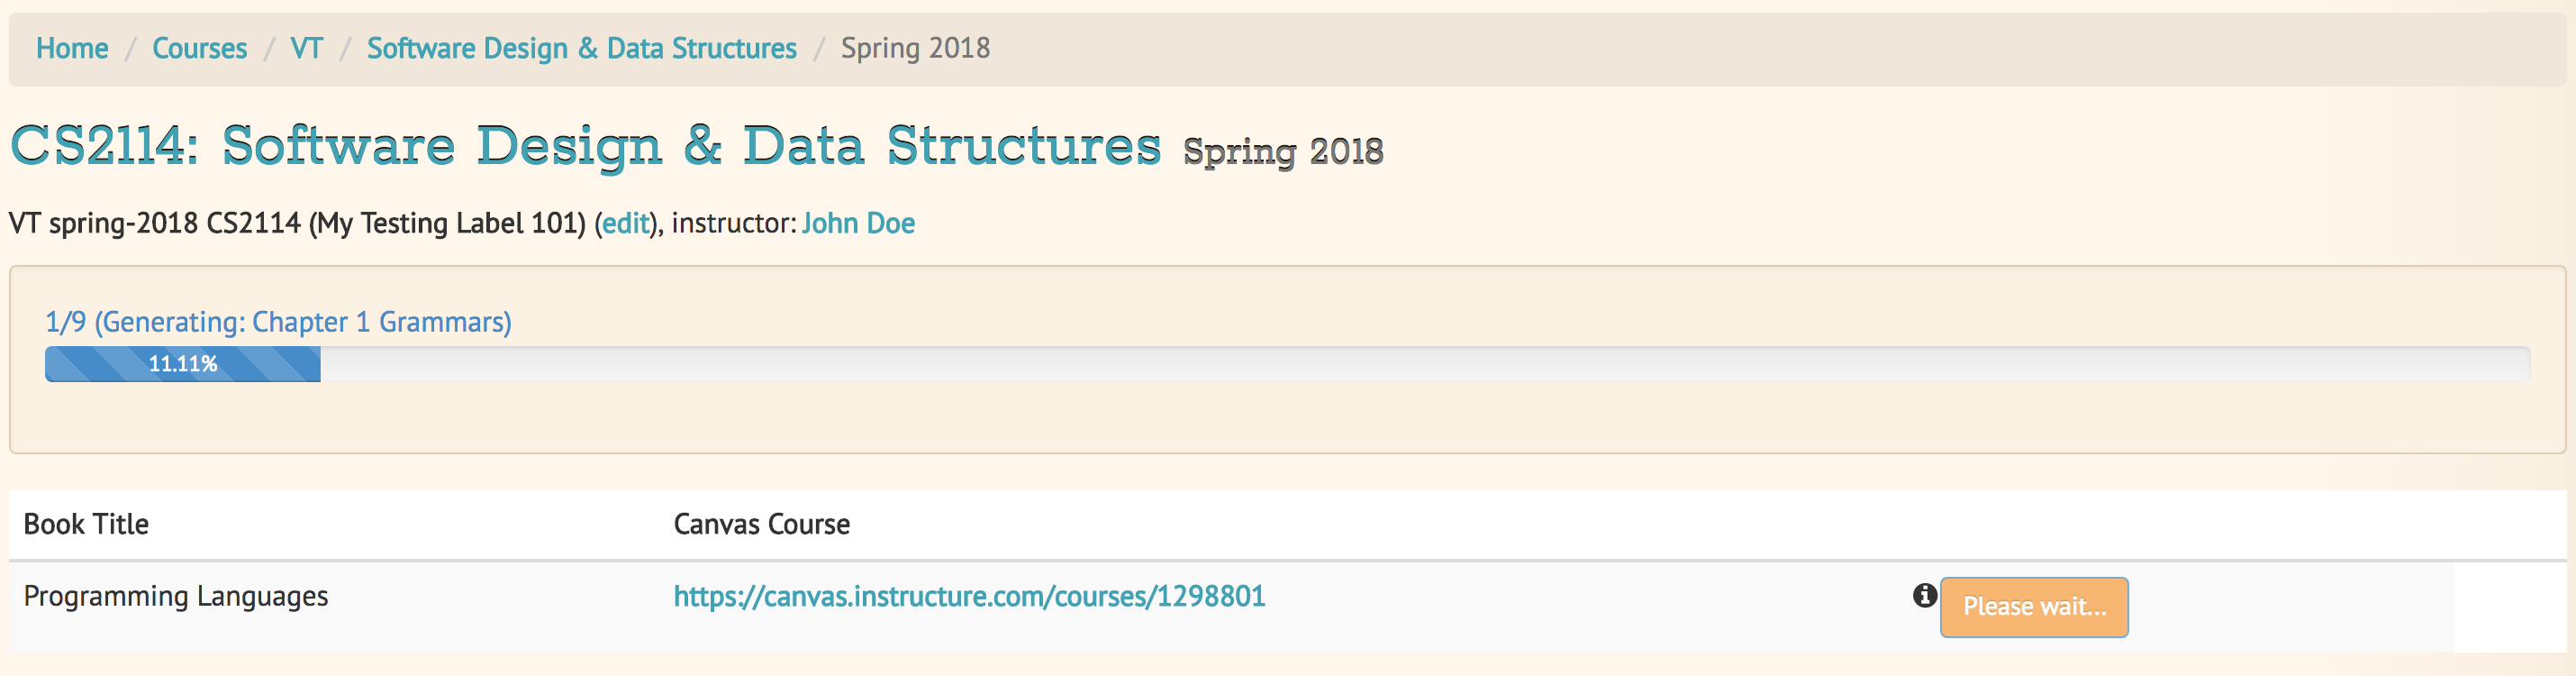
After that, wait for a progress bar to finish and reach 100%.
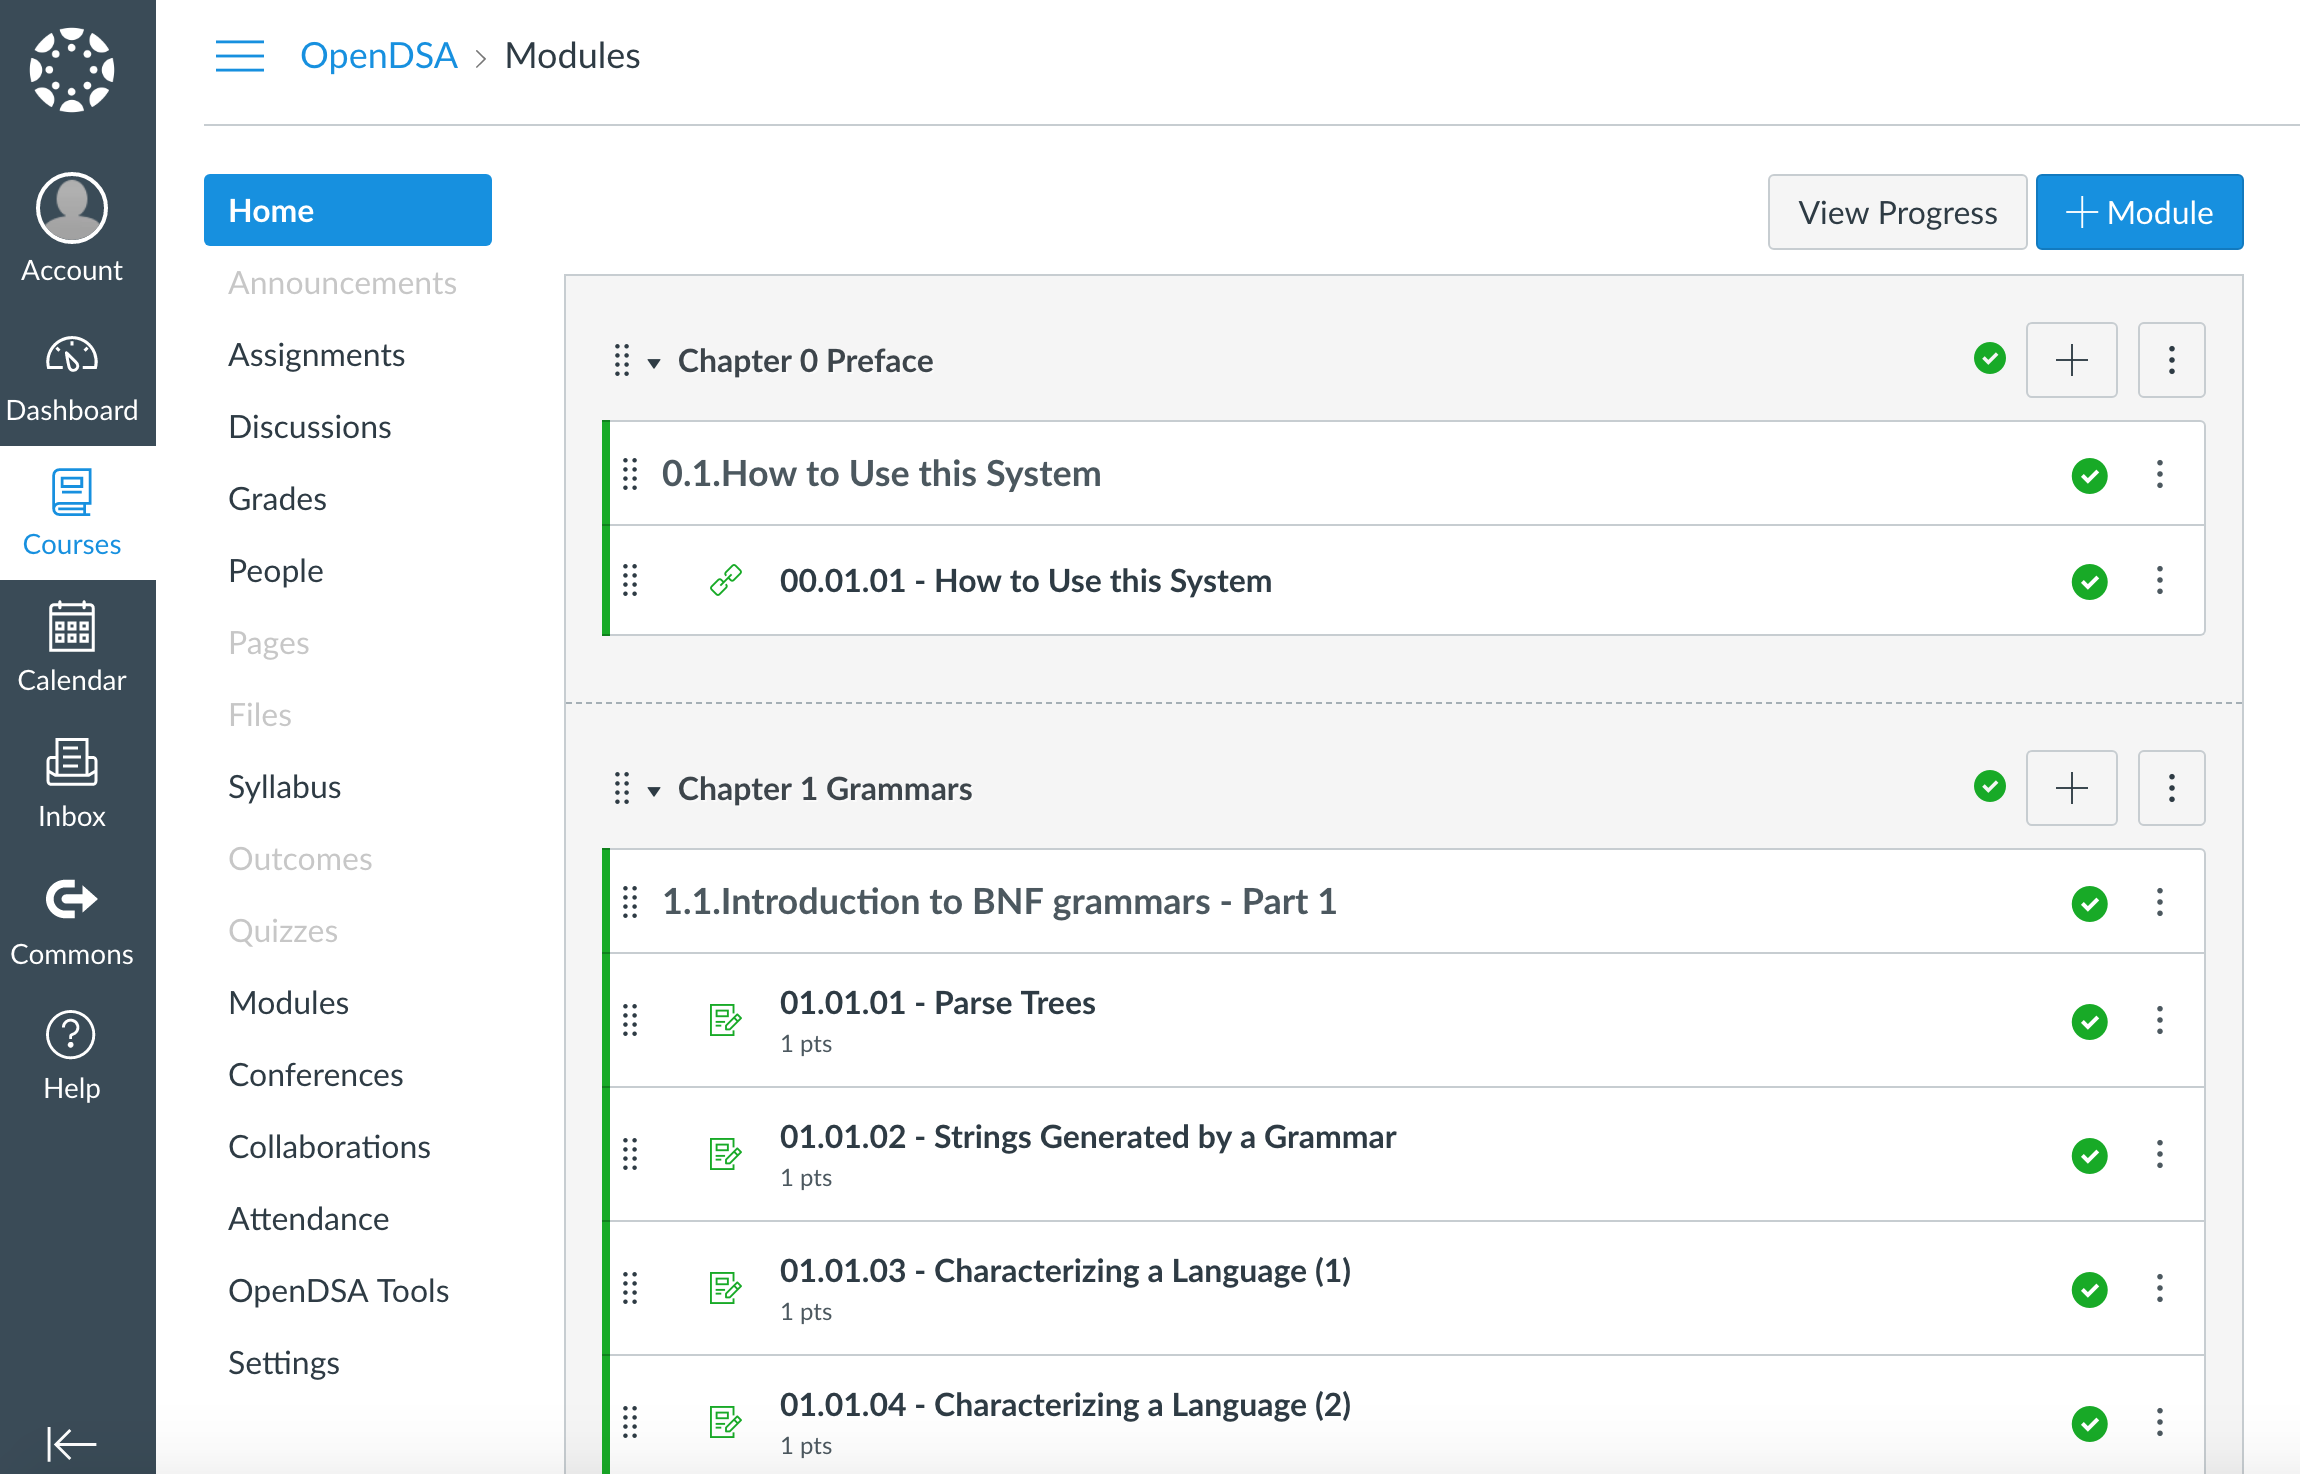
Step 28: You should now see the assignments and modules in your Canvas course.