2.4. Installing the Web-CAT Submission Plug-in for Eclipse
2.4.1. Introduction
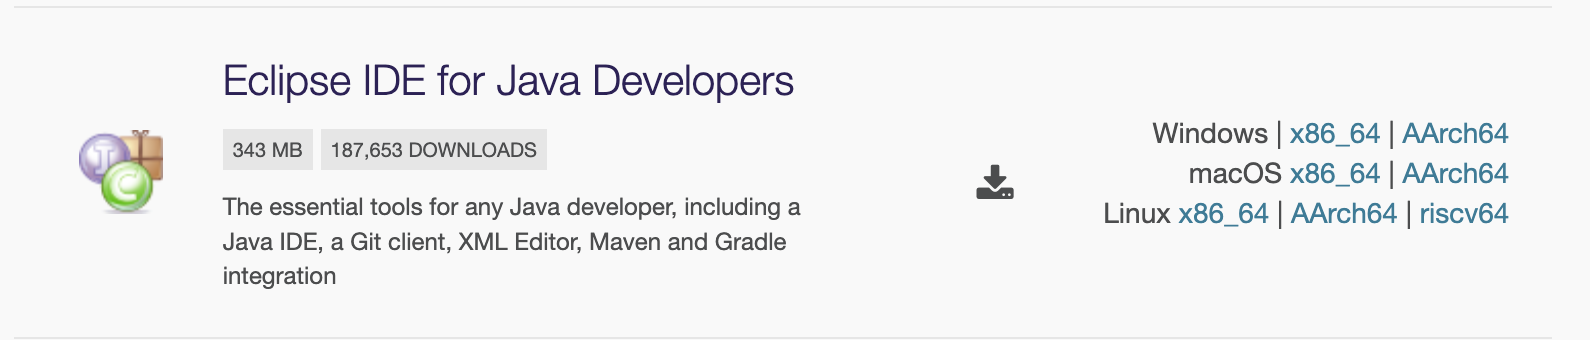
Here are instructions for how to install the Web-CAT submission plug-in for Eclipse. These instructions were written for Eclipse version 25-3. If you have not installed Eclipse yet, or are running a version earlier than this, you can download the most recent version of the Eclipse IDE for Java Developers for your platform/architecture from https://www.eclipse.org/downloads/packages/. You will need to chose a package (you can chose the installer, and then Eclipse IDE for Java Developers) and an architecture (most people want x860-64).
If you are running a reasonably up-to-date version already,
then you can check for updates at Help --> Check for Updates.
Note: Eclipse requires JRE 21 or later to install, but we will NOT be using JRE 21 for projects. So the next step is to install a version of Java that Web-CAT can use.
2.4.2. Installing Java 11
2.4.2.1. Downloading the JDK
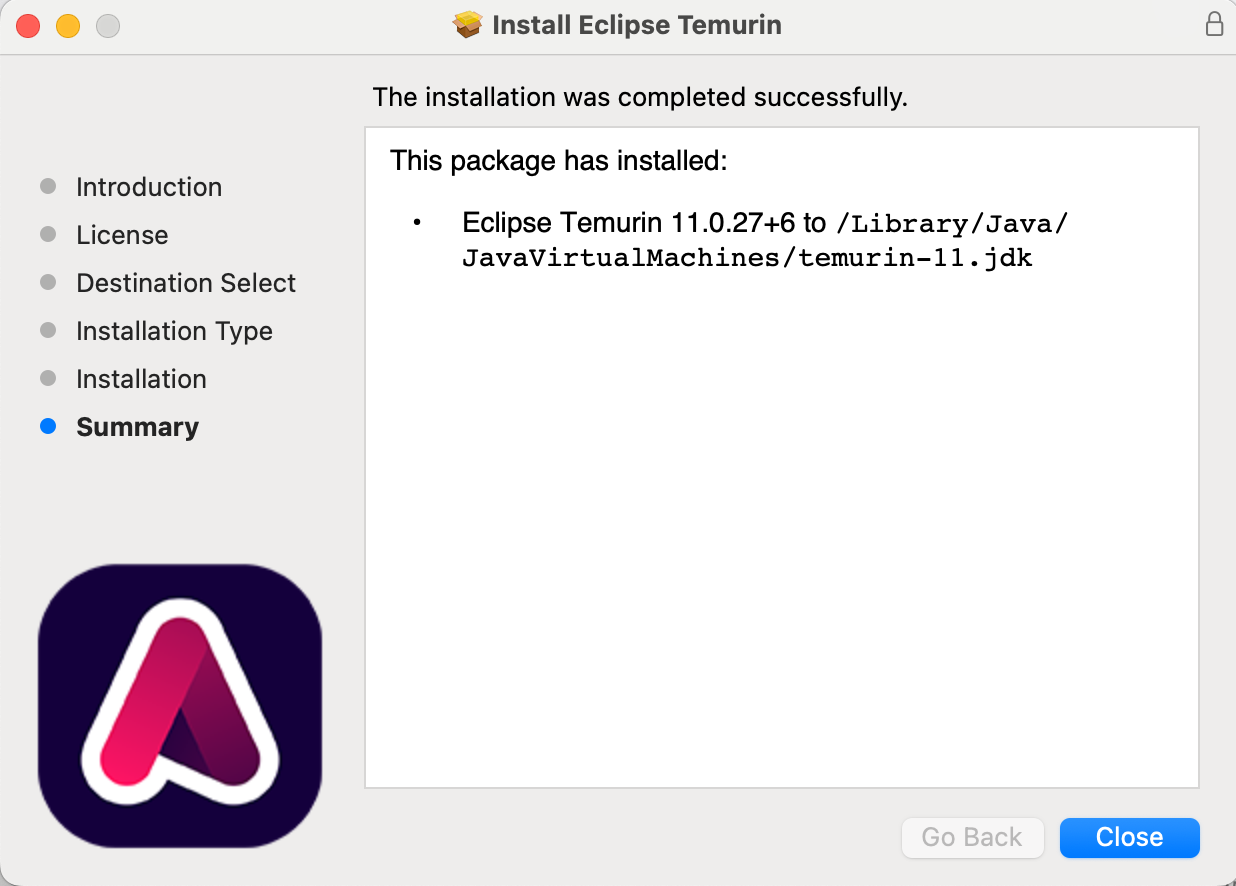
Download the Java 11-LTS JDK from https://adoptium.net/temurin/releases/?version=11&os=any&arch=any&package=jdk. We recommend downloading the .msi if you are on Windows or the .pkg if you are on Mac. Once you have downloaded the installer, run it to install Java 11 on your system. Make note of the path Java 11 is installed to, as you will need it later.
2.4.2.2. Configuring the Eclipse JRE
Once you have installed Java 11, you will need to configure Eclipse
to use Java 11 as the default JRE. To do this, open Eclipse and
navigate to Window --> Preferences. In the window that comes up,
in the column on the left, click on Java --> Installed JREs.
You should see a window like this:
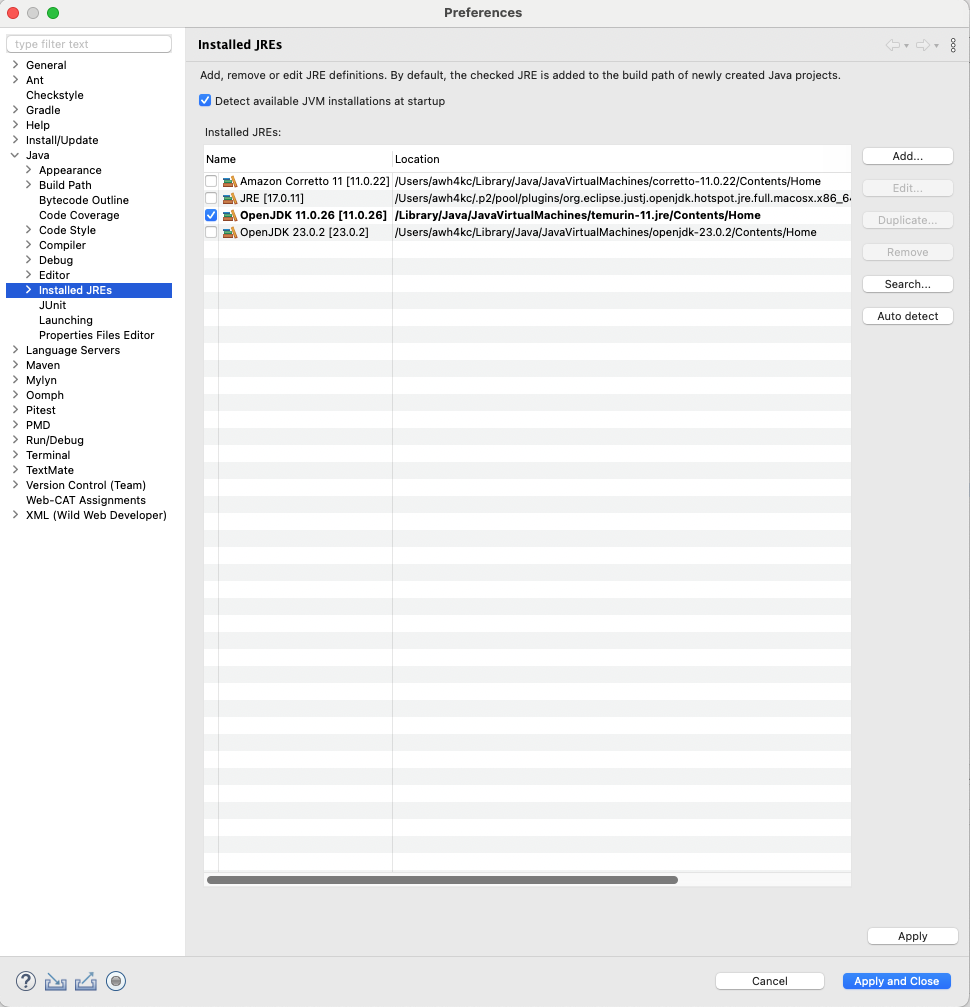
If the newly installed JRE is already listed, you can select it and
set it as the default JRE by clicking on the Default button.
Hit Apply and Close to close the Preferences window.
If the JRE is not listed, you will need to add it manually.
Click on the Add button. In the window that comes up, select
Standard VM and click Next. In the next window, click on
Directory and navigate to the location where you installed
Java 11. Select the folder that contains the JDK (it should be
something like OpenJDK 11.0.26 or Temurin-11) and click
OK. You should now see the JDK listed in the Installed JREs
window. Select it and click OK to close the Preferences
window. You should now be able to create and run Java projects
using Java 11.
You will then be taken back to the Preferences window where you
should see the JDK you just added in the list of installed JREs.
Select the JDK you just added and click on the Default button.
This will set the JDK you just added as the default JRE for
Eclipse. Hit Apply and Close to close the Preferences window.
2.4.2.3. Setting the Compiler Compliance Level
Once you have set the default JRE, you will need to set the default
compiler compliance level to Java 11. To do this, in the Preferences
window, click on Java --> Compiler and the first line will be
Compiler compliance level. Set this to 11. You should see
a window like this:
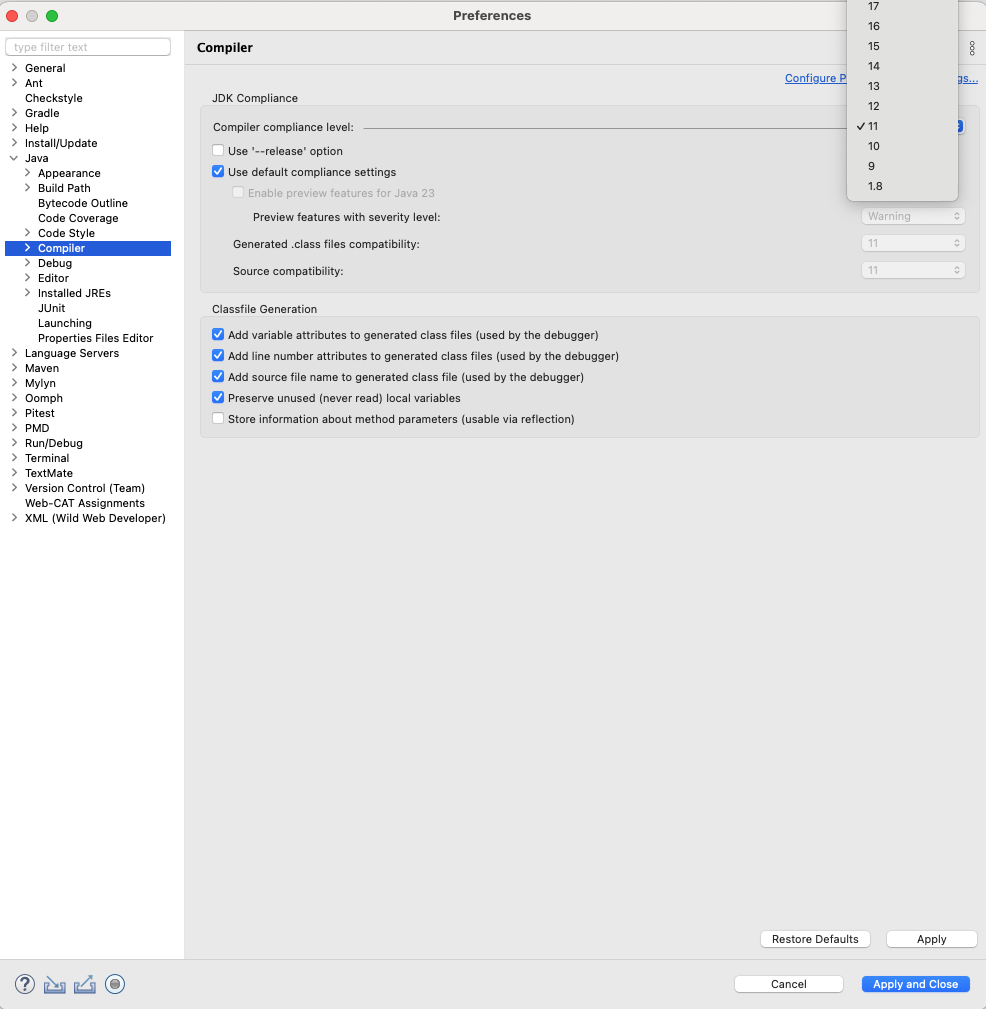
Click on Apply and Close to close the Preferences window.
2.4.3. Installing the Plug-in
If you already have an earlier version of the Web-CAT plug-in installed, you will first need to uninstall it. For those installing it for the first time, skip to the section on Installing the Plug-In.
Open Eclipse, and in the tool bar at the top of the screen, go to
Help --> About Eclipse IDE.
Then click on the button that says Installation Details.
A window something like this should come up:
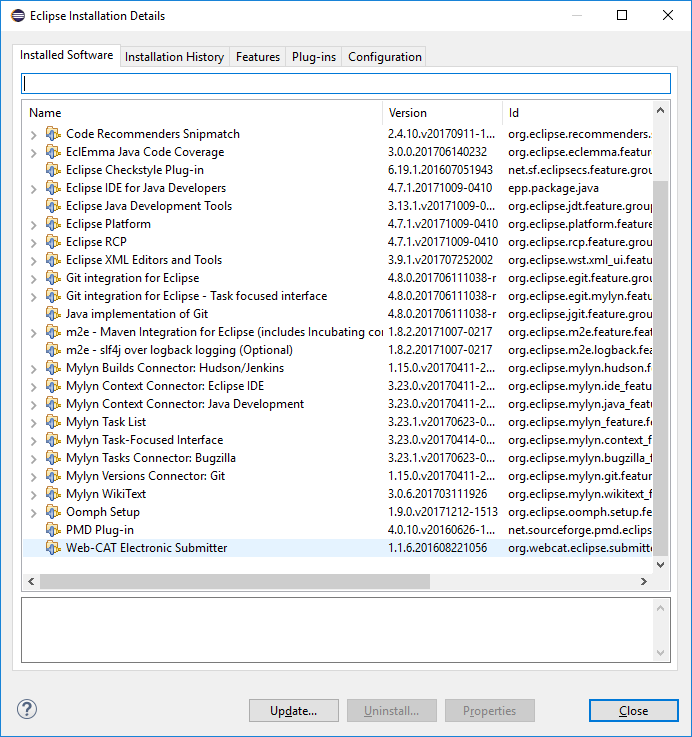
Select Web-CAT Electronic Submitter and click Uninstall.
Follow the prompts, clicking Next and Finish as appropriate,
and restart Eclipse to complete the process.
If you don’t see a line labeled something like
Web-CAT Electronic Submitter then you probably do not have the
Web-CAT plugin installed.
2.4.3.1. Installing the Plug-in
Open Eclipse, and in the tool bar at the top of the screen, go to
Help --> Install New Software.
The following window will come up:
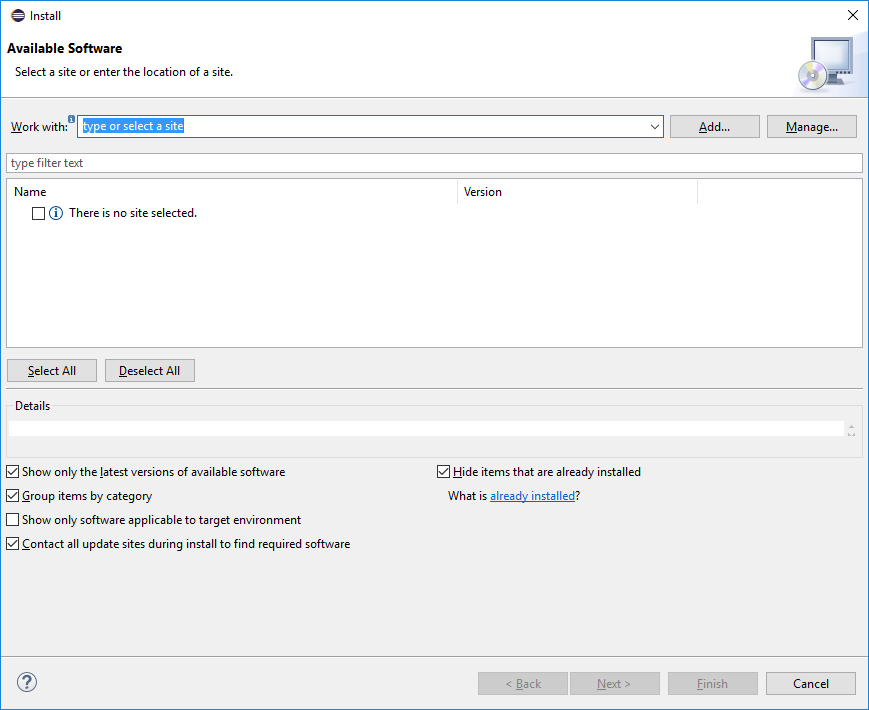
In the Work With text box, paste this link:
https://web-cat.org/eclstats
Next, click
Add. A dialog box will pop up with two text boxes.Make sure the above URL is in the box labeled
Location, and put in a sensible name (like “Web-CAT plugin”) in the box labeledName.Once that’s done, click
Add.
This is what the window should look like now:
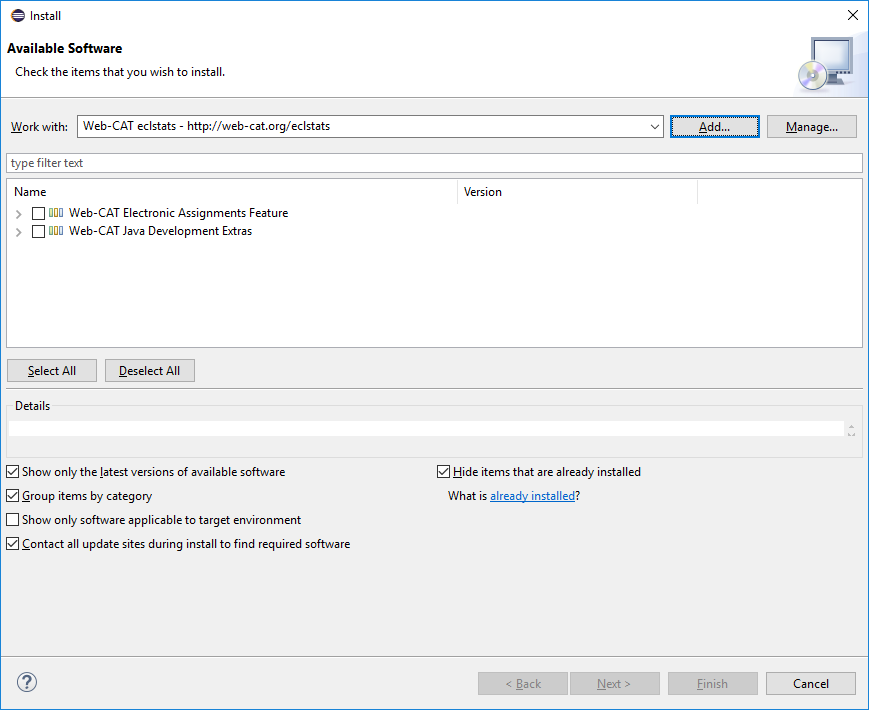
Check the boxes next to
Web-CAT Electronic Assignments FeatureandWeb-CAT Java Development Extras, and clickNext.It will then tell you about files that it plans to install. Click
Next.Accept the terms of the license agreement, and click ‘Finish’.
The install will start now.
This might take some time depending on your internet connection. Probably at least once it pause and warn you that you are about to install software with unsigned content.
If this is your first time installing the plugin, then You are likely
to get a window titled Trust Authorities that looks like:
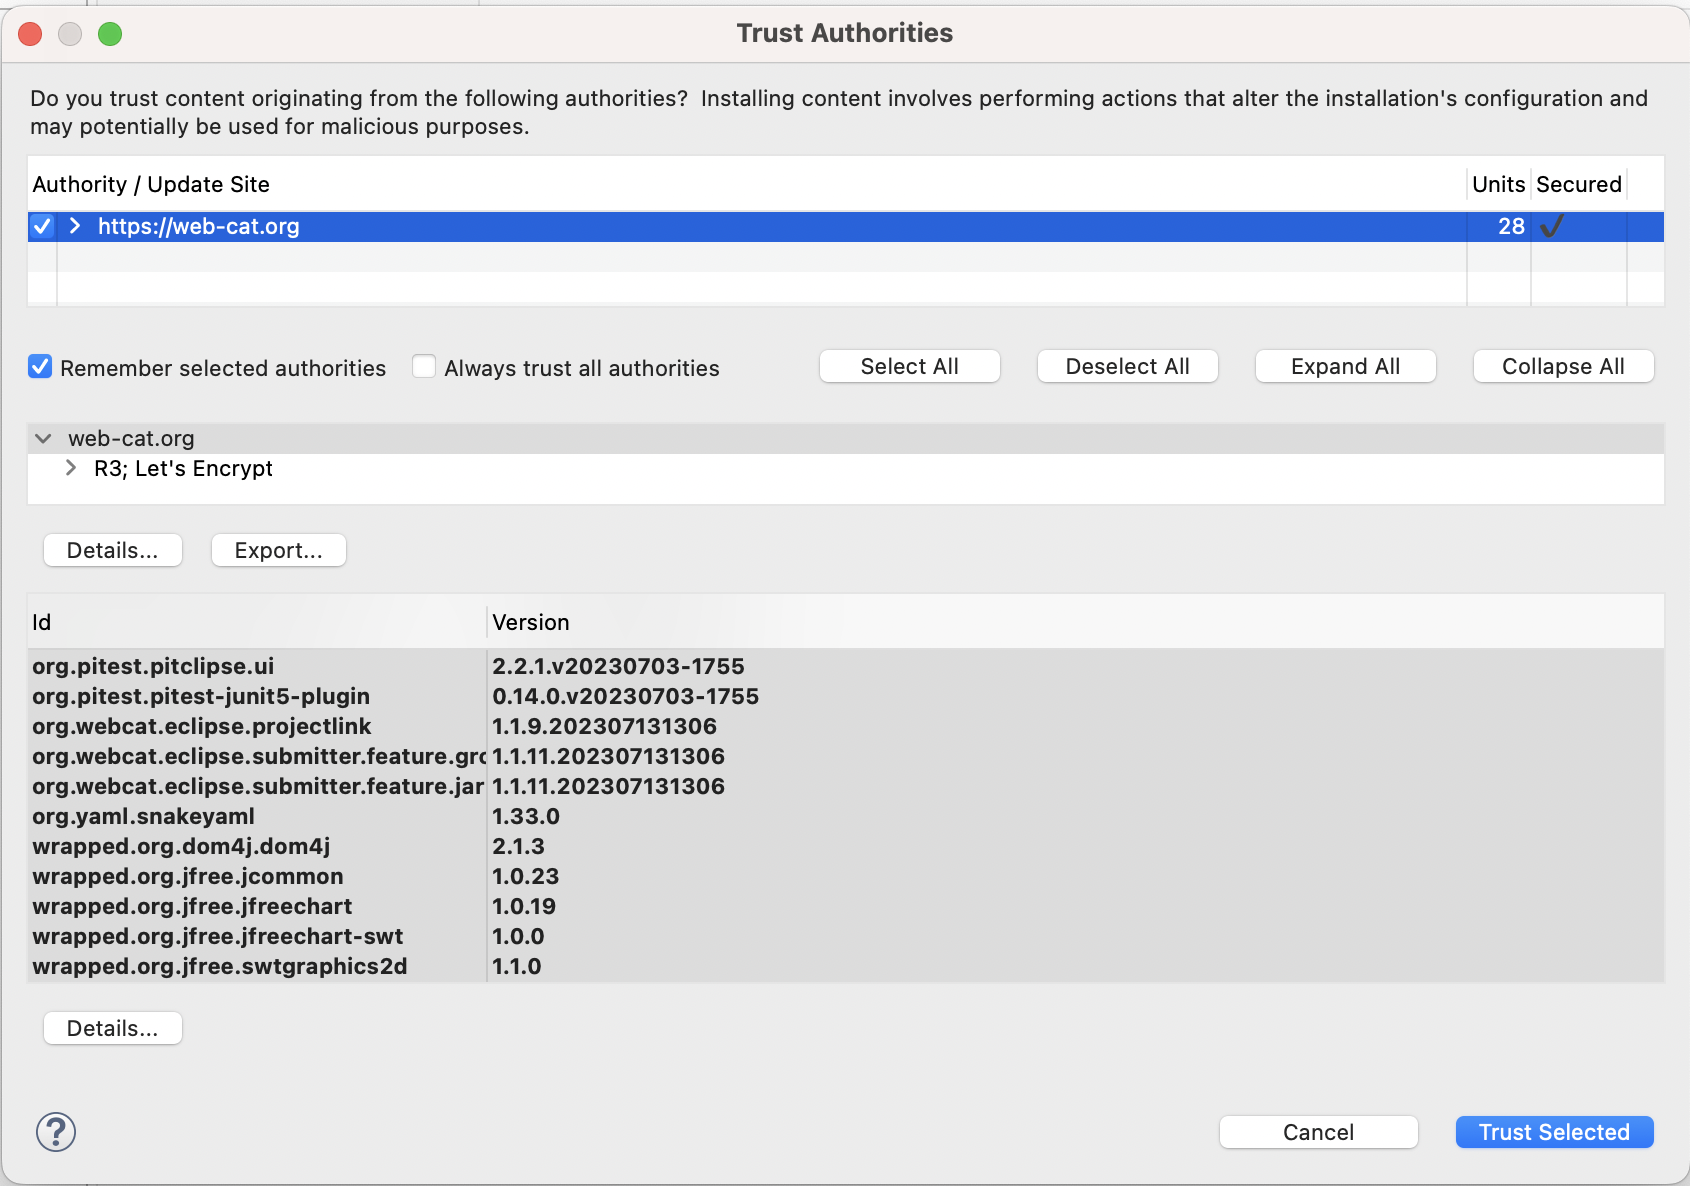
When it does this, select the checkbox next to ‘https://web-cat.org/’
and click the Trust Selected button.
At some point while downloading the plugin files, you might get
another window titled Trust Artifacts that looks like:
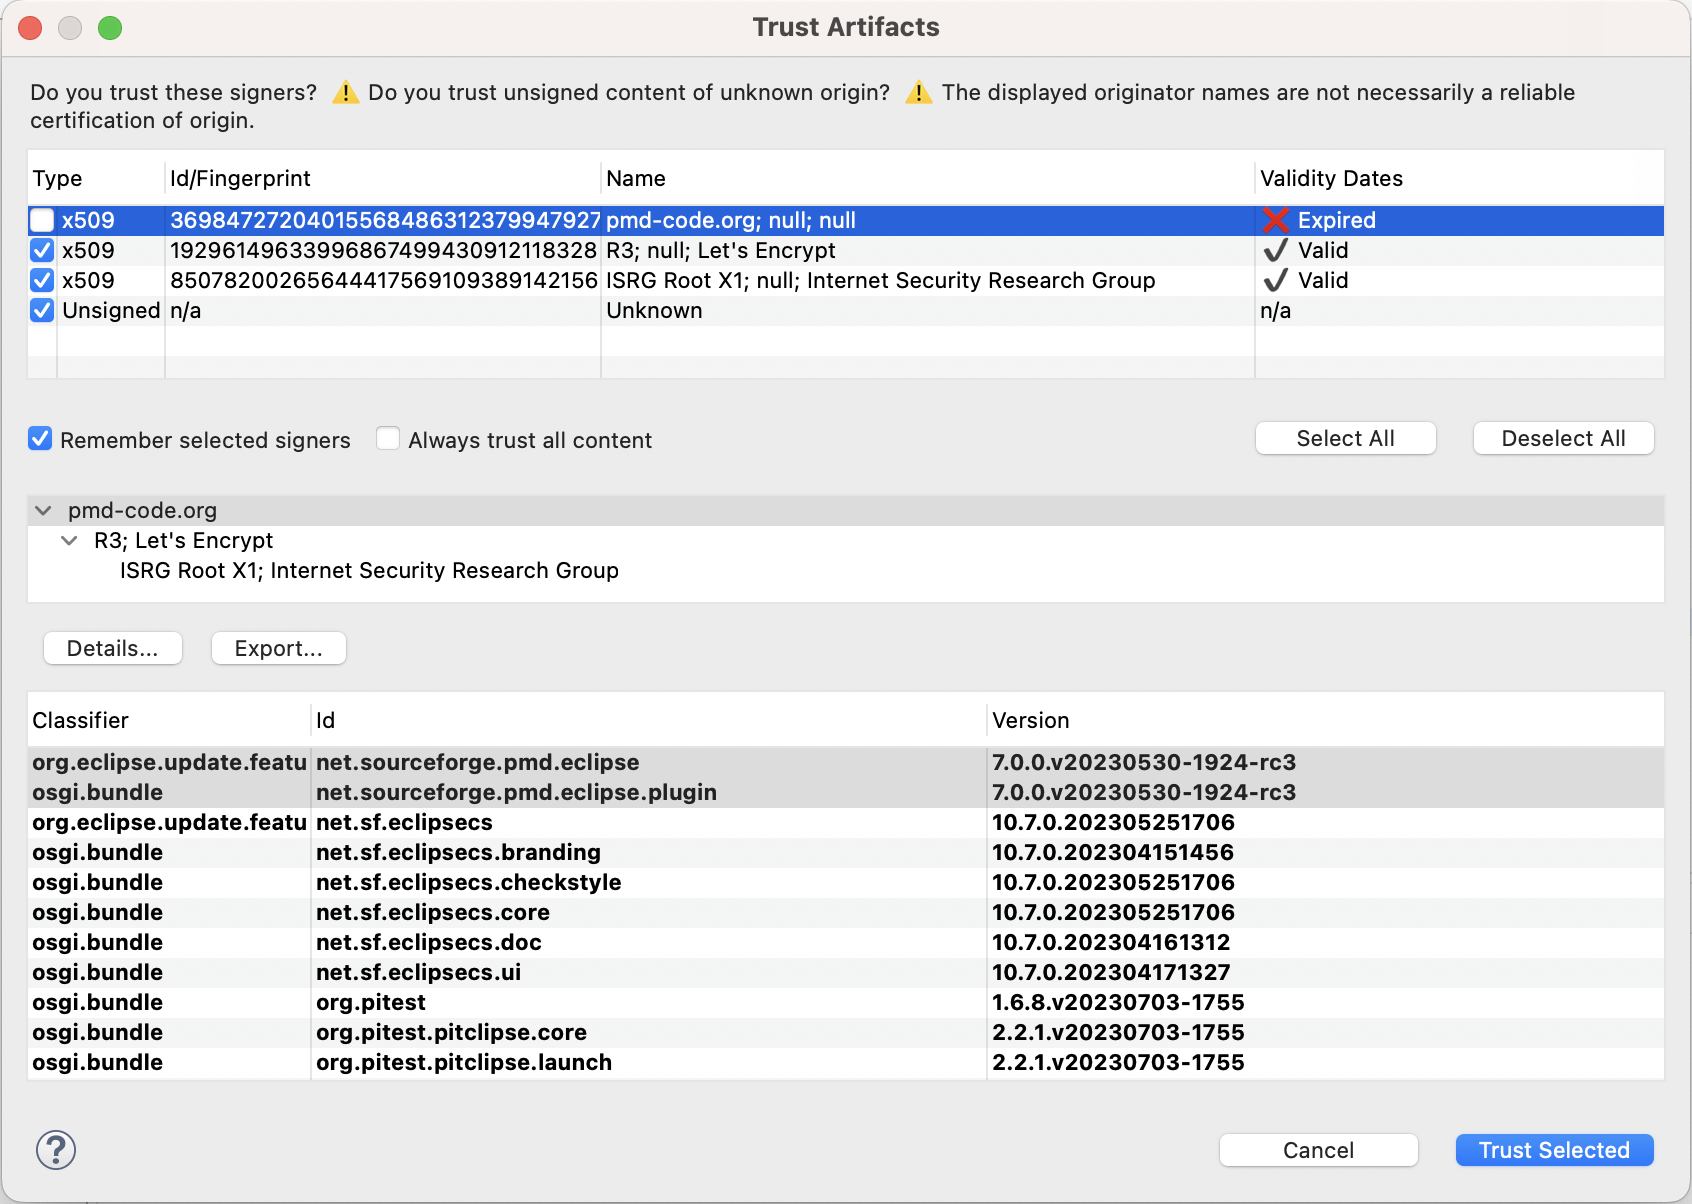
If so, click Select All and click the Trust Selected button.
The install will continue.
Restart Eclipse when prompted to complete the process.
2.4.3.2. Final Setup
Once you have the plug-in installed, you need to set it up to be able to communicate with Web-CAT:
Go to
Window --> Preferences(Eclipse --> Preferenceson Mac).In the window that comes up, in the column on the left, click on Web-CAT Assignments. You should see this window:
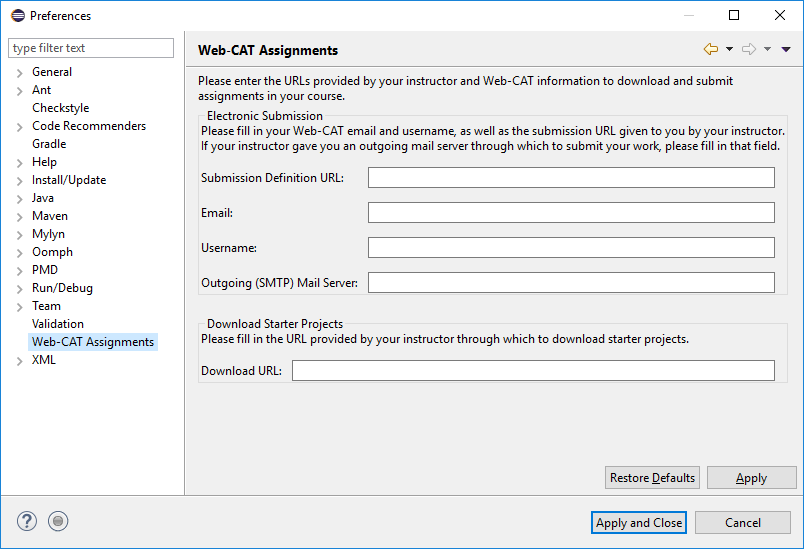
Put in the following information:
Submission Definition URL: https://web-cat.cs.vt.edu/Web-CAT/WebObjects/Web-CAT.woa/wa/assignments/eclipse?institution=VT
Email: Your VT email address (PID@vt.edu).
Username: Your PID.
You can leave Outgoing SMTP Mail Server blank.
In the
Download URLfield, enter the URL for your semester. So if you are taking the class in Spring 2026, you would use this URL: https://courses.cs.vt.edu/cs3114/Spring26/assignments.xmlClick on
Apply and Closeto complete the process.
2.4.4. Installing student.jar
If you are using Web-CAT, then you probably will want to use the VT local support for JUnit tests. For many courses, you will be given “starter code” in the form of a project that you can drop into Eclipse, and that already contains the student.jar file in the project library folder along with the proper classpath information. But in case you want to create your own Eclipse project and add the student.jar (or any other library in the form of a .jar file), here is the process.
First, download the student.jar file.
Then, in Eclipse, right click on your project, and navigate to
Build Path --> Configure Build Path.
In the window that comes up, click on the Libraries tab.
Select Classpath and click Add External JARs.
Navigate to the location where you saved the student.jar file,
select it, and click Open.
The student.jar file should now be listed in the Classpath
section as shown below:

Now click Apply and Close to complete the process.
You should now be able to use the VT local support for JUnit tests.
Note: While you install the student.jar file, you may also want to
check that your project is set to use Java 11. To do this, while you are
in the Java Build Path window, under Libraries, and make sure
that the JRE System Library is set to Java 11. If it is not, you can
click on the JRE System Library and click Edit. In the window
that comes up, select Alternate JRE and select the JDK you
installed earlier. Click Finish to complete the process.
See here for some practical advice on getting started with JUnit testing. At the time of this writing, the prefered version of JUnit to use is Junit 4.
2.4.5. Installing formatting support
You might want to make sure that your Eclipse style checker is as close as possible to the style guide that Web-CAT is enforcing. To do this, you can install configuration files for tools that are used by Web-CAT.
2.4.5.1. Eclipse Formatter
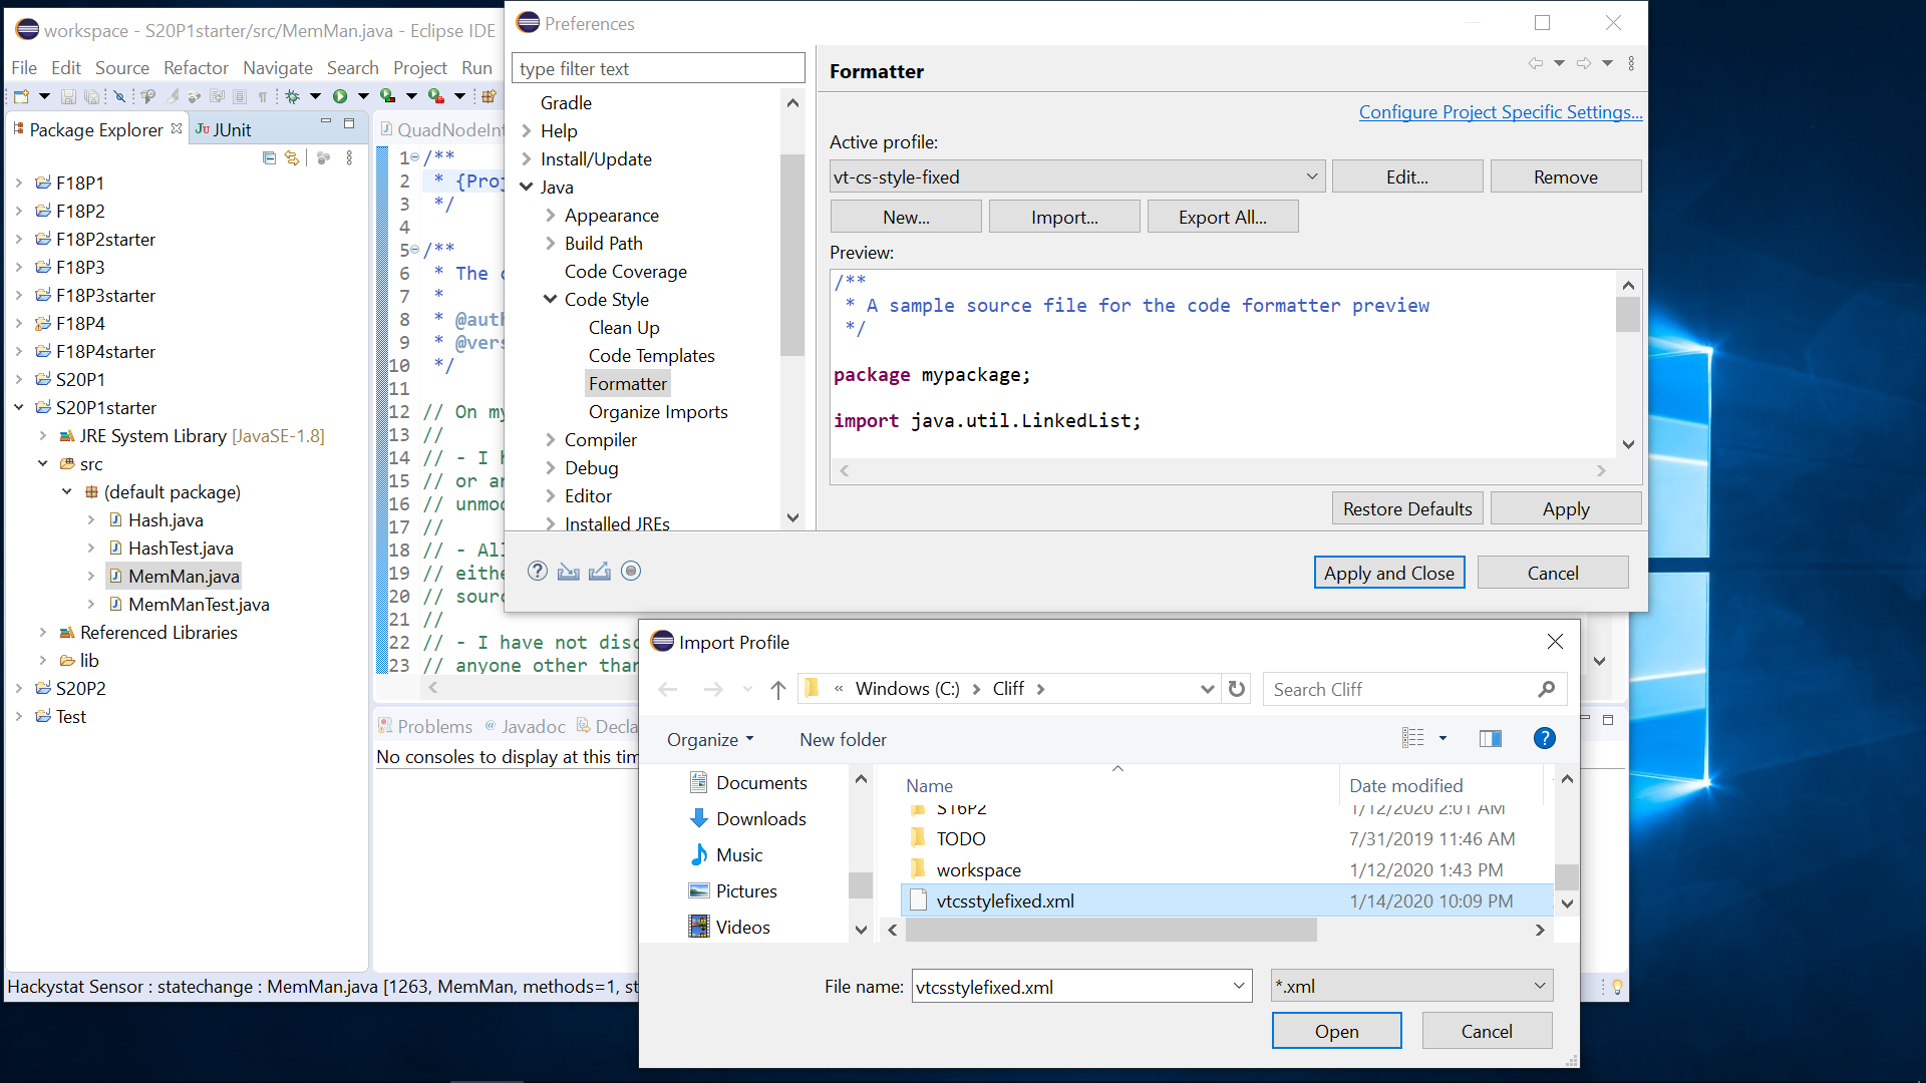
Download this file: vtcsstylefixed.xml (Right click and Save-As). Then install it into Eclipse, as described below.
Once it is installed, press CTRL-SHIFT-F (Windows) or COMMAND-SHIFT-F (Mac) within Eclipse to format your code.
To install:
Mac:
Eclipse->Preferences->Java->Code Style->Formatter->import
the above file, then click okay.
Windows:
Window->Preferences->Java->Code Style->Formatter->import the above file,
then click okay.
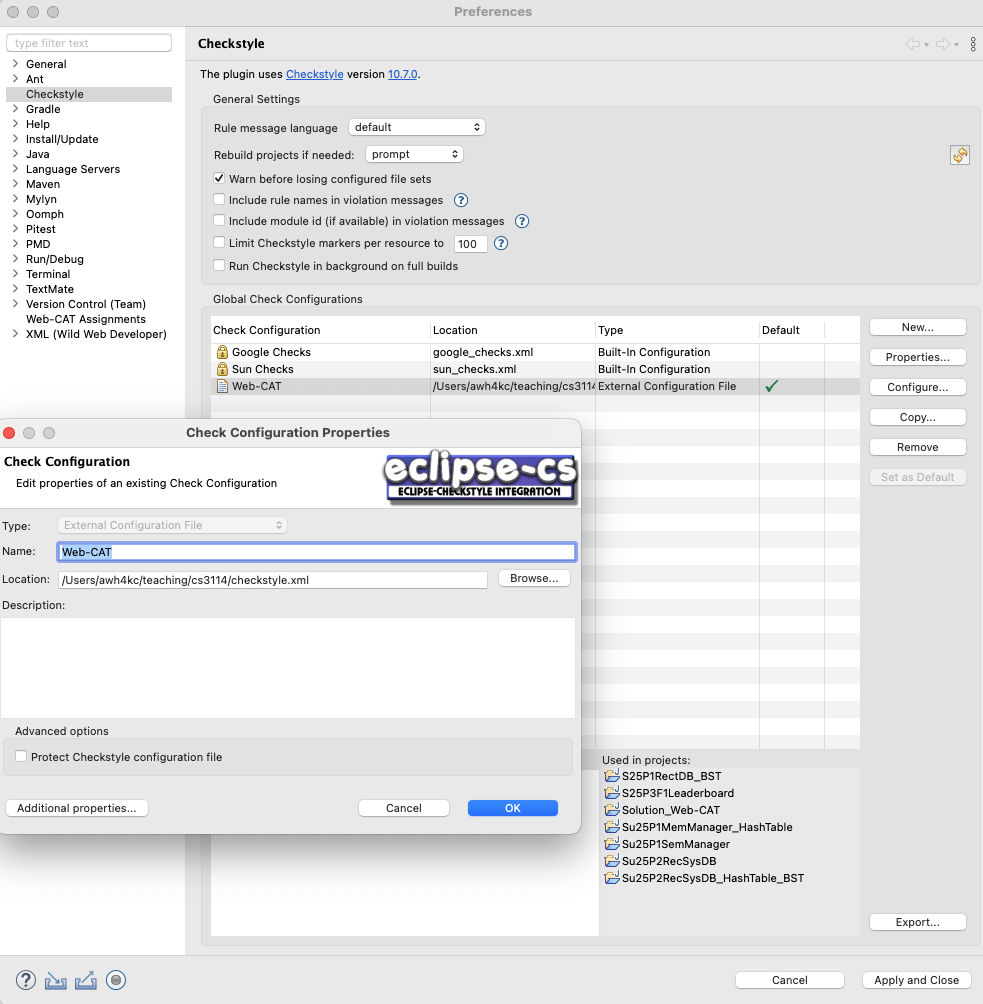
2.4.5.2. Checkstyle Formatter
Download this file: checkstyle.xml (Right click and Save-As). Then install it into Eclipse, as described below.
Once it is installed, right click on the project folder, and select
Checkstyle --> Activate Checkstyle.
Alternatively, right click on a file, or on the default package to
check your entire project, and select
Checkstyle --> Check Code with Checkstyle.
If necessary, you can also right click on a file, or on the default package, to
clear the checkstyle errors, and select
Checkstyle --> Clear Checkstyle Errors.
To install:
Mac:
Eclipse->Preferences->Checkstyle and click New
and then External Configuration File and name it
Web-CAT, then click Browse... and select the above file
then click OK. In the list, select the Web-CAT configuration
and click Set as Default. Finally, click Apply and Close.
Windows:
Window->Preferences->Checkstyle and click New
and then External Configuration File and name it
Web-CAT, then click Browse... and select the above file
then click OK. In the list, select the Web-CAT configuration
and click Set as Default. Finally, click Apply and Close.