
Mutation Coverage: FAQ
Frequently Asked Questions
What is Mutation Testing and why should I use it?
Mutation testing is a powerful technique for improving the quality of your test suite. The primary purpose of mutation testing is to evaluate the effectiveness of your tests with respect to your program implementation. It does not directly find bugs in your program. But if you know where your tests are not looking, it gives a powerful tool to see where bugs could hide.
Mutation testing works by introducing small changes, or “mutations”, into your code and then running your test suite against the revised code. If all your tests still pass after a mutation, that’s a sign that your tests do not care about the outcome of the code that was changed. In other words, the tests are not checking whether that part of the code has a bug.
Mutation testing can help in writing better code, and it does so in several ways:
Increases Test Coverage: Mutation testing helps identify the parts of the code that are not well-tested. When a mutation survives, it indicates that there is a gap in the test coverage. By striving to kill all mutants, developers are encouraged to write more comprehensive tests, which can lead to better, more robust code.
Detects Unneeded Code: If a mutation does not lead to a failing test, one possibility is that the code in question is not necessary for the correct function of the program. This could help you identify and remove dead or redundant code.
Improves Test Quality: Mutation testing doesn’t just increase the quantity of your tests, it also improves their collective quality. By generating mutants, mutation testing pinpoints where you need new test cases.
Encourages Simpler Design: When working with mutation testing, it often becomes clear that complex code generates more mutants and is therefore harder to test. This should encourage developers to keep their code as simple and straightforward as possible, which generally leads to higher quality code.
Exposes Assumptions: Mutation testing can expose the assumptions made while writing the code and the tests. If a mutant survives, it might mean that the assumption under which you wrote the test was not correct or comprehensive.
Increases Confidence: By striving for a high mutation score, you can gain more confidence that your code is well-tested and free of obvious bugs. This can make it safer to refactor or add new features to the codebase. A number of empirical studies have shown that mutants are coupled to real faults/bugs and that Mutation Testing is positively correlated with real fault detection (which is not so true for the Code Coverage metric for test suites). Therefore, a high mutation score can be a good indicator of the quality of your code.
Does 100% Mutation Score mean 100% Project Correctness?
Mutation Score and Project Correctness are two different metrics. Mutation Score is a measure of the effectiveness of your tests, while Project Correctness is a measure of the correctness of your code. Having a 100% Mutation Score does NOT ensure that your Project Correctness will be 100%. Consider this: You can have 100% Mutation Score on Project 1. Now, if you submit your Project 1 solution code for Project 2 – which has a different project specification – you will NOT get 100% Project Correctness in Project 2 despite having 100% Mutation Score.
Mutation Testing attempts to make sure your code is doing exactly what you expect it to do.
Project Correctness at Web-CAT attempts to make sure that your code is doing exactly what instructors expect it to do.
Why does writing Mutation Tests take so much time?
So much time compared to what? Most students doing intermediate-level projects spend the bulk of their project time debugging. How much time you spend debugging depends in part on how well you write the code to begin with, and how much effort you put into your test suites. When used correctly, mutation testing gives focussed information on where your test suite is missing out on testing your code. If that helps you to find bugs, then it is saving you a lot of time.
Why should I use Mutation Testing instead of Code Coverage?
Testing is a huge concern for industry, and so there has been a lot of research and empirical study on testing methods. Code coverage, while relatively simple to understand and cheap to measure, has been shown empirically not to be well correlated to actual bugs in code. Mutation testing is much better correlated to real bugs.
Why are we using this particular set of mutation operators?
Historically, mutation testing has not been used much in academic settings because of its expense in terms of server load on the autograder. Every mutation requires running the program against the test suite. Part of the research in recent years has been about finding minimal sets of mutations that are a good tradeoff between identifying bugs and the expense of running the testing process. While there are many other ways to do things, we think the choice of operators used by Web-CAT represents a good tradeoff between effectiveness at finding bugs and runtime cost.
Does 100% Mutation Score mean my code is perfect?
A high mutation score indicates that your tests are effective at catching the introduced mutations. This probably means that the test suit is doing a pretty good job of testing your code. However, this doesn’t necessarily mean that your code is bug free. First, you might have a mis-understanding about the project requirements that lead to your program giving one answer (which your own tests agree with), while the instructor reference tests expect a different answer. Second, your tests might not cover some edge cases, or there might be issues in the code that mutation testing doesn’t reveal.
Why do I have bugs in my code despite having 100% Mutation Score?
A high mutation score indicates the effectiveness of your tests in capturing the introduced mutations. We are only using a particular set of mutation operators. While these operators are extremely effective at catching bugs without taking an excessive amount of time, they are not perfect. Fortunately, even bugs not actually triggered by the mutation tests will often be caught by a test suite that is good enough to get 100% mutation score for these mutations. Still, it is possible for something to get through the net.
For example, let’s start with a simple class definition:
public class SimpleMath{
private Integer divisor;

  public SimpleMath(Integer divisor){
    this.divisor = divisor;
  }

  public int divideByDivisor(int dividend){
    return dividend / divisor;
  }
}
In this case, we have a class SimpleMath which takes an Integer in the constructor and uses it as a divisor in the divideByDivisor method.
Now we add a test for this class:
import org.junit.jupiter.api.Test;
import static org.junit.jupiter.api.Assertions.assertEquals;

public class SimpleMathTest {
    @Test
    public void testDivideByDivisor() {
        SimpleMath sm = new SimpleMath(5);
        assertEquals(10, sm.divideByDivisor(50));
    }
}
This test will pass and the mutation testing can achieve 100% coverage with the applied mutators (for example, changing arithmetic operators, altering return values, etc.). However, there’s a situation not covered by the test, which is passing null to the SimpleMath constructor:
SimpleMath sm = new SimpleMath(null);
sm.divideByDivisor(50);  // This will throw a NullPointerException
If this happens in your code, a NullPointerException would be thrown, as divisor is null. The mutation testing won’t catch this because it does not include mutators that check for NullPointerException. To catch this kind of exception, a good practice would be to add null checks in the SimpleMath constructor and/or divideByDivisor method, and also include corresponding test cases in the test suite.
Here is another simple example. Start with a Point object class definition.
public class Point {
  private int x;
  private int y;

  Point(int inx, int iny) {
    x = inx; y = iny;
  }
}
Now, consider if we create a new Point like this:
Point mypoint = new Point(myy, myx);
Here, the values for x and y are reversed between the caller and the constructor. Mutation testing cannot catch this sort of error. Note that probably your tests will also show this line as “code covered”, but you won’t fail any test that does not explicitly depend on the values for x and y.
Why do my mutation tests not cover all branches of my code?
You may have a situation where your unit tests do not cover all branches of your code no matter how hard you try. Hopefully this will stop you from getting 100% mutation coverage (and likewise, you would not get 100% code coverage either). In such cases, you should check whether you are writing over-constrained code.
Consider this example of a comparison of two points. You want to know which quadrant the second point (x2, y2) is in with respect to the first point (x1, y1).
public class Quadrant {
  public static String getQuadrant(int x1, int y1, int x2, int y2) {
    if (x2 >= x1 && y2 >= y1) {
      return "South-East";
    } else if (x2 < x1 && y2 >= y1) {
      return "South-West";
    } else if (x2 < x1 && y2 < y1) {
      return "North-West";
    } else if (x2 >= x1 && y2 < y1) {
      return "North-East";
    }
  }
}
This has the virtue of being quite logical and clear. However, it has some problems. For one thing, it is relatively inefficient compared to alternatives, requiring many more arithmetic comparison tests. But our real concern has to do with testing and mutation coverage.
Fact: No series of tests will cover all branches in this code.
You can try yourself to verify this by carefully considering the logic of the code. Can you think of test cases that will trigger each of the eight branches? Since there are effectively only four possible inputs (the one point can only be in one of four positions with respect to the other point), you cannot.
We want complete mutation coverage but there are only four logically distinct inputs. For that to be possible, we must come up with code that has only four branches!
For example, our refactored code could look like this:
public class Quadrant {
  public static String getQuadrant(int x1, int y1, int x2, int y2) {
    if (x2 >= x1) {
      if (y2 >= y1) {
        return "South-East";
      } else {
        return "North-East";
      }
    } else {
      if (y2 >= y1) {
        return "South-West";
      } else {
        return "North-West";
      }
    }
  }
}
With the refactored code, not only can you test every branch, but this is a lot more efficient. Every branch requires two tests. (In contrast, the original code needed eight tests if it had to go through to the North-East banch.)
This is an example of another way that mutation testing can help you to improve the quality and efficiency of your code, by alerting you to over-constrained code blocks.
How do I localize the bugs in my code?
Localizing bugs in code can be a challenging task, but there are several strategies and techniques you can employ to make the process more manageable. For example, you can develop unit tests to systematically check your code’s functionality. Creating test cases that reproduce the bug can help you isolate the issue and ensure it is resolved when you fix it.
Write unit tests: Begin by writing unit tests that reproduce the bug or trigger the undesired behavior. Design your test cases to cover different scenarios, including edge cases and boundary values. These failing tests will serve as indicators of the presence of the bug.
Improve existing test suite: While focusing on the bug, consider writing additional unit tests that cover different scenarios and edge cases related to the problematic code segment. These additional tests can help verify the correctness of the bug fix and prevent regressions in the future. Use the mutation testing tool often to evaluate how well your test suite detects mutations.
Select mutator group: Our Eclipse IDE plugin supports different mutator groups that can be manually configured. Select the mutator group that best suits your case. By default, the plugin uses the “VT defaults” mutator group, which includes Logical Expression Mutator (Remove Conditionals) and Arithmetic Operator Deletion Mutator (AOD). You can also find other mutator groups in the Mutation Test configuration. Navigate to Run As -> Run Configurations -> Mutation Test -> <your_project> -> Mutators and select your desired mutator group. Keep the following in mind:
Stronger groups (Stronger defaults/All) will generate more mutants, but will also take more time to run.
The “VT defaults” group is a good starting point but stronger groups are recommended when trying to track down a difficult bug.
The Web-CAT system uses the “VT defaults” group for grading purposes.
For more information on mutator groups, please refer to the official documentation: https://pitest.org/quickstart/mutators/.
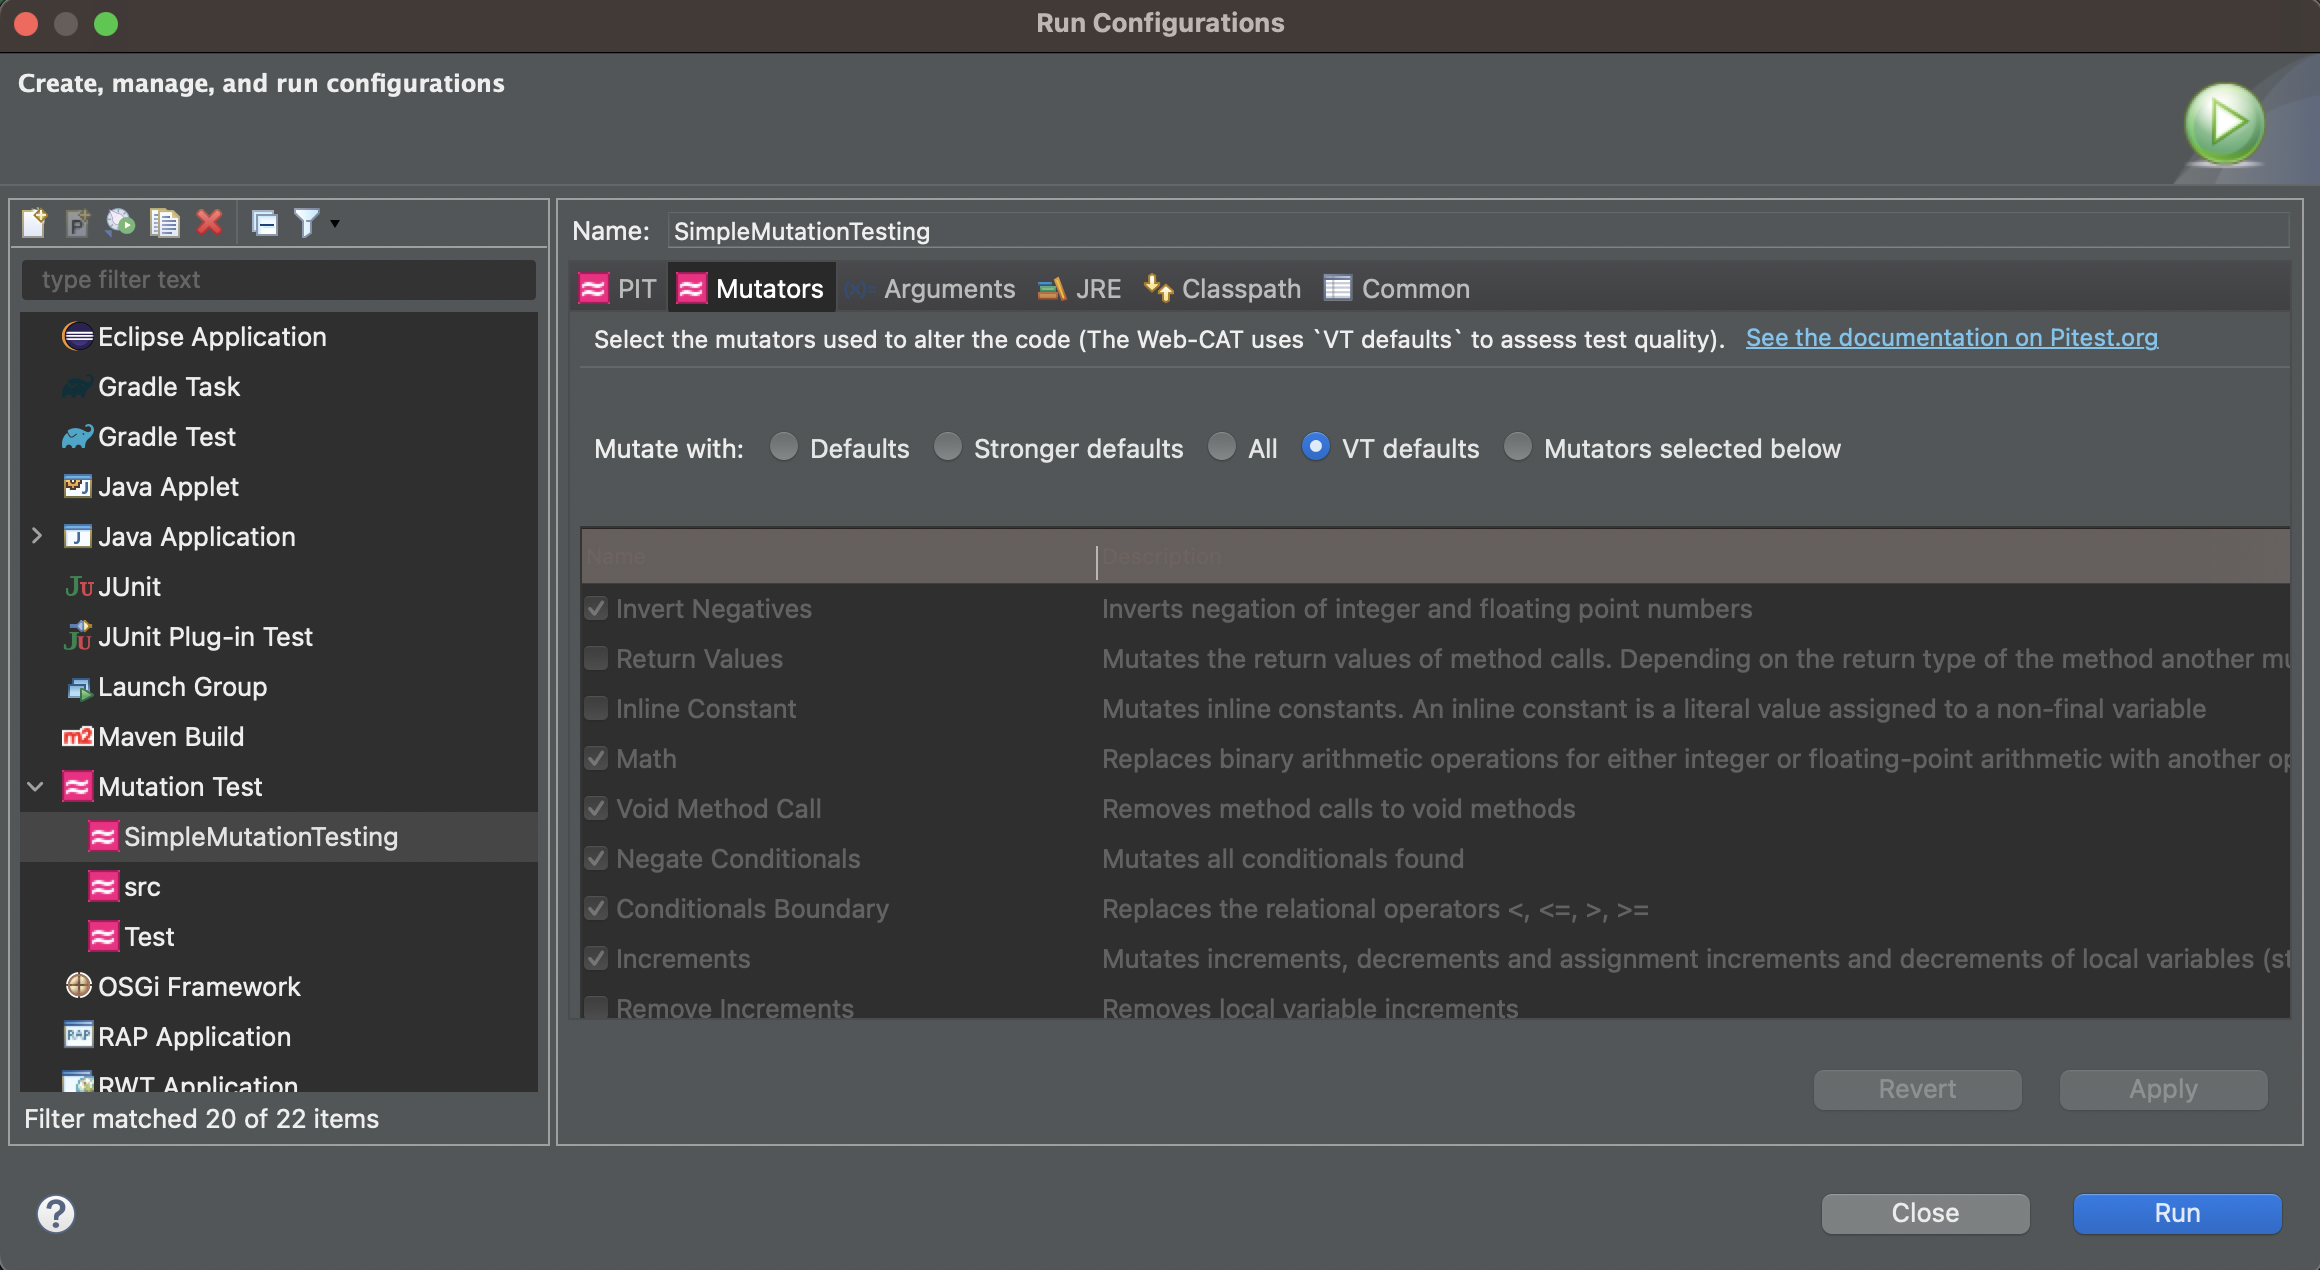
Figure 0.1: Configuring Mutator Groups
Run mutation testing: Configure and run the mutation testing tool on your codebase and test suite. The tool will generate mutated versions of your code by applying the selected mutators. For each mutation, the tool executes your test suite and checks if the tests pass or fail. If a mutation is not detected by any of your tests, it will show up in the “Mutation List” tab, indicating a potential weakness in your test suite.
Analyze the results: Review the results of the mutation testing process. Identify the surviving mutants, as these represent areas of your code where your tests failed to detect the introduced faults. These surviving mutants can indicate potential bugs or areas where your test suite may need improvement.
Write additional test cases: Use the surviving mutants as a starting point for writing additional test cases. Analyze the nature of each surviving mutant and create test cases that specifically target the mutated code. By designing tests that cover these specific scenarios, you increase the likelihood of detecting the bugs or issues associated with the surviving mutants.
Repeat the mutation testing cycle: After adding new test cases, rerun the mutation testing process. The goal is to ensure that the newly added tests are capable of detecting the previously surviving mutants. If any surviving mutants remain, analyze why your test cases failed to identify them and refine your tests accordingly.
Sometimes bugs are hard to find. Localizing the bug in your code can be a long, iterative process. With good techniques (including mutation testing) and strategies (writing abundant test cases), you can make the process effective and save time.
How do I recover the “Mutation List”/”Mutation Summary” tabs?
There are two ways to get the “Mutation List” and “Mutation Summary” tabs back if you accidentaly close them.
Simply run mutation testing again:
Run as --> Mutation Test. This might regeneate both the “Mutation List” and “Mutation Summary” tabs.On the menu bar, navigate to
Window --> Show View --> Other. There, under thePIToption, you should find both “Mutation List” and “Mutation Summary”. Click on the desired tab and thenOpen.
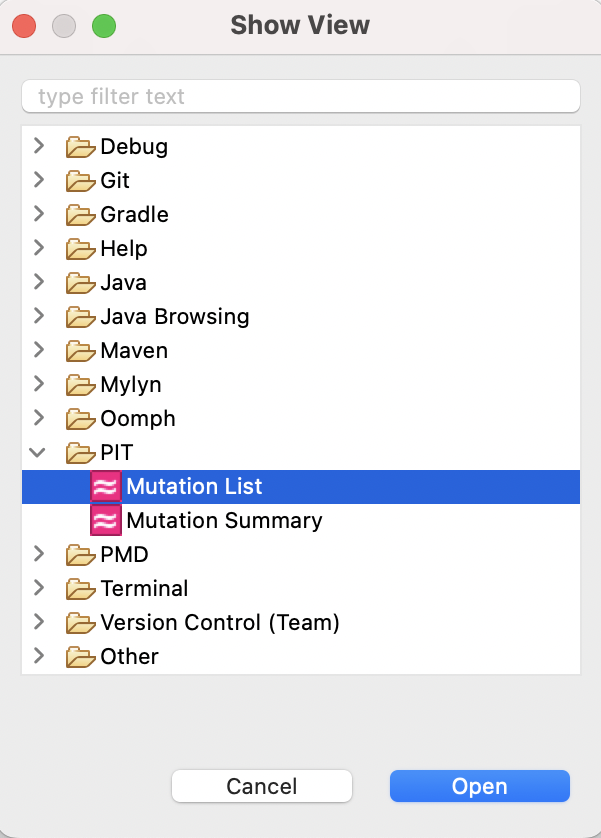
Figure 0.1: Mutation Panel View